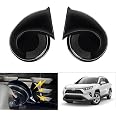
💡 Light up your RAV4’s cargo like a pro—because your gear deserves the spotlight.
Powerty LED Lights are custom-designed cargo lamps for Toyota RAV4 models from 2022 to 2025, featuring automatic tailgate-activated lighting, waterproof polycarbonate lenses, and easy, non-destructive installation. This 2-piece set enhances trunk visibility and style with a perfect OEM fit and durable construction.
Brand | Powerty |
Color | 2022+ RAV4 Tunk Light |
Specific Uses For Product | Rear Lights |
Vehicle Service Type | Car |
Year | 2024 |
Special Feature | Waterproof |
Auto Part Position | Rear |
Lens Color | Clear |
Lens Material | Polycarbonate |
UPC | 792119375703 |
Assembly Required | Yes |
Manufacturer | Powerty |
Item Weight | 12 ounces |
Package Dimensions | 7.17 x 6.06 x 2.83 inches |
Manufacturer Part Number | Powrty0511 |
Special Features | Waterproof |
J**M
Looks OEM, watch installation videos
While there are instructions supplied with the set, they may as well not exist for their usefulness so watching videos on YouTube are a must - just search "Rav4 cargo hatch light install" to find several versions. The most frustrating part of the process is feeding the wires through the grommet between the hatch and rear of the vehicle...it *can* be done, just take your time so as not to tear through the grommet or break any wiring it already contains. The left grommet has a lot more space, as the right grommet has only enough room for the washer line and you don't want to damage that. I used a piece of copper electrical wiring to feed through; bend a small hook on one end, turn that hook into a loop containing the wires to pull and just slowly work it back through, and its easier to do so after unseating the grommet from both ends and roll it back onto itself to make it shorter. Frequent hand-washing to remove the 'grease' used around the weather stripping and using some trim removal tools will also help things go more smoothly.A caveat for newer vehicles that *don't* have a toggle switch on the existing trunk light - it does eventually go out after an hour, but instead of waiting or blowing fuses on connection here's a modification to the procedure:1. Pry the existing trunk light out, pop the panels on the right side containing it and let it dangle out of the hole. Go slow when popping the blue retainers as they can go flying.2. Wire up your new rear lights to everything *except* the existing trunk light and power connection. I'd suggest leaving the trunk panels off until you can verify all connections are working.3. Use a wire or piece of weed trimmer line to fish the new wiring harness from behind the popped panels and out the hole to the existing light, but do not connect them yet.4. Close the trunk, flip the rear seats forward and reach back to access the exposed rear light, making sure it turned off once the trunk was closed.5. Now connect the new harness to the existing light and power source. You can let them dangle and reopen the trunk to verify your connections are working. If everything is correct, your new lights will also work once the trunk opens.6. After verifying all connections, now you can button everything up using cable ties and double-sided foam tape to secure the loose wires and prevent rattles. The panels just pop right back on once everything is lined up for a clean, seamless look.Once installed these look OEM and should come as a standard feature. The 30 mins or so it takes to install them is well worth the vastly improved amount of lighting you get out of them.
D**D
Nice product, install tips for 2025 Rav4
Lights fit perfectly and seem quality. Installation can be difficult. Watch some youtube vids, but be patient if you are like me, DIY installs always take twice as long as I think. Here's some notes and tips I hope will help some. The side LED light does take some force to pop off. My plastic pry tool wouldn't fit it the tight crevice. I think I had to use a small screwdriver. I did test that the LED lights worked before removing any panels and wiring work. The 2025 Rav4 wiring hoses are really tight. I recommend using the wider left side wiring hose. Someone recommended using a hydroflask metal straw with silicone and that worked great for me. If your lights don't work after final wiring, check that your fuse good, and check that the fuse holder is screwed on tightly. I did notice a bit of red wire was visible through the LED cover, who's going to see that LOL, but you can pop the LED off and cover the wire with black tape if bothers you.
C**M
Easy enough install when you find the right video tutorial
I installed these on my 2025 RAV4 Hybrid Limited. The paper that came with the lights says exactly what to search for on YouTube to help with the install. In all honesty, the video it brings you to probably makes it tons harder simply because the hardest part of the install is feeding the wire through the rubber grommet at the top of the door. In the video it has you refer to, the guy runs a usb cable from the top down to the side cargo light then pulls the new wire back up through. I tried this way for over half an hour and I just could not get the cord past the curve of the frame to run down to the light. The video I did end up following has you pop the side and upper liner loose on the inside of the vehicle. I was done with that part in 5 minutes. Then you need to run that wire through the rubber grommet at the top. It’s a very tight fit and I did need to open of the existing hole on the rubber to be able to run the wire. This part I did use a usb cord to run it through then taped it to the new wire and pulled both through together. From there it’s plug and play then hide wires and pop panels back on. Had I started with the second video to begin with, total install would have taken roughly 20 minutes.Video that I followed, search YouTube for “RAV4 hatch light install - EASY! CHEAP & BRIGHT!” Posted by the Mr. Kidd Network
R**S
Finally Installed
Okay so I bought these once before and then returned them because the install is horrible. You will need to pull panels off and route the wire thru a ridiculously small plastic accordion-style conduit… and it is not fun. Took me a few hours to do, most of which was cursing to get the wires thru the conduit piece. And then I finished and touched the button and… nothing.Turns out the fuse was already blown on the one they sent. In all fairness I don’t know if I accidentally blew the fuse or if it came that way; but I can tell you it’s good they send 2 replacements. Popped in a new one and they turned on. This is the only reason I’m subtracting 1 star — you can’t actually test the lights until you’ve done all the work. If you do plus them in, then you can’t get the wires unstuck. So it’s really risky to do all this work not knowing if your lights work. Hopefully they fix that in the future.Install was awful. Go look up a video on YouTube and mentally prepare yourself. I told my family I would never do this again. However, the lights look great and make trunk is lit-up wonderfully. I wish they were even brighter, but can’t complain too much cause the original light was dinky.
A**O
Take everything to the next level. Bright easy to use and amazing amount of light when it’s dark.
Follow the you tube channel for install advice and it works perfectly. Took about an hour taking my time and making sure not to cut anything
R**W
Nice upgrade
easy install, recommend that you get the window switches to go along with this product, looks very nice
Trustpilot
2 months ago
2 weeks ago