Desert Online General Trading LLC
Dubai, United Arab Emirates
Desert Online General Trading LLC
Dubai, United Arab Emirates


🔩 Upgrade your ride with precision-engineered power and leak-proof peace of mind!
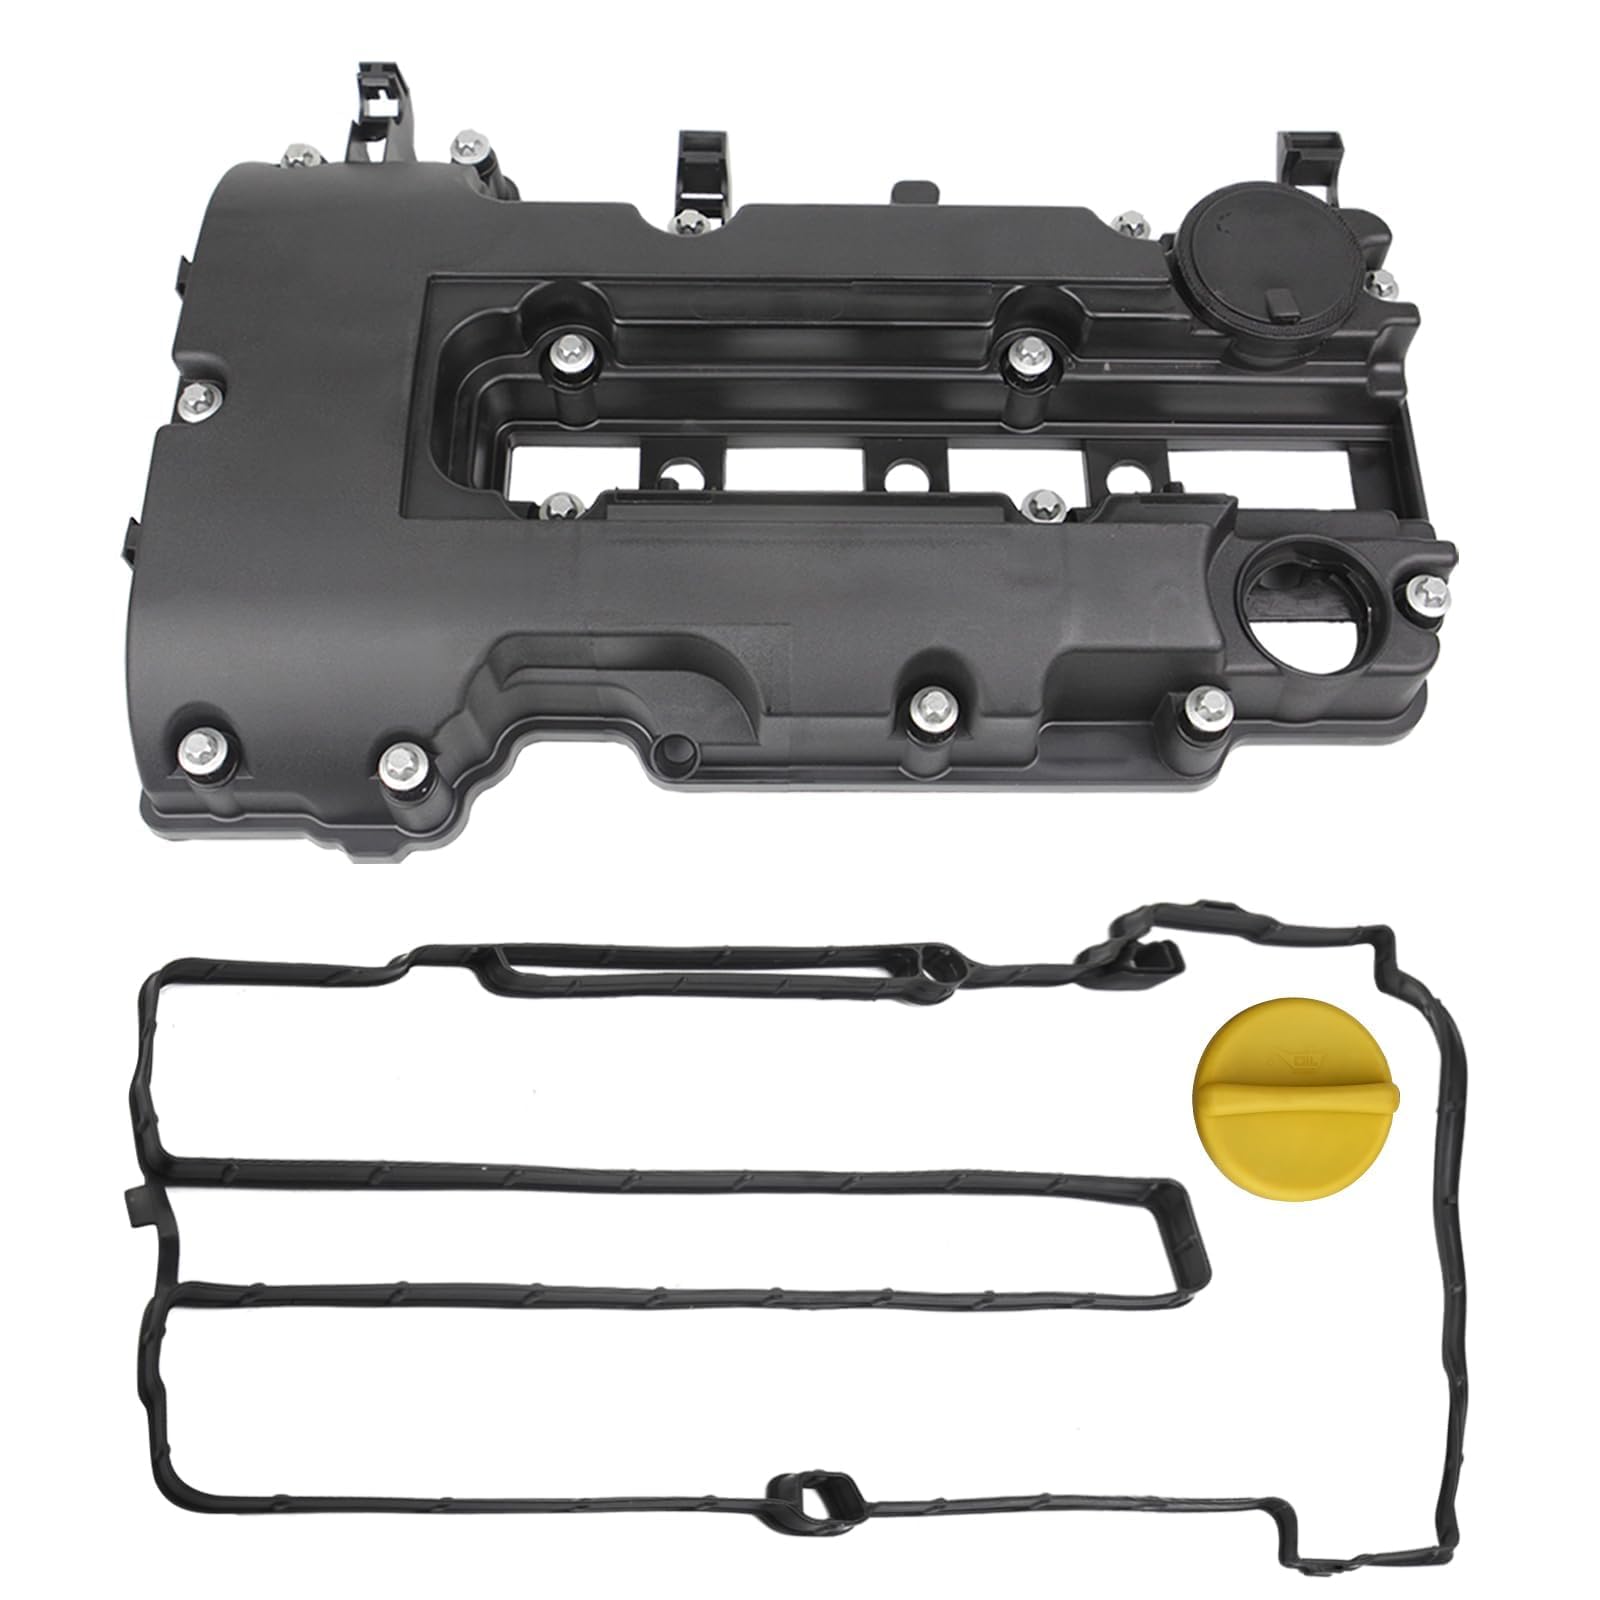
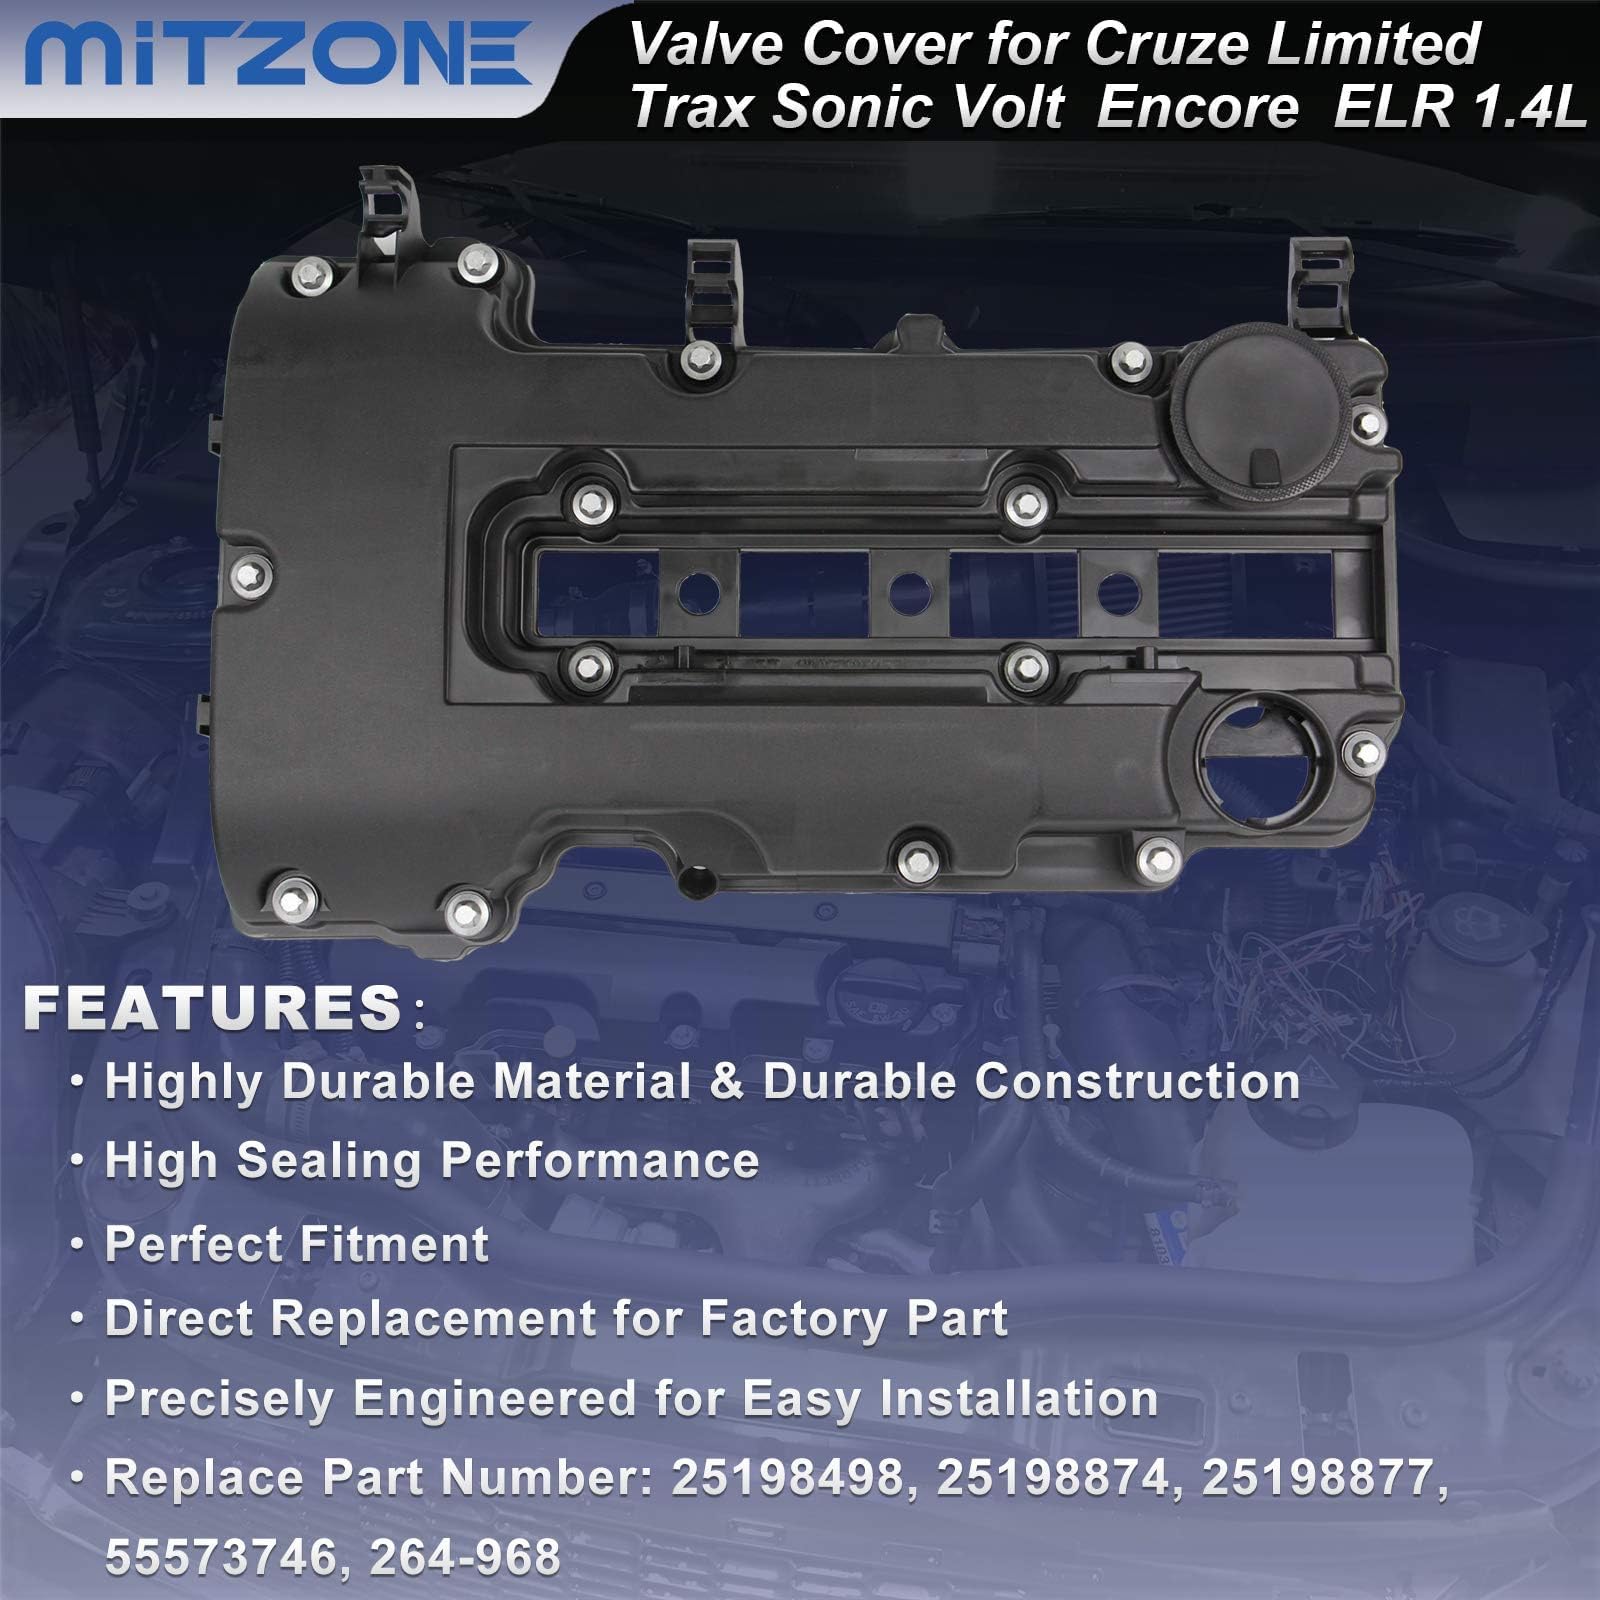
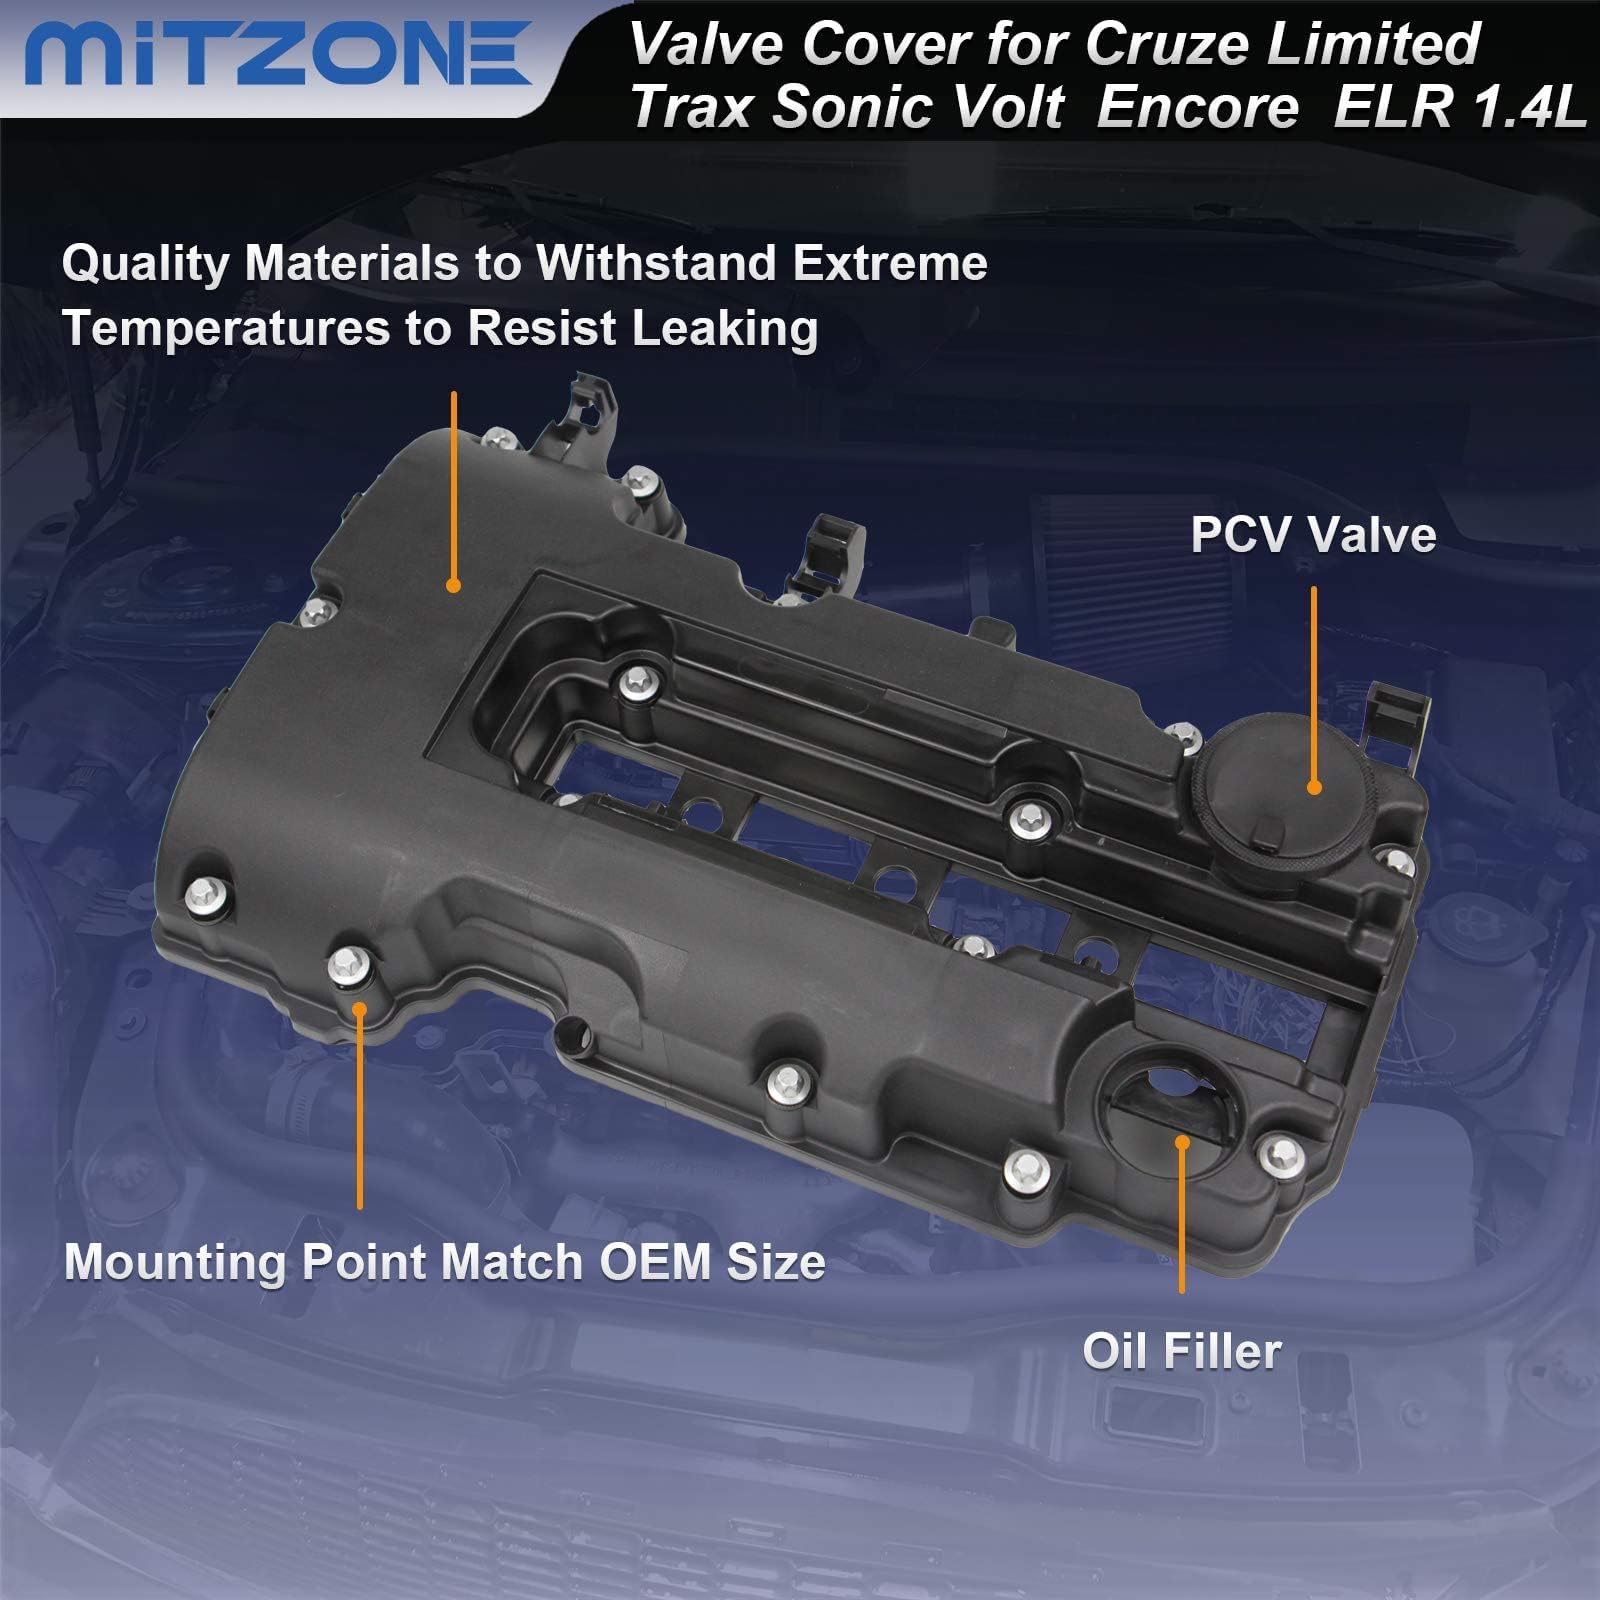
The MITZONE Engine Valve Cover Kit is a comprehensive replacement solution compatible with select 2011-2020 Chevrolet, Buick, and Cadillac L4 engines. Featuring OEM-quality materials, a pre-installed gasket, and all necessary bolts and caps, this kit ensures a seamless, leak-free fit that enhances engine performance and durability. Designed for easy installation and backed by confident customer support, it’s the smart upgrade for maintaining your vehicle’s power and reliability.


| Manufacturer | 25198877 25198498 25198874,55573746 |
| Brand | MITZONE |
| Model | 04-55573746 |
| Item Weight | 4.07 pounds |
| Package Dimensions | 17.76 x 12.6 x 3.43 inches |
| Item model number | 04-55573746 |
| Manufacturer Part Number | 004-027-A |
B**Y
FITS LIKE OE, WORKS GREAT
Got this for Chevy Trax 1.4L Turbo, and it fits like OEM. The Trax was getting a couple different CELs, and after some research, turns out it is bad PCV valve built into the valve cover. I had to replace this AND the intake, because the root of the problem seems to be a bad valve in the intake manifold having to do with turbo boost pressures blows out the PCV valve diaphragm. After these were replace, car runs strong again, no more hesitation or excessive oil consumption. Install was pretty easy, with some basic tools it all can be done. I used the the old oil cap, this one looks too generic. It all fits like OE, and looks like OE and there are no leaks. Good product so far.
I**J
The perfect OEM swap for 100% failure rate PCV valves
2014 Chevy Cruze started whistling LOUD at the beginning of last week. At first I thought it was a part of a Rage Against the Machine song I was listening to on the radio (LOL!), but alas, it turns out it was coming from the engine compartment.Engage: YouTube Shade tree Mechanic Mode!A bit of google searching and YouTube browsing later, and I was able to diagnose the issue as a bad PCV valve on my 2014 Chevy Cruze LTZ. I was just brushing up near 96K miles, and apparently all the 1.4 L EcoTec engines produced by GM are destined to blow the PCV valve...not a matter of "if" but WHEN. My PCV valve had apparently had enough, so I found this product and it had great ratings and at a good value. I had heard that dealership wanted ~$100 for parts and another couple hundred (~$300) for labor, so I was determined to save the cash...There are plenty of step-by-step videos online that show you exactly how to make this swap. If you have a decent tool set and any mechanical inclination, you CAN do this. It's not that hard...I'd give it a 4/10 on difficulty scale. If I was doing it a 2nd time, it would probably take me less than 40 min. 1st time around it took around 1.5 hrs, but I was really taking my time, too.A few notes of importance:-When prying off the old cover, use a PLASTIC putty knife to free up the old seal. If you use a metal putty knife or scraper, you risk damaging the surface, which would of course lead to later oil leakage and nobody wants that.-To give extra leverage getting the old cover off, insert the PLASTIC putty knife as far as you can, and then use a thin flathead screwdriver ON TOP of the putty knife (so you're putting pressure on the putty knife with the screwdriver and NOT the metal flat mating surface), and gently but firmly pry upwards. That should release the seal and allow you to remove the old cover successfully.-Wipe down the metal mating surface to remove the crankcase oil before seating the new cover & seal. I used isopropyl alcohol and paper towels to get it clean.-Make sure to use Black RTV sealant on the seam of where the crankcase meets the timing belt area. It should be pretty evident where, because there should be the remnants of the old sealant there, which you'll need to scrape off (with that plastic putty knife!) before applying the new black RTV.-GET YOUR TORQUE CORRECT. The specs for this are 71 INCH LBS (not FT LBS!), which isn't a ton of pressure - just past hand tight. Don't guess on this, and definitely don't over-torque it. IF YOU OVER TORQUE you're destined for an expensive trip to the mechanic.-Blow out the bolt holes with compressed air to get any oil runoff out of the threaded area. Oil is not compressible, and will result in you over-torqueing the bolts, leading to unequal seal and eventual oil leakage, and that expensive mechanic trip as mentioned above...-If you need to reset the Check-Engine Light, just remove the negative cable from the battery, and go open the drivers door and press the brake pedal for 30 sec. That will drain all the stored electric energy, and reset the CEL. Make sure to follow the instructions on the dash after you start back up...the Chevy Cruze makes you roll down the drivers window and then back up (odd), but that gets everthing back to normal operating condition.
M**
Great value
Fits great quality is nice. Price is great
H**A
DONT WASTE YOUR MONEY!
It worked fine for the first 4 months, then it started losing power and leaking oil. After month 5, it started leaking oil from the cap. I bought a new oil cap, and the problem persisted. I had to buy a new part, and that's the end of the story. DO NOT BUY THIS PRODUCT.
K**R
Great except for the cap
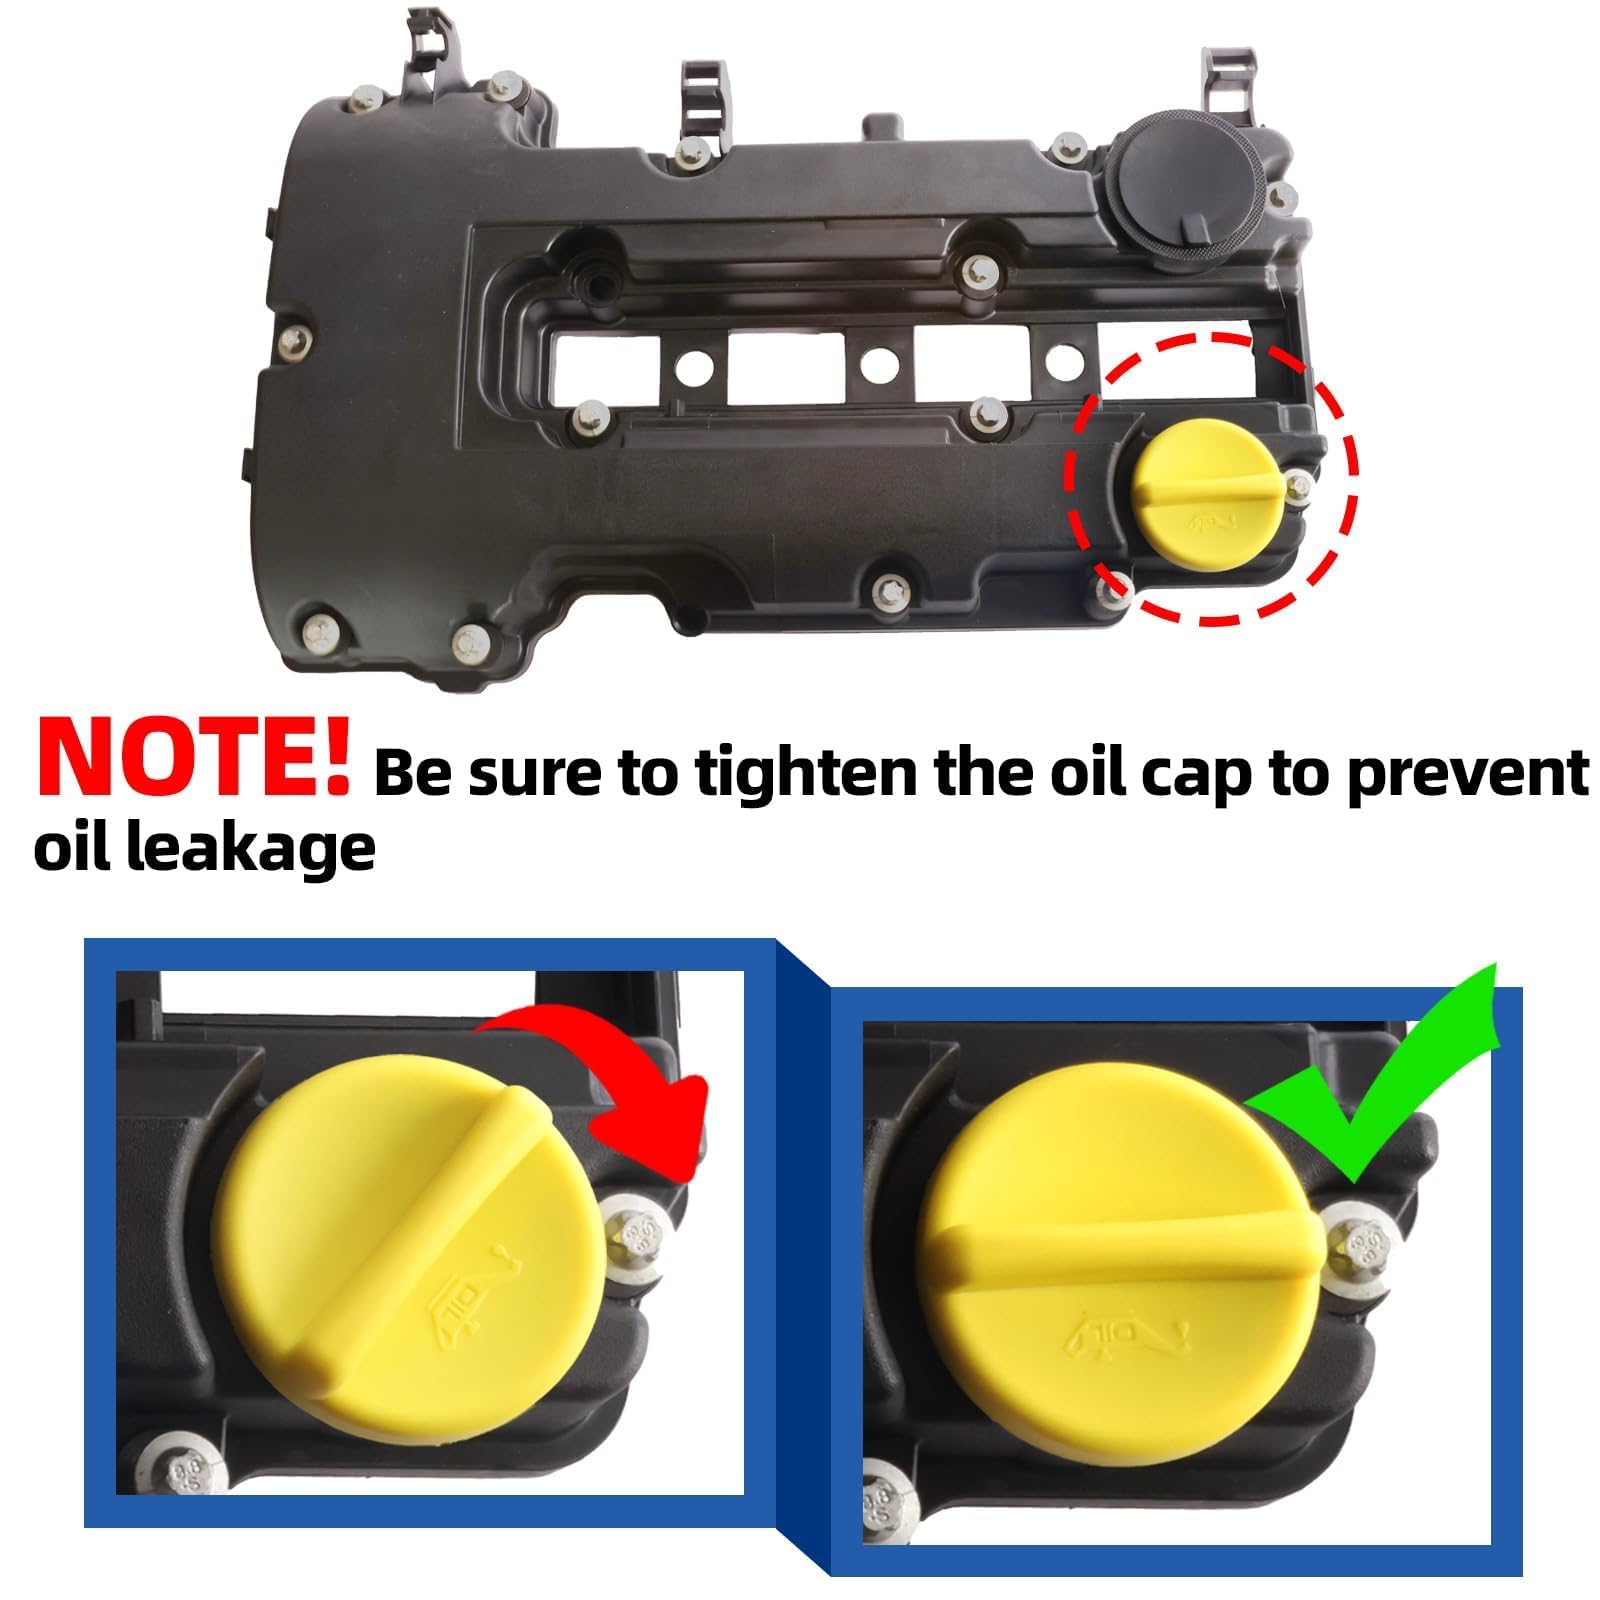
Great valve cover replacement, get the OEM cap and adapter though, the cap included with this will vibrate out and cause a huge oil leak. Perfect fit on the actual valve cover and no leaks yet, was extremely easy to install, and seems to be pretty much the same as the original design. Not sure about durability but it’s a plastic valve cover, if it goes bad again I will invest in one of the aluminum upgrades but for now it looks good and isn’t leaking, I only took the last star because of the horrible cap that ended up coming off while driving. Throw that part away and buy the OE full cap assembly and this valve cover is great for the price.
K**Y
Don’t buy it from the parts store
Good quality especially for the price. You can’t buy the gasket by it self for that price at the parts store
N**L
Just as good as OEM
Just as good as OEM!
M**A
Chevrolet volt
Fits like oem the seal is just right.
Trustpilot
1 month ago
1 month ago