
☕ Elevate your coffee ritual with precision and ease — because average is not an option!
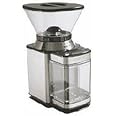
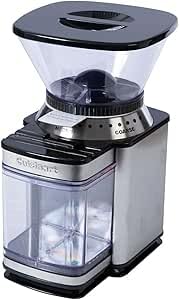
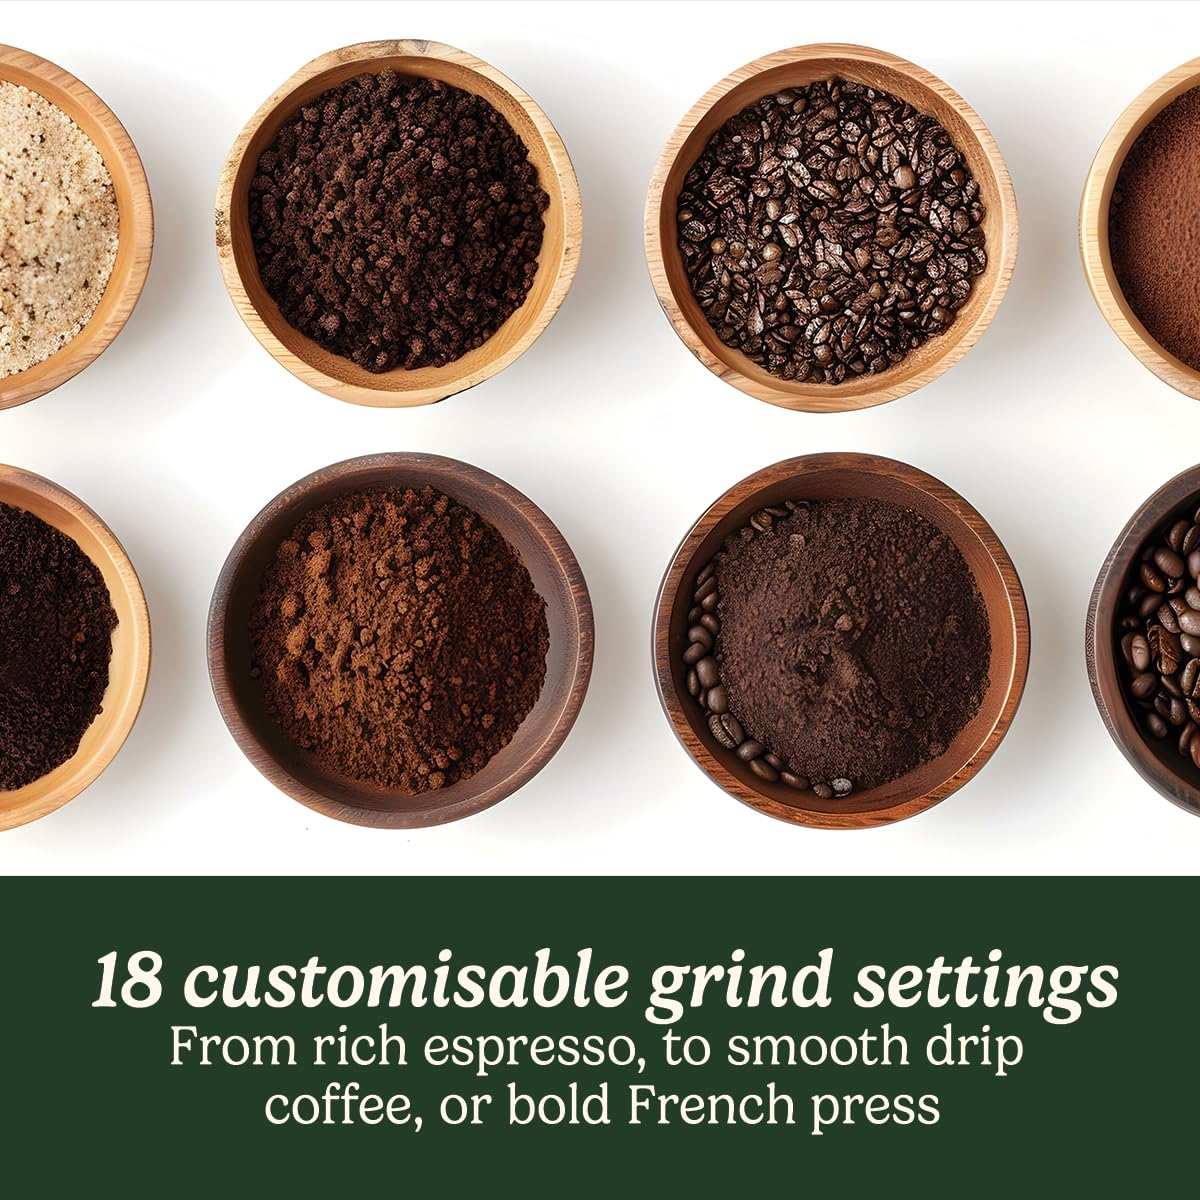
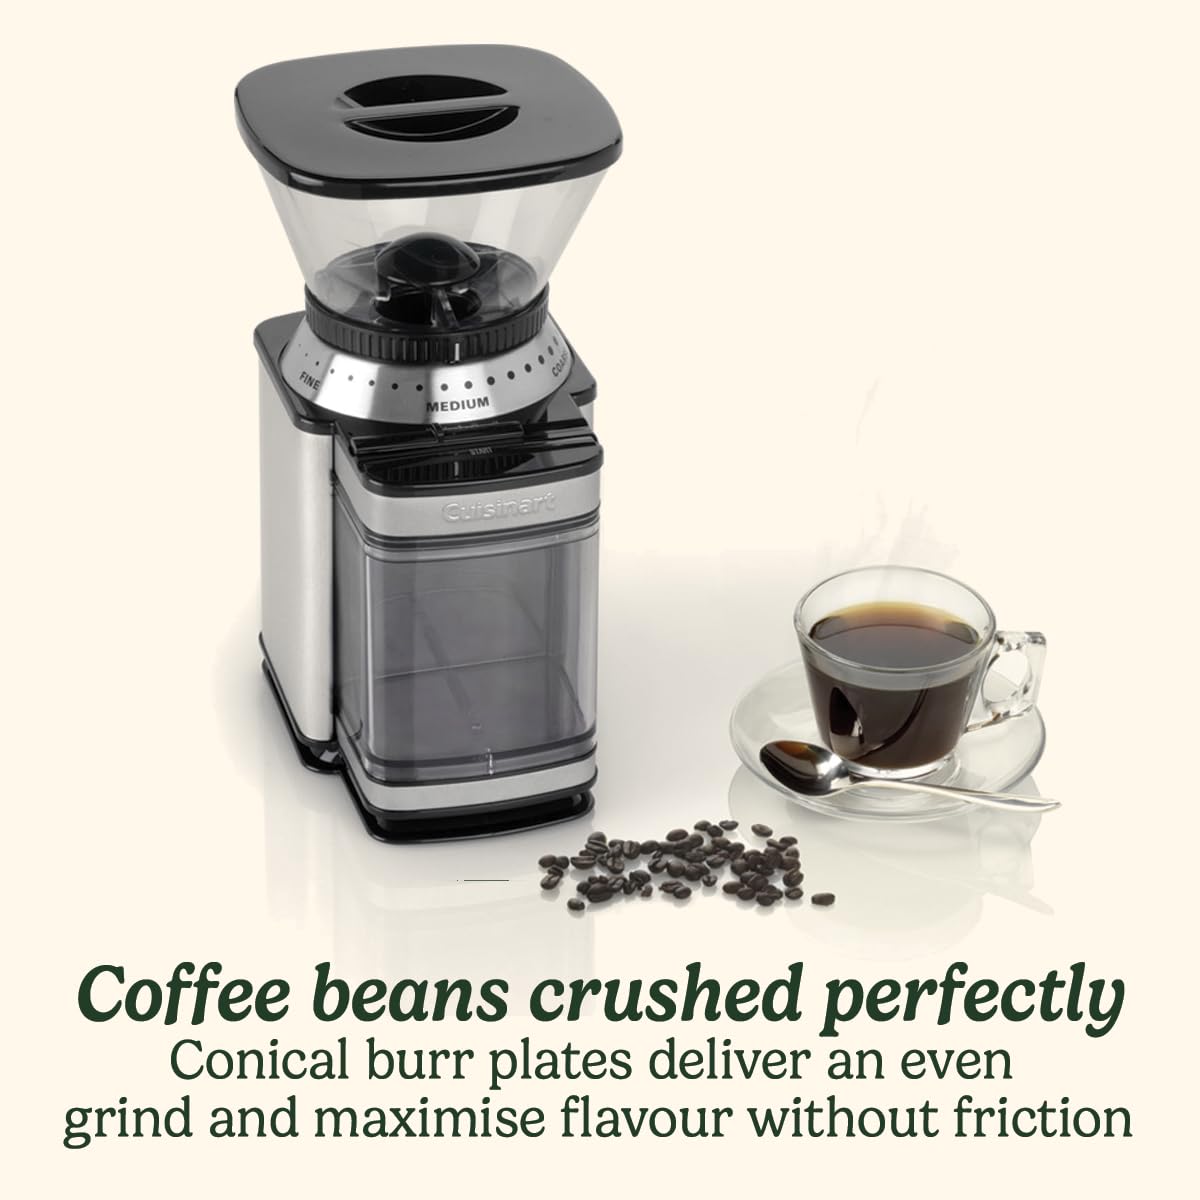
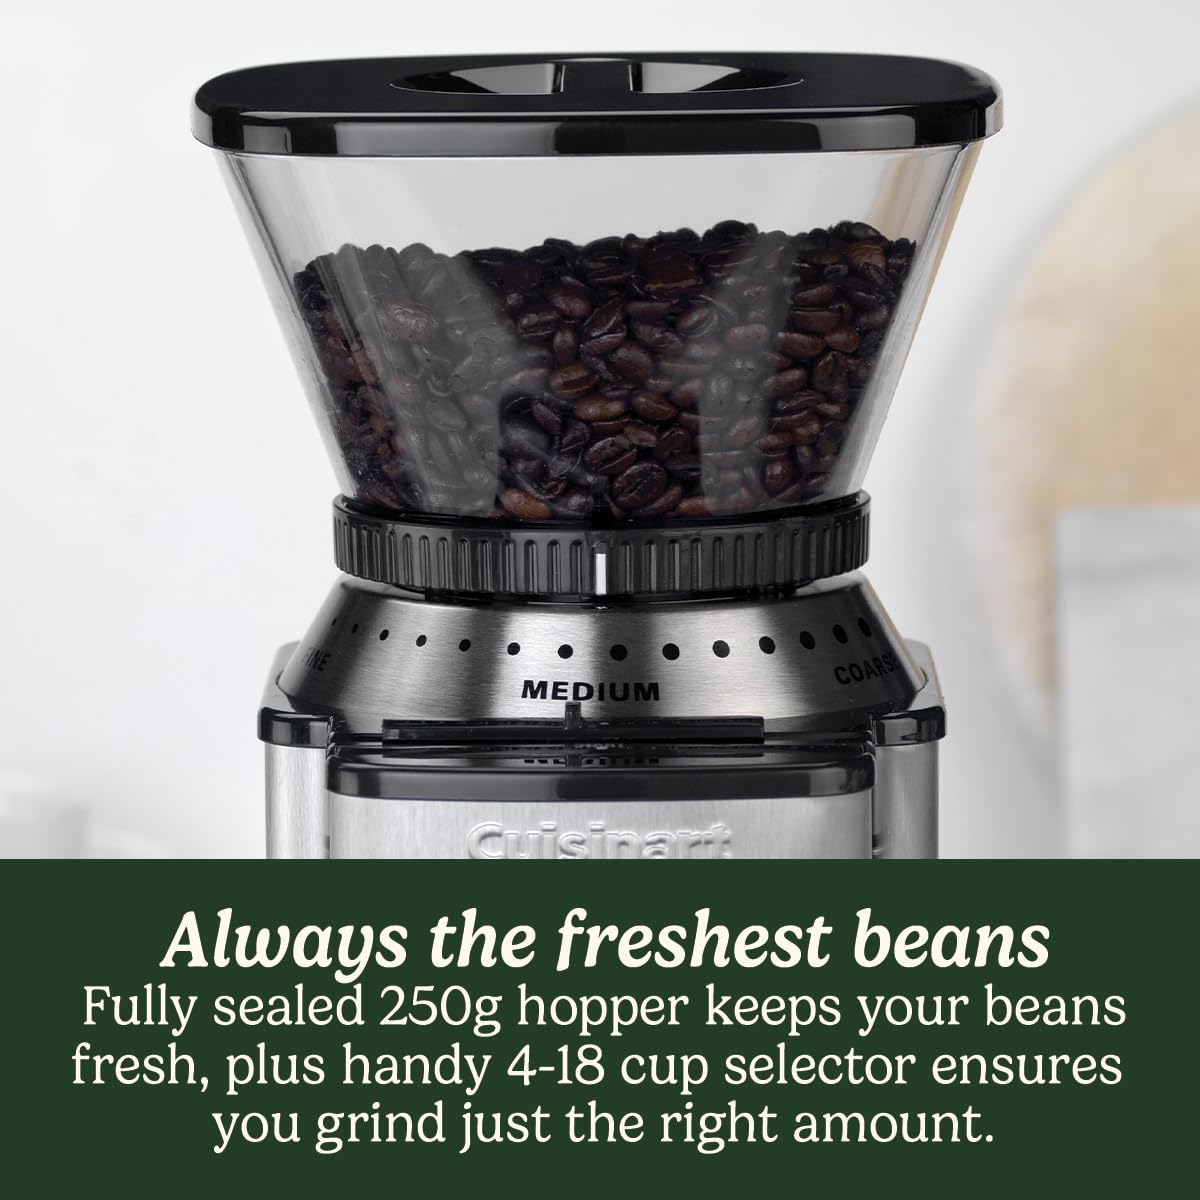
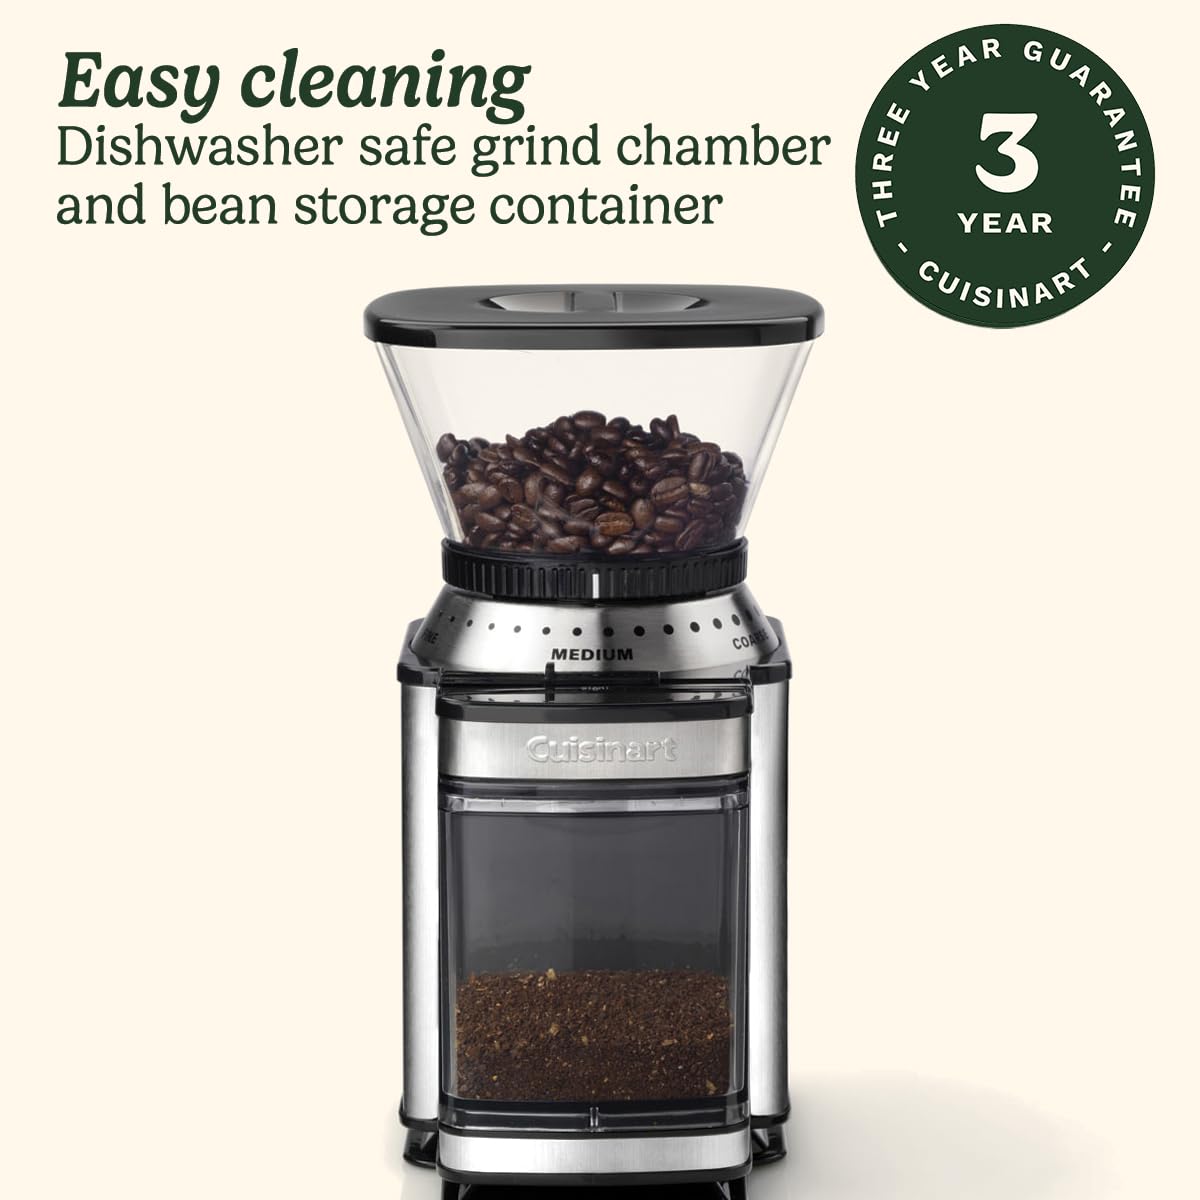
The Cuisinart Coffee Burr Grinder DBM8U offers 18 grind settings and a 4-18 cup selector to customize your coffee experience from espresso to cold brew. Featuring an airtight 250g bean container and dishwasher-safe removable parts, it ensures freshness and easy maintenance. With a sleek stainless steel design and backed by a 5-year warranty, it’s built for durability and daily enjoyment.


| Brand | Cuisinart |
| Model Number | DBM8U |
| Colour | Stainless Steel |
| Product Dimensions | 22 x 31 x 19 cm; 1.8 kg |
| Voltage | 230 Volts |
| Item Weight | 1.8 kg |
B**R
Not much to add to the other reviews, but.....
I've been using this mill every morning for the past 3 months with a few different beans, although no elephants yet, and am very very pleased with it.To echo what others have said, and add my two pence worth.....I find it makes perfect (paper) filter grind on the fifth notch from finest. Looks like a very even grind, with no residue in the jug or the cup. Set the cup selector (8 to make 4 mugs of coffee, 4 to make 2 mugs), press the button, fill up the coffee machine with water while you wait, then pour the entire freshly ground contents into the filter. Couldn't be easier.I shut the kitchen door when grinding so I don't wake my wife two rooms away. It's certainly not quiet, but it's grinding coffee so what do you expect? It's no louder than 'professional' grinders. My cats aren't bothered by the noise, so it can't be that loud. They run a mile when I vacuum the flat!The problems with static were a bit annoying at first. I appreciated the tip in another review of using the back of a spoon to discharge it, but found it's easier to just wipe your hand around the outside of the container. I've never had a shock. You can always touch the metal chassis of the grinder while you do it and this will discharge you. Static seems to have lessened considerably over time (Perspex is highly statically charged when it's manufactured, but once you have worked with it for a while, the static wears off) and this morning when I ran my hand over it there was just a tiny bit of charge at the base of the rear of the container. In any case, give it a couple of heavy taps (with your thumb over the hole!) before you remove the lid, as your worktop can soon get messy if there's charge, as grinds go flying everywhere. (Just to be clear, this doesn't happen if I'm careful!)Cleaning is a breeze with the supplied brush. You could easily use a cotton bud if the brush ever went missing. I've not had to dismantle it yet for any reason.....After a bit of trial and error, suitable cafétière grind appears to be bang on medium. (You can tell if it's too fine as the coffee tastes powdery.) The grind is very even, with a surprisingly minimal amount of residue in the cup when ground. I have no idea what coarse is supposed to be for, as I've never felt the need to push it that far!(I don't make espresso, so I make no claim in favour or otherwise for its espresso grinding capabilities.)I really don't like giving products 5 stars, but I can't think of anything that would make it better! One of the best £55 I've ever spent!
C**R
Good grinder, needs a shim for ROK espresso grind,here's how!
A great machine, still going strong after several years of use. Nice coarse grinds available for a 70s percolator and intermediate settings are great for cafetiere. Not fine enough setting for my new ROK hand press espresso maker; however a simple modification is possible by making a plastic shim to bring the grinding burrs closer together. Here's how.Remove the bean hopper completely (spin anti-clockwise)to reveal the attached upper burr. Remove the 3 small screws taking care not to damage their heads and the burr can be removed. Draw around the inside and outside of the burr on a very thin plastic sheet such as a strawberry punnet or margarine tub lid. Also mark the 3 screw holes. Cut out this ring shape and drill out the 3 screw holes. Place your shim between the hopper and burr and re-attach the 3 screws firmly. Easier than it sounds! IMPORTANT: re-attach the bean hopper to the unplugged machine and stop at the first course setting. With the grounds tub removed, spin the lower burr (visible in the outlet chute)with your finger to check for free spinning movement. Gradually click the hopper round to finer settings, spinning the lower burr each time. You will reach a point where the burrs just touch and will no longer spin by hand. Go back one click on the hopper and mark this as the finest setting on the machine- NEVER go beyond this setting or you will damage the burrs. What a difference for my ROK hand press! It should help other espresso machines too and saves buying a different grinder.Of course, you have lost the most coarse setting. To restore it, I bought a second hopper (complete with lid and upper burr)from customer services for £10 delivered. (Most parts are available promptly at reasonable price).I hope owners and prospective buyers find this information useful.2022 UPDATE: Yes, this grinder is still going strong without any problems, 12 years on. I did buy a new plastic grounds tub as the original got rather scuffed-very easy and quick from customer service. I now drink Hario V60 pour-over style coffee so don’t need the fine grind of an added shim on the burr. Yes it’s noisy and a bit of a faff to clean completely but easily fits into the ‘good enough and reliable’ category with spares available. Happy brewing! ☕️
J**Y
Not many burr mills at this price
I wanted a coffee grinder that had burrs rather than blades, and had a hopper to store beans. This was the only one with both of those requirements at this price point.It works well, you can change the fineness of the grind but even the fine grind isn't that fine for espresso. It's satisfactory, though. You can change the quantity of ground coffee by moving a slider to point at the right number of cups. It's a slightly mystical scale and I'm not sure what the numbers correspond to, but you soon learn how much is the right amount.The main downside is that the ground coffee tank is plastic and quickly gets charged with static electricity. The ground coffee is charged too, and clumps together in odd ways. Occasionally, when you remove the lid of the tank, the coffee jumps out and makes a mess. A glass tank would have been better, but you can work around the issue by touching the tank all over with your hands to discharge it.
Trustpilot
1 day ago
2 weeks ago