Vibram Rubber Half Soles Replacement, No Color, Size Large
T**E
Vibram quality, easy do-it-yourself; scarfed for a nice transition.
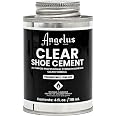
I had a favorite pair of Justin boots that are comfortable to drive in and to walk in on e I added padded insoles. I am in and out of the car and a bookmaker pointed out that the pivot as I get out is why I wear a circular pattern out on my left boot.I had just barely worn through the bottom to the inner layer when I noticed it. (Better to catch it when it starts to thin out.) These are relatively inexpensive new, and I bought 'em pre-broken so I figured I would try my hand at being a cobbler.I roughed up the leather best I could with a file I had handy- I recommend 150 grit or better sandpaper if you have it. I did the same on the half-sole. Do not trim until after they are on the boot!I decided where to put them exactly and put a line of painter's tape in the arch where you see the Vibram tapers down to meet the leather. I taped up the edge all the way around as well then applied and spread out a thin coating of Barge Original. I selected a tube of that when Amazon suggested that other buyers had bought that product with this half-sole. I highly recommend you use that. I spread another thin coat on the other half sole.Do this in a well-ventilated area. I will next time.Wait 15 minutes. Be patient. You want the contact cement to be tack dry on both sides. The way this works, is the cement drys to each half, then "contact" permanently bonds the two sides.I put on a nice pic pair of wool socks and put the boots on my feet and applied as much pressure as I could with my weight gently rocking around on the boots without walking in them.I trimmed a rough outline that night, but I recomend you wait a day. I set them aside for a day and forced myself not to fool with them any more.If I would do it all over again I probably have some heavy duty shears handy like leather shears or maybe 10 snips or something to rough the outline of the boot you want to get it kind of close to wear you wanted to be but not quite finished.I then used to file (from the bottom, so as to not encourage it to peal) because it was night again and I didn't want to wake the neighbors. Eventually I used my 7 in grinder and that worked much better.A little parade-gloss black to re-black the edges where my grinder had bit some fresh leather and they looked good.I forced myself not to use the boots for a couple of days, then wore them as usual. I clomped and shuffled in crushed granite and tried them up and down a rocky ravine and these Vibram didn't even scuff.Highly recommend the product and the satisfaction of do it yourself.You can do it!!!
S**L
Research before purchasing.
These are sole protectors, same ones professional cobblers install. To install them you must sand the soles down to bare leather, apply appropriate glue (barge original recommended) and press them VERY WELL against the soles of the shoes for 24 hours, then trim off the excess. It is what it is, don’t buy them and say they’re too big or they’re not adhesive. It’s DIY and if you prepare ahead of time and do a careful job you can get great results. Cobblers charge 50 or 75 bucks to do this. I think I got good results for my first try. The trimming could have been better for sure but I’m happy. I trimmed with a regular razor blade but in the future I’ll use a hooked carpet blade. IN MY OPINION for best results: tape off the arch of the shoe, and the sides of the soles with masking tape so only the glueable surface is exposed. Sand the soles down to bare leather. Sand the glue side of the protectors, particularly the ramp section which comes slick. Trim the protectors so they hang a half inch or so off the edge of the soles. Apply barge with a brush to both the sole and the protector, wait 20 minutes for the glue to dry to tacky. Carefully apply and press all the way to the edges. Stuff the inside of the shoes tight and slide an old (disposable) sock over the front of the shoe. Use duct tape to wrap the whole thing, putting a lot of pull on the edges to force the edges of the protectors up to the edges of the sole. If the soles are flat you may put another sock or something squishy on the sole itself to put even pressure across it. Mine were rounded from wearing the boots already. The protectors are flat hard rubber so it will take a good amount of pressure to mold them smoothly to rounded soles, but as you can see on my boots, it’s possible. WWait 24 hours before unwrapping your absurd creation. This is just how I did it. You may have better ideas if you’re creative. Good luck!Update: I have installed these on a second pair, tecovas this time. I learned a lot from the first time and these came out much better.1. Use a hairdryer or heat gun to warm the protectors, and shape them to pre-fit the soles of your shoes. They become soft when warm and can be worked into a cupped shape.2. Use a carpet “hooked” shape blade in your razor knife when trimming the excess. Heat the rubber when doing this as well, it cuts very very smoothly when warm and the hook blade is used. Heat the blade as well.3. After 24 hours when you unwrap the shoes, the glue is not fully hardened. Once the trimming is done, and sections that may not have been pressed fully at the edges can be heated up and clamped with paper clamps and left for a further 24 hours.
Trustpilot
2 weeks ago
1 day ago