🛡️ Guard Your Ride in Style!
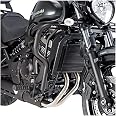
The Puig 8544N Engine Guards are expertly crafted in Spain, designed specifically for 2015-2018 Kawasaki Vulcan models. Weighing in at 8.93 pounds, these guards not only provide essential protection for your bike but also enhance its aesthetic appeal with a sleek black finish. Installation is straightforward with included instructions, ensuring you can hit the road with confidence.

| Manufacturer | Puig |
| Brand | Puig |
| Model | PUIG 8544N |
| Item Weight | 8.93 pounds |
| Product Dimensions | 10.7 x 10.7 x 1.5 inches |
| Country of Origin | USA |
| Item model number | 8544N |
| Is Discontinued By Manufacturer | No |
| Exterior | Painted |
| Manufacturer Part Number | 8544N |
| OEM Part Number | 359988 |
| Position | Front |
D**R
Guarding Your Ride in Style!
I recently installed these engine guards on my Kawasaki Vulcan S, and I must say, they blend seamlessly with the bike's aesthetics. The sleek black finish not only adds a touch of aggression but also promises durability. Installation was straightforward, though I did have a brief moment where I wondered if I was auditioning for a mechanic's reality show. One minor hiccup: the provided instructions were a bit sparse, so a quick online video saved the day. Overall, a solid investment for both style and protection.
D**S
Fit my 2021 Kawasaki Vulcan S in standard setup.
Edited 8/4/22 I have left my original review down below but definitely need to raise this from 3 to 5 starts. I was side swiped by a car doing 40mph and these bars saved my right leg. They took the brunt of the hit and because I had them installed the only injury suffered was a scraped elbow where the armor in my jacket ended. No damage to the tank, fenders or engine occurred. The other car however was pretty messed up where impact occurred. I'm 100% installing a new set once the bike is fixed. The only damage to my bike other then the bars were a bent in foot pet, handle bars and mirror were also damaged. Third image attached showing damage to the bars after the accident.I purchased these for my 2021 Kawasaki Vulcan S. I did not make any modifications with the ERGO-FIT system so they fit perfectly. The reason I'm giving only 3 stars is one side arrived with the black powder coat chipped. I did not want to return them as I wanted to begin my slow turn practice. I'll just touch them up and keep an eye out for rust.Installation wasn't too difficult, took about 40min and be aware the installation video from Pugi on YouTube is bs. They are able to use a wrench to tighten a bolt that is impossible to reach in that fashion. I instead followed a video from Hhctires Vlog, I ran into the exact same issue he had and his work arounds were perfect.I have seen engin guards on other bikes that stick out pretty far, these don't do that so they look good on the bike. All I need now are some passenger foot pegs and I'm pretty sure if the bike goes sideways it won't touch the ground.
M**R
Fits 2022 Vulcan S Cafe with extended reach pegs
I have the extended reach footpegs and followed a fellow reviewer's instructions to install. It does work with enough room for your feet to shift and brake effectively. My recommendation is to get all of your bolts just started in the threads (2-3 turns) on both sides. Once you have both sides seated but not tightened, connect the crossbar rod, and then very patiently and tediously go back and forth side to side, tightening your bolts down. This is a tight fit so be patient.Quality seems great and I hope to never find out how well they work. Be safe everyone!
P**.
I like'em
Very good quality. Poor instructions but pretty Easy to install, take your time to understand how it fit. Looks great on Vulcan. Seem sturdy enough to protect your legs, hopefully wont have to find out!
C**I
Work great.
Fits perfectly, looks great,Instructions don't exist.Check YouTube for Instructions.
J**T
Look great, but installation is awful
These look great once installed, but the installation process is a pain in the butt. The left side went on fairly easily, but attaching the passenger side I either received a bent product or the design is off. I was able to get it installed with some forcing, but it left plenty of scuffs in the process. The logo is also upside down, which just looks stupid. I hope to never need these, but they seem sturdy enough should the bike go down. Overall the look is good, but the product could use some re-engineering.
M**A
If you use extended reach foot pegs, read this first
Puig says you cannot install if you have extended reach pegs. You actually can, but you'll have to do a simple mod that requires a few extra (cheap) parts. Basically, you just need to extend the rear left (shifter side) peg holder spacer and rubber boot a little so the shift pedal will clear the crash bar. On the right (brake) side peg holder you just need to use a shorter spacer on the front mount hole. Even though the directions below are a bit long, this is actually a super easy mod that'll cost you around $6 at your local hardware store. Hey Puig: Feel free to include this in your instructions with proper credit... ;)You will need the following parts:2) M8 x 1.25 55mm (or 60mm) boltsAround 20-25) M8 or 5/16" flat washers1) Rubber boot that's longer than the original one on the left (shifter side) peg holder. This part might be optional.Left (shifter side) peg holder:1: Remove (or don't install) the bolt at the bottom of the crash bars that goes in the same front hole as the foot peg holder.2: Replace the rubber boot on the foot peg holder with the new longer one after putting a stack of washers in the boot first (I used 7 washers, but depending on the washer thickness, you may have to use a different amount). You may still be able to use the original boot, but it may not stay on the peg holder as well as it did originally.) This allows the boot to stick out further than the original.3: Mount the front peg holder hole using the other new M8x1.25 55mm (or 60mm) bolt with the original spacer. Don't torque the bolt yet.4: You need to use a stack of washers to equal the thickness of the metal where you removed the bolt from the crash bar (I used 5 washers). If you have some super glue, glue these washers together for easier installation.5: Slide one of the new M8x1.25 55mm (or 60mm) bolts through the rear hole of the left peg holder, then put the stack of washers on the bolt followed by the original spacer (creating an extended spacer). Mount the peg holder starting with the rear hole.6: Torque the bolts appropriately.Right (brake) peg holder:7: Remove (or don't install) the bolt at the bottom of the crash bar that goes in the same front hole as the foot peg holder.8: Mount the foot peg holder starting with the rear hole using the original bolt and original spacer. Don't torque it yet.9: For the front hole, replace the original spacer with a stack of washers (I used 7 here - this stack plus the thickness of the metal where the crash bar mounts should equal the thickness of the original spacer). For easier installation, glue the stack of washers together.10: Mount the front hole with the stack of washers through the crash bar using the original bolt.11: Tighten both bolts to appropriate torque.12: Enjoy not having cramped legs and keep the rubber down! :DThat said, the bars seem to be really nice quality - I hope I never get to test that, though. The worst part about the installation is just figuring out exactly where this mounts since their instructions aren't the best. There are some YouTube videos that are helpful.
B**T
Worth every penny
Great product. Buy these and scratch them up instead of your bike if ya drop it. Worth every penny. Saved mine twice. Dropped it once and a storm blew the bike over worked like a charm not a scratch on the bike.
Trustpilot
2 weeks ago
1 month ago