🔋 Power up your Switch, power up your play!
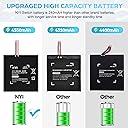
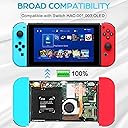
The NYI Upgraded 4550mAh HAC-003 Battery is a high-capacity, 3.7V Li-ion replacement battery designed exclusively for the 2017 Nintendo Switch HAC-001 console. It delivers 25% more power than typical replacements, ensuring longer gaming sessions. The package includes a complete installation toolkit with magnetic screwdriver and multiple bits, plus safety features like overcharge and short-circuit protection for a secure, DIY-friendly upgrade.

| ASIN | B09QKX539N |
| Antenna Location | Gaming Console |
| Battery Capacity | 4550 milliamp_hours |
| Battery Cell Type | Lithium Ion |
| Battery capacity | 4550 milliamp_hours |
| Battery cell composition | Lithium Ion |
| Brand | NYI |
| Compatible Phone Models | Nintendo Switch |
| Customer Reviews | 4.0 out of 5 stars 1,223 Reviews |
| Number of Batteries | 1 Lithium Ion batteries required. (included) |
| Number of batteries | 1 Lithium Ion batteries required. (included) |
| Recommended uses for product | Gaming Console |
| Reusability | Rechargeable |
| UPC | 761587382384 |
| Unit Count | 1 Count |
| Unit count | 1 Count |
| Voltage | 3.7 Volts |
E**A
Funciona
Tiene lo necesario para instalar la bateria y el manual aunque muy sencillo indica con claridad que tornillos debes quitar y que desarmador usar (están incluidos). Necesitarás paciencia para ir despegando la bateria y la pala incluida te ayuda bastante, asegúrate de desconectar la bocina que esta junto a la bateria para evitar romper el cable. Una vez que levantas un 10% de la bateria, lo demás es facil. Respecto a su desempeño. esperaba que duraría más; yo la compre para el primer switch que salió (la primer versión de hardware) y mi bateria original ya se me acababa en 2 o 3 horas, esta dura unas 7 horas continuas (a veces más, a veces menos depende el juego o si esta descargando programas) pero en general es aceptable. Si la recomiendo, pero no esperes que realmente la bateria sea de larga duración.
K**N
Was able to get it changed out in 45 mins but...
Amending once more after receiving replacement. As a note, the issue may not *actually* be the battery (it still could be), but the switch battery indicator incorrectly reading battery life incorrectly, which Nintendo has an article for (solution didn't work for me however). I tested the original NYI battery I received by playing and letting the indicator drop to 1% and seeing how long the battery lasted afterwards, and the battery lasted a total of 3 hours for Mario rpg (not too graphic intense). It's definitely no where near the original battery's life when I first got the switch, but it's better than the Nintendo battery after 8 years/SO many hours of play and changing, lasting an unpredictable 1 hr sometimes, 30 minutes others. I opted not to use the replacement I got because every time you have to change out this stuff/unplug connectors there is more chance of something breaking/bending. I am satisfied with this overall and would buy again. Amending my original review (below) because after charging and playing for about 15 minutes last night, my switch sat in sleep mode. I turned it on at lunchtime today to see if had dropped to 56%, and then when I went to turn it on after work it was completely dead. I charged it again to test it and this time I left it on for 10 minutes. Watched the battery drop rapidly to 56% then a couple minutes later it showed 4%. Ordered a replacement... It will amend my review again if i receive an actual working part. The kit had *almost* everything needed, and the instructions were very easy to follow. As others said and I had read, the adhesive on the original battery was REALLY tough to break. I watched a YouTube video that used isopropyl alcohol and a straw to drip it down the sides of the battery/tilt the switch and get underneath. The plastic tool that came in this kit was a little too thick to get under all sides of the battery, but ended up being able to pry from the bottom of the battery. After getting it out the rest was simple. The battery charged, and so far seems to hold the charge (this is less than 24 hrs after installation) so I will come back and amend my review if I have any issues, but as of now this kit/replacement gets an A+
K**N
Everything You Need to Replace Your Switch Battery - Easy to Install, Clear Instructions
The NYI Battery Replacement for the Nintendo Switch is a great option if your Switch battery farts out and you need a reliable replacement. The kit includes everything you need to replace the battery: the battery, a screwdriver and matching tips, and a spatula for removing the battery. The instructions were very clear and easy to follow, though I would still look up a video for reference, as there are a few steps that are quite delicate, such as detaching the SD card slot and the battery itself. Additionally, I would definitely advise using the tray everything was sent in to separate your screws as you remove them as they come in different sizes and head shapes. I thankfully did this by group, and didn't have an issue with the screws getting mixed up. As of the battery itself, it seems to be working perfectly. My Switch now stays charged for more than a minute (it was that bad) and I can travel with my console and enjoy using it while on the go again. I can't say much about longevity of the battery as I've only just installed it, but if starts wearing out quickly, I'll update. At ~$17 for the battery, it's a small price to pay to get my console working again and much cheaper than getting an OEM Switch battery. It seems like an excellent value for what I'm getting so far. Overall, it's a great kit and something I would purchase again if my battery decides to stop working again.
J**Y
Definitely not a permanent solution.
Battery arrived on time and well packaged. Had switch already disassembled and tore down. Installation was super easy. Quick plug and play. After connecting the battery I did a power on test and the switch came to life. Put switch back together. Noticed battery life was at 80% after reassembling and powering on. My son played on it for about an hr. Battery life went down to 64% then after about another 40 mins battery life was at 46%. Put on charger and saw indicator come on. Left for about 30 mins checked it and it had lost 8% while charging so I turned off the console and tried to charge it while off no luck. Battery is now sitting at 10% even powered down while on the charger it still kept loosing charge. Definitely a great sub for a quick battery if ur needing to get things off the switch of info but definitely not a great permanent replacement or solution. It did do its job but just enough to still need another one.
E**N
Excellent battery replacement kit
I bought this for my daughter's switch, replacement was not difficult, the tool kit especially the multi bit screw driver was very good and instructions were clear. Battery worked with no issues. If you do not have experience replacing batteries in similar electronics such as smartphones and tablets you should watch YouTube videos, take your time, and be careful. Additional tips: 1. Use a repair mat and secure the screws in groups as disassembly progresses to make repair process smoother. 2. Use tweezers to remove sd card reader vertically to avoid damaging connector. During reassembly, carefully align rubber connector cover in the slot and press carefully on the center to reconnect. 3. Make sure battery is completely drained with no residual charge. This switch had been dead for months so it was ready. Use the plastic spatula to pry out the battery to avoid punctures and leaking chemicals. This greatly minimizes risk of battery fire. Bending the battery during removal is unavoidable although use of rubbing alcohol to loosen adhesive could reduce this. I'm paranoid about battery fires and put the battery outside overnight where it can't do much damage, probably unnecessary, but sleep better not worrying. 4. After replacement battery assembly, place more thermal paste on heat sink which will be surrounded by the original red-orange thermal paste. If existing paste is hardened, remove completely and replace with new paste. Press the metal cover in firmly to seat in the paste. 5. After reassembly and before replacing the back cover, test to ensure battery AND SD card reader are functioning. Reinsert sd card, go into device settings and make sure the card is registering. The connector may not be seated correctly or get damaged during assembly. Have a spare card reader on hand in case needed. I bought the two pack replacemt kit from another seller but didn't need it. Maybe for the next repair if careless or unlucky. Overconfidence can result in mistakes and damaged components. 6. Bright light or headlamp will help reassemble small screws.
Trustpilot
3 weeks ago
1 week ago