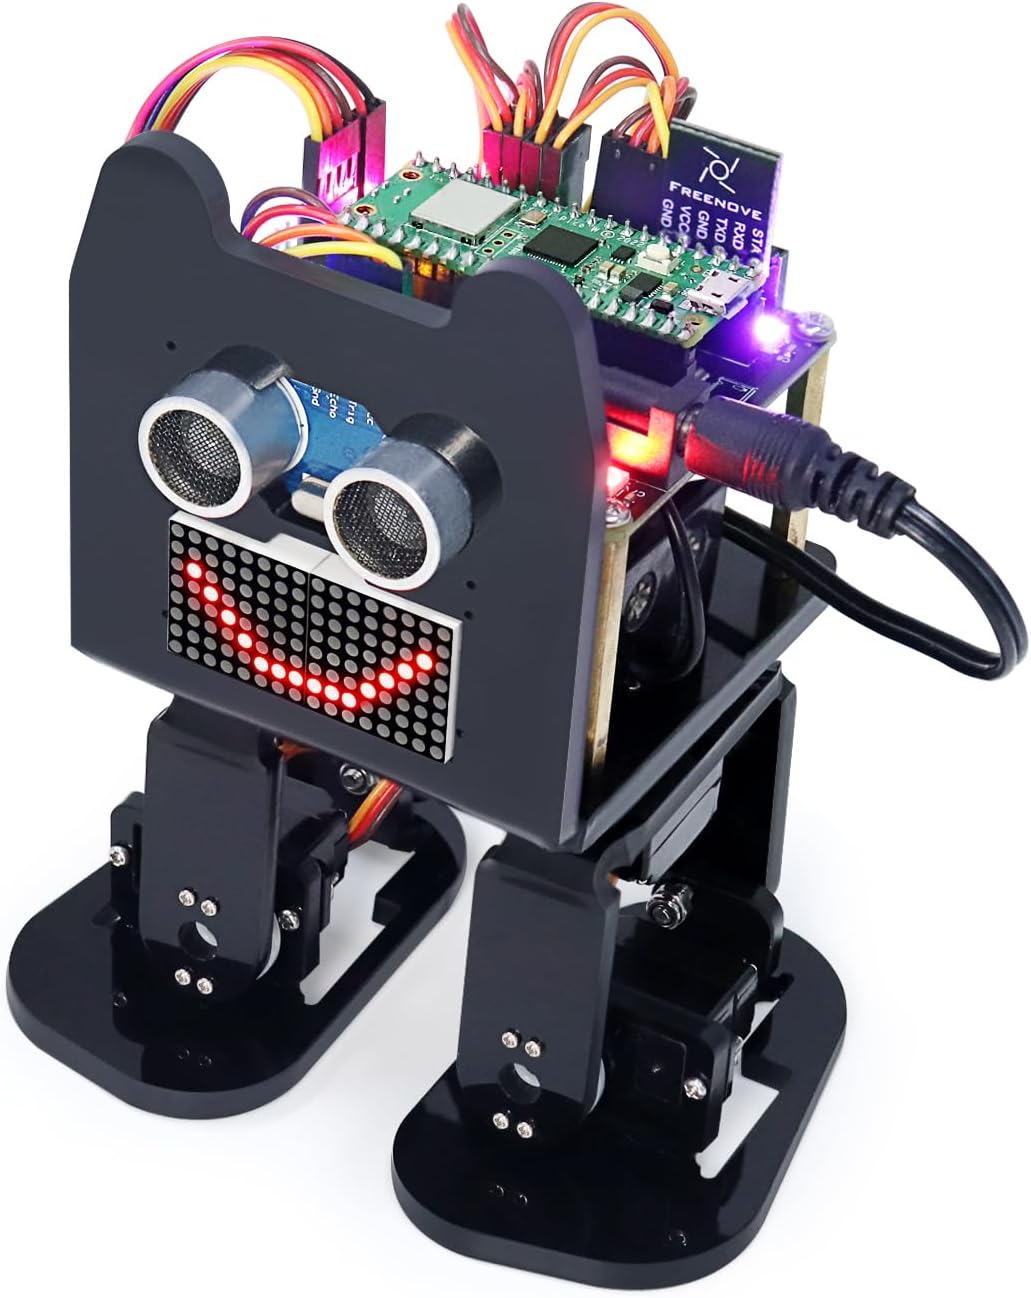
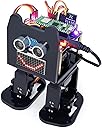
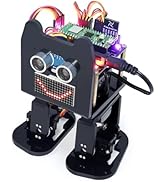
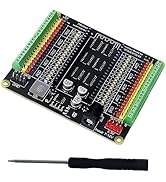
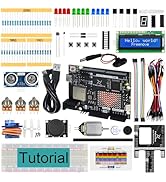
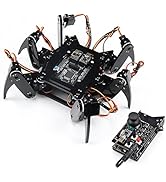
Freenove have come a little late to the bipedal robot party, there are plenty of others that have been around for a while. However, this is the first Raspberry Pi Pico powered bipedal robot that I have come across and that, for me, is a major plus. The Pi Pico is a much more powerful microcontroller than the Arduino Nano that powers most competitors that I have looked at. The Pi Pico runs faster and has more memory so has more possibilities for future expansion. The reason that I have said it is more than just a robot kit is that the tutorial covers each component and how to use it on its own before bringing it all together to give the fully featured robot. This means an opportunity to learn how to use the pi pico with servos, a buzzer, how to play mp3 files through a speaker, controlling leds, reading analogue voltages, using an led matrix and reading distances with an ultrasonic sensor. It also covers sending and receiving information via ir and Bluetooth. The robot parts themselves are made of laser cut acrylic, which for some parts, as far as I can guess, has been heated and folded to create more complex shapes. As with other freenove kits, the instructions for assembly are clear and easy to follow, although mounting servos can be a little tricky. I find it easiest to hold the nuts in place with a little bit of tape, before positioning and screwing together. (I have included a photo of a servo with nuts held with tape, at this point the bolts can be removed, the servo positioned and then assembled with the nuts held in position by the tape) It is important to follow the tutorial step by step. I had problems with the Bluetooth initially, but this was down to accidentally missing out a critical step. As ever with Freenove products, the support they provide was excellent and I soon got to the bottom of my mistake. The finished robot is lot’s of fun with plenty of scope for further development, such as creating my own expressions for the LED matrix. The board has spare ports for extra servos, so I may consider adding some arms in the future.