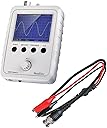
⚡ DIY your way to precision — the oscilloscope that means business!
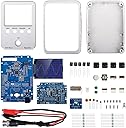
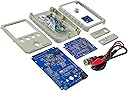
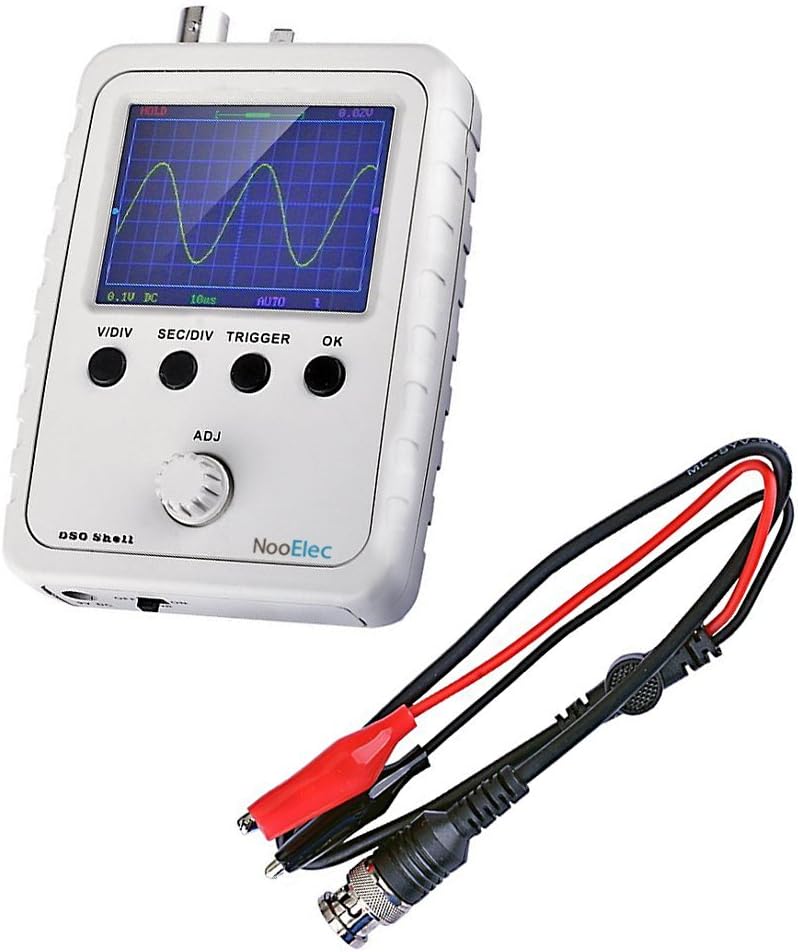
The JYETech DSO Shell (DSO150) is a low-cost, DIY digital storage oscilloscope kit featuring a sharp 2.4" TFT LCD, rotary encoder for intuitive control, and improved sensitivity from 5mV/div to 20V/div. It comes with a durable molded plastic enclosure and clip probe, mostly pre-assembled motherboard, and comprehensive documentation. Ideal for professionals and hobbyists seeking hands-on electronics measurement with reliable factory-tested quality and dedicated support.
| Customer Reviews | 3.8 out of 5 stars 421 Reviews |
H**E
Good enough for me.
I'm an amateur electronic hobbyist and basement tinkerer, and every once in a while, I either assemble my own circuit or solder one up in a kit I get off Amazon, and problems arise that could be easily troubleshooted with an oscilloscope. But it's so rare that I never felt coughing up for a full blown 'scope was justifiable. Thanks to this kit, I've got a o-scope that I not only got at an a good price, but I take pride in the fact that I assembled it myself and it still works. This kit doesn't come with a power supply. But the instructions tell you what specifications the supply needs, so it was simply a matter of rummaging around for a transformer that met or exceeded specifications (at least in specified current output). The instructions, while not written by someone that speaks English as a native language, are clear enough to understand and electronic components are quantified accurately. There's a nuance I want to discuss about the instructions of this kit: I've assembled kits like this and many times, the instructions regarding circuit board testing are as clear as mud. But again, despite some broken English, I was able to understand what I needed to test on this board and how to go about it. You test the board before you begin soldering, and once more after you complete soldering. I appreciated the added effort to clearly specify what and where I needed to probe my multi-meter for testing! So, is this o-scope any good? I can't say yes or no with authority. The only experience I've had with an oscilloscope was nearly 10 years ago, and it was an old unit with a screen that barely worked, in some rushed training. I'd imagine it can't compete to even an entry level mass produced o-scope. But for my occasional needs and the price I paid for this, I think this 'scope is great and think it will hold either for a very long time, or until I get more advanced in my tinkering to justify buying a common o-scope.
L**N
It's a toy, not for professionals.
It works to regulate, but sometimes it gets stuck and doesn't work. If it's powered with more than 11V, it burns out.
M**.
Weak, not robust enough to take handling during assembly
Booted up once after building it out, was able to see a reading, then I turned it off. The next time I went to turn it on, the unit went nuts saying it couldn't read the chip set on board (EPROM read error). Turned it on multiple times with the same error after that. Sent it back. I think it has potential, but it's just not robust. The display was color and readable and appeared to have decent resolution for a scope it's class. However, If it was destroyed in some way by me putting it together, how much worse will it be if I accidentally hit a voltage it doesn't like during testing? There's no instructions on how to assemble the main button on the front panel, I followed the steps in the badly written manual and there was nothing about what to do with the little PC board and the main button, took me a awhile to realize it after I put it together, but then had to unsolder the button from the main board to put it on the tiny expander board. The resistors were measuring all over the place with my precision digital multi-meter, I had to pick the nearest values to what was listed in the manual and on the motherboard. These are flameproof resistors (I assume), and should have good tolerances, but they were sloppy in value, some were off by thousands of Ohms. It could be the bad resistors is what caused this thing to collapse in front of my eyes. Electrically, it's a weak performer.
T**R
Definitely worth the purchase
This was a surprisingly good kit, rather well thought out and executed... and insanely inexpensive for the functionality. It is not a beginner's kit, designed to be hammered together with a propane torch and a brickbat... it's a fairly upscale kit that requires a pretty serious hobbyist to build it. You'll want magnification. You'll want good solder and a good iron. You'll want a pair of serrated-jaw forceps and some good sharp flush-cutting dikes. You'll want good light and a clean surface to work on, where tiny dropped parts can easily be found. A linen sheet is a good work surface. You'll want a very small Philips screwdriver and a decent multimeter (HF is fine, no need for a Beckman). You'll want a true 9VDC wallwart. It's NOT perfect; like all things, it could stand to be improved. The solder pads could afford to be considerably larger in most cases, for example, and most of the through holes could stand to be both smaller and closer together (per component). The adjustment instructions could stand a little clarification. I would have felt better if more of the resistors were within 5%, or even 10%, of nominal value; some were barely within 20%. I may go back and replace those with better resistors. The first task for mine was to fill some COVID time. Its second task will be to assist in troubleshooting and repair of an issue in one of the channels on my old Tektronix dual-trace oscilloscope. Reminds one of a junior cub scout helpfully assisting an elegant old lady across the street. 8)
S**Y
Great Little Scope for General Sleuthing!
This genuine JYE scope is awesome! What a treat! I have lots of more expensive gear, but I prefer this little powerhouse for general testing and lower-frequency use. If you pick up a x10 scope lead you can read higher voltages than the average person should dare try, safely ;) In addition to being a truly useful low-cost, low-frequency scope, after reading the manufacturer's materials, it looks like the more adventurous among us can even get this little gem to export its sampled readings to a PC over a USB-to-serial port adapter! (Again, not by default - it would take some soldering and a little knowledge about downloading software, etc.) But, wow. What a great knock-around, low-frequency scope. Good for automotive wiring, audio projects, household appliances, (etc.) where both the voltage is low and the signal is not super high frequency (e.g. is *NOT* computer-bus-type frequency ranges). However, it can certainly help you test why your PWM servo hooked up to your Arduino isn't functioning correctly! Or help you figure out if your RS-232 serial GPS port is at 9600 baud or not. Great fun, great price, neat little scope!
B**A
Excellent scope for simple tasks
This is an excellent scope for the purpose: check in the field the waveform of UPS. We have several UPS supposedly "true sine wave" but some customers had complain that they were not really true sinewave With this we can pinpoint the wrong ones and fixed/replaced them There are several things to notice: one: the probe supplied is 1x and the max Vp-p rating of the scope is 50V; for use with normal 120V AC we use a little transformer; not big deal, but it's some to be aware of two: In some reviews is stated that you could mount a 9V battery internally. This is not the case with this particular version as there is no physical space to fit the batter. It does have an internal power connector, however. three: I *eats* the battery. In our use, a new 9 v battery will last around 4-6 hours of use. I strong suggest using a power adapter Overall is an excellent product if you do not need to exceed its target spectrum: Low voltage, audio frecuencies For anyting else you will have to buy something else
J**N
Challenging build, not sure about quality
First off, this kit is NOT for beginners. The parts are rather small, and a fair amount of experience is needed. Second, the instructions advise you to check each resistor with a meter prior to installation. THIS IS GOOD ADVICE. The resistors use the 5-band color code, and being 1/8 watt, they are small and the colors are difficult to see. You will want to measure each one to make sure you are selecting the right one. Once assembled, I had difficulty calibrating it, and even when I did, it didn't seem to "hold" calibration very well. I've seen the JYETech forum on troubleshooting, but honestly, one shouldn't have to do some of the things that they suggest to a brand-new product. I bought this more as a diversion, something to build. In that respect it was fine. I'll keep it around just for S&G's, but I don't think it will be my main scope by a long shot.
L**4
Quite amazing little oscilloscope!
I can start saying what is not perfect, however this is not meant to be perfect to start with. I soldered it without a problem, had to rework couple of my mistakes (please pay attention to orientations of the part you solder). The power connection to a battery was flaky (not their fault) and so after putting it together there was no signal (my battery connector nozzle is too short and created intermittent connection). The case is a bit flimsy, one button rubbed on the front pannel and I had to file the hole a bit to make it bigger, e.t.c. I almost gave up on it, but in the end it all worked and worked beautifully. It even provide the signal measurements (if you hold the OK button for 3 sec) and has a uart port (which is not soldered) to get the data out - another potential extension project in the future. Overall, I am quite impressed and satisfied with the looks and performance.
H**.
Eher für erfahrene Bastler/ Elektroniker
Zuerst was zu meiner Person. Ich war ein Berufsleben lang im Bereich Elektronik Entwicklung und Anwendung tätig. Kann also löten. Und das muss man auch können. Selbst, wenn die SMD Bauteile schon aufgelötet sind. Man benötigt auch einen entsprechend feinen Lötkolben und dünnes Lot. Ansonsten ist man beim Zusammenbau nicht wirklich gefordert. Alles gut beschrieben. Man muss es nur lesen... Und auch vor dem Zusammenbau die Schutzfolie vom Display abnehmen. Das steht nicht in der Anleitung. Die Widerstände für den Analogteil waren bei mir mit einer Toleranz von 1%. Das ist meiner Meinung nach ausreichend genau für die Signalaufbereitung von diesem doch eher im Bereich Gadget anzusiedelndem Mini DSO. Was jetzt keine Abwertung sein soll. Es ist ein brauchbares Teil. Insgesamt bin ich sehr zufrieden. Funktioniert absolut gut. Es ist alles, was man bei einem Oszi einstellbar sein sollte, auch einstellbar. Auch Trigger. Auto, Normal, Single shot. Trigger Flanke und Level. Die Verarbeitungsqualität des Produktes ist erstklassig, auch die mechanische Passgenauigkeit. Value for your money. Würde ich wieder kaufen.
C**O
Divertente e Utile
Certo non un prodotto professionale per per un uso hobbistico e per apprendere o piccoli test è un ottimo strumento
P**L
Kit particulièrement bien fait. C'est un vrai, attention aux imitations!
Pour une fois tout est bien détaillé en images et en bon Anglais! Exemple de sérieux: il y a 9 points de test dont on doit mesurer le voltage: si la valeur est incorrect on a une piste vers la cause du problème: vérifier telle soudure ou erreur sur telle resistance. Compter 2 à 3 heures au total , mais c'est un vrai plaisir. La consommation sous 9V est de 110 mA, soit 1Watt.
P**O
It is a nice DIY project to do and seem to be working
It is a nice DIY project to do and seem to be working. I didn't fully test it, but so far I liked it.
W**9
Excellent wee scope for the money and good fun to build.
Great little scope for the money. The assembly instructions were concise and easy to follow and the user instructions were simple to understand too. Some parts are very small and I would say that unless you have good experience soldering you shouldn’t attempt it and buy the fully assembled unit. I used a 50W temperature controlled iron and needed a relatively small tip and low temp for the small parts. I changed the tip to a large one and set a higher temperature for the BNC connector and ground pins on the adjust control. Everything fitted together perfectly and all the voltages measured within spec. I did find that although the adjustment of C3 made a difference to the waveform, C5 seemed to make no difference, but I don’t think it matters. I have tested it with 4 different waveforms at about 1kHz and all seems as it should be. Overall this is a very nice and handy little bit of kit for the price and putting it together happily used up an otherwise boring lockdown afternoon.
Trustpilot
1 month ago
2 months ago