Desertcart purchases this item on your behalf and handles shipping, customs, and support to South Africa.
๐ Seal smarter, not harder โ lock in comfort and style with Loctite!
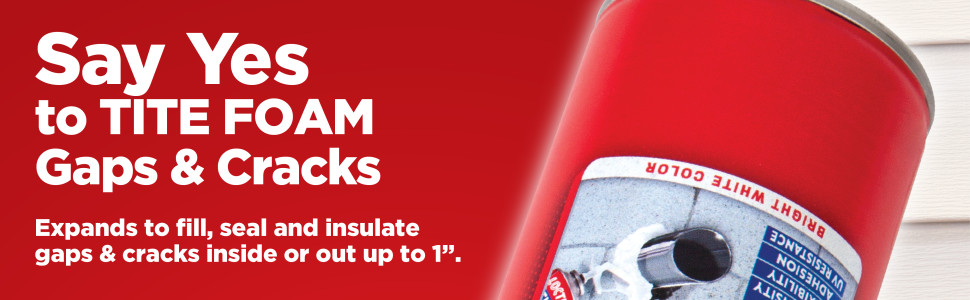
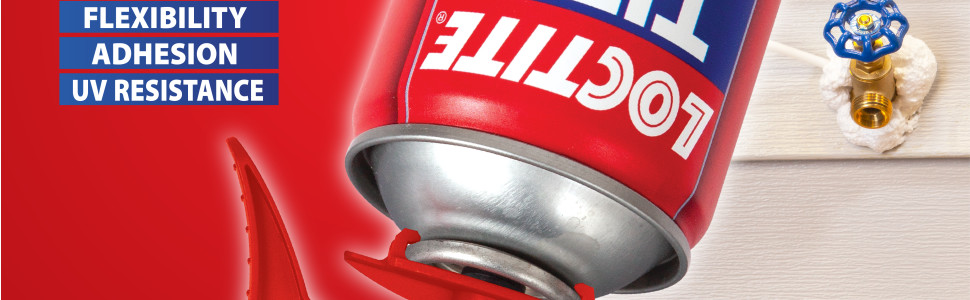
Loctite Polyurethane Foam Sealant is a high-density, expanding foam designed to fill, seal, and insulate gaps and cracks up to 1 inch. Its UV-resistant formula ensures long-lasting durability, while its strong adhesion bonds to most building materials. Ideal for both interior and exterior use, this foam is flexible enough to withstand structural movement and can be sanded or painted for a flawless finish. Perfect for professionals and DIYers aiming for efficient, reliable insulation and sealing.


| ASIN | B0CFKJJ984 |
| Best Sellers Rank | #139 in Industrial & Scientific ( See Top 100 in Industrial & Scientific ) #1 in Urethane Adhesives |
| Brand | Loctite |
| Brand Name | Loctite |
| Color | Red |
| Compatible Material | Polyvinyl Chloride, Wood |
| Customer Reviews | 4.4 out of 5 stars 21,619 Reviews |
| Item Dimensions | 2.56 x 2.56 x 7.87 inches |
| Item Form | Foam |
| Item Type Name | TITE FOAM Insulating Foam Sealant |
| Item Weight | 1.5 pounds |
| Item dimensions L x W x H | 2.56 x 2.56 x 7.87 inches |
| Manufacturer | Henkel Corp |
| Material | Polyurethane |
| Material Type | Polyurethane |
| Model | 2975892 |
| Number of Items | 1 |
| Part Number | 1988753 |
| Style | Compact |
| Style Name | Compact |
| Surface Recommendation | Floor, Gutter, Tile, Window |
| Unit Count | 2 Count |
| Water Resistance Level | Water Resistant |
R**R
Stuff is amazing! But a bit of a learning curve. Learn from MY mistakes!
TLDR: This stuff is great and 100% accomplished what I needed in what I think was a somewhat challenging use case. However, there was a bit of a learning curve for applying it properly. - The Project: Creating a vent for portable AC exhaust hose in a disgusting and ancient basement window. - The Process: First I removed the old and already completely shattered glass window from the window frame. I tried to chip out all of the old mortar or whatever it was that held the old glass window into the frame but some of the bits were impossible to remove. I knew I wanted to remove as much of that as possible so that the new panel that I put in place would sit flush and make for a better seal. This proved extremely difficult but I was eventually able to get the panel to fit into the metal framing fairly well. Once the vent panel was in place I started with the foam. There was a learning curve. I started from the outside of the house. Applying the foam into the gap at the bottom went perfectly fine. Then things got ugly. When I first tried to seal along the right side, going up and down vertically, the foam just sort of rolled off the front of the vent panel. It made a mess and was turning what had been a surprisingly tidy and semi-professional looking result into a huge mess. And more importantly, the seal was clearly not made. There was no insulation along the right side and the panel was in no way attached to the frame with any adhesive along that side. It was still secured fairly well from the physical fitment but it wasn't glued at all. This was a major problem and I thought my project was going off the rails. I removed the excess foam that had slid down the side of the panel with my hands (more on that later) to clear it off and give me a second chance. Next I went across the top horizontally with better results, similar to what happened along the bottom, but I still had not gotten the hang of using this foam. I went along the left side vertically and again had it sliding around and had to remove with my hands. I tried again and the foam sort of went into place and did what I wanted it to do but I still didn't understand why or what I had done differently to get the right seal and behavior of the foam. At this point, I decided to start sealing from the inside. But I knew I needed to move fast because I wanted to be able to sort of push the panel into place pushing it outward from inside the house to make for a better seal and fit. But I knew I wouldn't be able to do that if the foam had dried. However, my hands were now completely useless as they were covered with this stuff. After about a 5 minute diversion to the slop sink I had removed enough of the stuff to get my hands back to a functional state. I went to sealing the window from the inside and here is where I finally learned how to use this stuff correctly. I had a gap of about an 3/4" between the edge of the vent panel and the styrofoam backing. So naturally, when I started applying the foam sealer on the inside I was spraying the foam into that gap. And this provided an amazing realization. - Using this product properly: Apply minimal force on the trigger. You don't need to blast this stuff out at a high rate. Spray the foam into a gap (duh!) and the foam will expand to fill the gap (again duh!). As long as you are spraying it slowly into a gap it will expand to fill the area and create adhesion on all sides which will prevent it from being pulled down by gravity or just sort of glooping up on the surface. Just based on the description and purpose of this product and my intended goal with using it, I feel kind of dumb that I didn't do this right from the start. - The Process, continued: With this new understanding of how to apply this foam I completed the inside and went back outside. I carefully position the straw so as to make sure the foam would be quite literally injected into a gap. The foam expanded to fill the gap and didn't gloop up or slide downward. You can't just spray it on the surface...you have to stick the straw into the gap and inject foam into the gap. - Conclusion: End result was probably about as good as I possibly could have hoped for given my complete lack of experience with doing anything like this. I made a mess of my hands but after only about 5-10 mins of washing my hands with regular dish soap I had removed 75% of the adhesive from my hands. About a half day later 95% of is gone. So yes, be careful with handling it, and yes I should have worn gloves. But it's not THAT bad if you get it all over your hands. Your best bet with this stuff is going to be to press VERY lightly on the trigger when applying it. This will keep things neater and avoid the disasters I've seen in the customer images here. This product is great and I think completely lives up to what it says it does. There is a learning curve though but once you get the hang of it your result can be both functional and neat and tidy.
W**I
Potentially VERY Messy to work with
This is an update to the previous review I wrote about Locktite for small cracks: MAKE SURE THE NOZZLE DOUBLE CLICKS ONTO THE RELEASE VALVE. I used a second can of this a week later that arrived that was ordered separately. The mistake MIGHT have been mine. The can I used the first time MIGHT have been defective. I'm pretty sure I heard the nozzle click into place as it says to do in the instructions on the can. I'm pretty sure I looked and it appeared to be seated okay, but I extend the benefit of the doubt to the company for the margin of error. Second can of this I made EXTRA sure the nozzle was properly seated and that both clips were securely in place. Pretty much no mess whatsover and the Locktite for large cracks as it turns out as opposed to this review for Locktite for small cracks, I'm certain, the story is the same. So I raised the original review from 4 to 5 stars. This stuff works GREAT. I will write a review for the other (Locktite for large cracks) and include a picture later. The original review is below in its entitety: I am not going to say a lot right now in case my review gets eaten by my android (again) and all time is wasted. If the photo and video uploads I will try to update. Here's the addendum: Absolutely,positively use work gloves and be advised you will be replacing them with another pair. This stuff is ridiculous to work with. (Ridiculous bad. No good, yuck, bad.) I held the can upside down to dispense it as it shows on the instructions on the can. Pro: they put a lot in the can. Con: No way you get to use it all for the stuff oozing out all over the place on you: still the usable amount is a good value for the money. Con: it makes an ungodly mess at the valve. Do not wear clothing you value when working with this. Pro: have a used stiff paint brush or scraper nearby as you work so you can smooth over the mess it makes as it makes a nasty mess of the can and whatever glove you're using to protect your hands from getting this highly unmanageable goop all over. (Zoom on the photos. That glove? It's stuck to the can and remaining contents that won't come out as it oozes out during application.) It's messy. I cannot emphasize that enough. Pro: I believe I just salvaged part of a wall surrounding my back yard that was built in 1978. I used it in the cracks. I will be buying more despite the mess because this is a very useful product. I rated it only four stars for the near enormous mess it will make. For usefulness: 5 stars plus: but for application 10 rotten tomatoes and not a single star. Okay, maybe 1 or 2 on a good day. Order a pair of inexpensive work gloves to use with this as it is highly likely you will be throwing them away along with the unused portion of the product that is going to seal up around the nozzle as you work.
B**.
As Advertised
Great product that works very well. Only problem is that it's really difficult to reuse the canister's special nozzle. Afterbtge initial use, the foam solidifies on the nozzle making multiple uses almost impossible. If you want an effective single use canister this product is great.
J**S
amazing sealant
Works for gaps cracks. amazing sealant
C**E
Good to fill gaps. Wear gloves, it's very sticky
Good product I used this to fill some cracks.
D**W
The very best and fastest drying foam insulation for small jobs
I purchased this to seal several gaps where mice and rats enter the building. I was surprised at how quickly it expanded and dried. In 8 minutes it was dry. It expanded to 3x the size of the gaps & holes I filled. Im very very happy with my purchase!!!
H**N
Poor dispenser design
Why did you pick this product vs others?: The insulation is quality, but getting it to dispense correctly is the problem. I've used a lot of spray foam insulation similar to this. Usually your dispensing trigger screws onto the top of the can. This is a simple design that I've never had fail on me. This design is very strange and failed on me twice rendering my cans useless. I won't buy this product again even though the insulation is the type I tend to need. The problem is the trigger assembly clips onto the top of the can. So the footprint of plastic on this cap is large creating failure points on the dispenser. Mine fail right at the point the plastic needs to flex to depress the top of the spout to release the foam. What happen when this fails is the foam comes out mostly around the trigger where your finger is. This happened to me on two cans, was able to salvage a little bit on one can but basically threw them away and grabbed a can of the style with the screw on trigger. Again, not a product for me considering my issues. Maybe I got a couple lemons, but I'm going to save my money and use other products. Good luck if you try it out. I hope it works for you. The attached picture is of where the foam ends up coming out for me. I dug it out of the trash so it wasn't attached to the can anymore, but that's where the issue was for me.
J**A
10/10
I cannot sing the praces for this foam sealant enough! We've had an irritating bug problem where these 1-2 inch long cockroaches are just walking into our home. It's upsetting! And stressful. I've literally been having nightmares, my daughters are stressed out over it. It's literally brought me to tears multiple times because I just don't "do" bugs well whatsoever, it's disgusting. I followed the instructions on the back of the can, I thought it would be complicated but the only thing to remember is to hold the can right. You can spray it like a spray bottle, you have to hold it upside down. It sprays out very easily. I was able to clog up the poorly manufactured areas under our kitchen sink and my daughters bathroom sink - it just had random holes that led into the wall which is where I'm assuming they've been crawling in from. I honestly might have overdid it with sealing it all up but I'd rather be safe than sorry. I'm no professional so it's not as neat and tidy as someone else might like but it's a work of art to me lol. All I see is no more critter access. It expands well. Be mindful that it can cause a bit of a mess if you just hold the nozzle in one place; you need to keep it moving as you spray for a clean, neat look. I am BEYOND happy with this. I've ordered 4 cans and didn't even use all of one. So I'm glad that it's not one of those situations where you get 4 could sprays and then the whole can is empty. I honestly feel silly for not doing this a lot sooner, the solution was just that simple.
K**)
Great
Easy to use
A**A
WEAR GLOVES BEFORE USING
Don't use without gloves , removing this chemical from hands was pain.
I**I
ู ู ุชุงุฒ
ุชู ุงู
K**D
ุฌูุฏ
ูููู ุบุงูู
Y**A
long time to delivery
bad quality,became yellowish after use
Trustpilot
1 day ago
3 weeks ago