

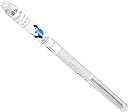
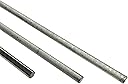
Blue Demon BDTP-125-01T Triple Play Low Temp Aluminum-Zinc Brazing Rod 1/8" x 18" 1 Lb Tube,
Product ID: 49161111
🔥3-in-1 multi-metal brazing
🛠️22 rods per tube
🛡️Superior strength & corrosion resistance
🔥 Triple the strength, zero hassle—weld like a pro with Blue Demon!
The Blue Demon BDTP-125-01T is a premium low-temperature aluminum-zinc brazing rod designed for professional and DIY use. It offers triple-metal compatibility, requiring only a propane torch and no flux, delivering welds stronger than aluminum and harder than mild steel. Each 1 lb tube contains approximately 22 rods, providing excellent value and corrosion resistance for durable, high-quality brazing.


| ASIN | B01MCTUIUN |
| Batteries Required? | No |
| Batteries included? | No |
| Best Sellers Rank | 263,211 in DIY & Tools ( See Top 100 in DIY & Tools ) 670 in Welding Accessories |
| Customer Reviews | 4.2 4.2 out of 5 stars (3,587) |
| Date First Available | 24 Oct. 2016 |
| Included Components | BDTP-125-01T |
| Item Package Quantity | 1 |
| Item Weight | 454 g |
| Item model number | BDTP-125-01T |
| Manufacturer | Welding Material Sales |
| Material | Aluminum |
| Measurement System | Metric |
| Part Number | BDTP-125-01T |
| Product Dimensions | 96.52 x 2.54 x 2.54 cm; 453.59 g |
| Style | Welding wire |
G**.
Great for small projects.
It does take some skills and knowledge to do it properly ( watched some YouTube tutorials) , but it can be done with minimal tools, in my case for a simple 3 mm aluminium box , it did the job as I needed, the weld feels strong, I can't damage it by bending the box.
G**P
alu brazing rods
i dont understand why the big blue demon needs gauntlets and a mask???? - hes meant to be a demon, used to hellfire and flashes of lightning.....!!! - oh, the rods work fine - nice price for a big load of long rods. there was a quality blue demon sticker in my tube of rods - fun item but shows pride in their product and theyre made across the pond in the USA!!
S**N
Highly recommended
Excellent
P**.
Solde sin batallar con este producto
De las 3 marcas que e probado en este tipo de producto, esta es con la que mejores resultados e tenido y con la que menos e batallado a la hora de estar aplicando.
G**Y
Scrap things
It’s not working . Not good Don’t buy. I lost time and money.
R**.
Copiously follow the instructions!
This low-temperature aluminum brazing rod is economical, easy to use, and effective (IF you follow the directions). I used this rod to seam braze 75 aluminum joints (300 total brazes) that had broken on an aluminum pontoon boat canopy frame that had collapsed during a storm. Most of the joints were 1" x 1" aluminum square tube" with heavier duty/guage rectangular aluminum at the base of the frame. This fluxless aluminum rod worked well for this purpose, but only when the instructions were copiously followed, which, in essence, are: 1) Secure your joint (vice grips, clamps, etc.) and copiously clean all aluminum surfaces to be brazed with a large new stainless steel ("SS") brush (buy one large brush and 2 or 3 small brushes), 2) get a good "handheld" torch (I tried several and found "Mag – Torch" the best) with a hose (sold separately from the torch for about $20) that connects the torch to a "map gas" cylinder (hotter than propane and available in all home improvement stores), 3) frequently use your small stainless steel brush on the area to be brazed during the heating and brazing process to remove impurities ("oxides"). if you don't brush, your braze will be significantly weakened or may not adhere at all. 4) frequently test the heat of your metal by running the aluminum rod over the joint area. When the rod begins to easily melt (from the heat of the rod against the hot metal only- absolutely not from the direct heat of the torch) deflect the torch flame away from the joint and begin "tinning" the joint ( tinning = applying a light coat of melted aluminum from the rod to the surfaces you abraded with your small stainless steel brush). 5) Put the flame back on the joint for 3 to 5 seconds to be sure that the tinning adheres, then remove the torch to let the tinning coo/solidify for 5 to 10 seconds. 6) Use your stainless steel brush again to clean the oxides from the tinned area, 7) reheat the joint to where your aluminum will again melt the rod and apply a generous coat of melted aluminum to the tinned area of your joint, 8) finish the joint braze with about 4 or 5 seconds more heat from the torch to increase final adherence of the melted aluminum to the joint. 9) If you see impurities (oxides) in your braze, don't be afraid to run your small brush through your braze to clean out the impurities to strengthen your joint. This "brush through" may require you to melt a little more aluminum on your joint but the joint will be stronger for it. In sum, secure the work, use new stainless steel brushes to frequently clean work, metal not torch must melt aluminum brazing rod, "tin" all brushed areas, apply final braze coat, and always finish with more heat for adherence. Practice on a few joints before doing your finish work. Everything will seem very awkward at first as you juggle the torch, the brush, the rod, and the correct heat. Within about 5 to 10 joints you will feel like a professional. If you cut corners though and don't get the work hot enough or don't frequently keep your joint clean of the oxides with the brush your brazes will look pretty but won't hold and your time will be wasted. Good luck!
S**R
Im warehouse gefunden
Billig ( gebraucht ,sehr gut) Prime geliefert ,dauerte etwas länger da das aus England kam ( zoll..) Wenn man weiß wie man es machen muss *ein top Produkt sehr schöne schweißnaht, dicht. Ich habe damit meine regenrinne am Haus repariert. * das Material muss warm gemacht werden ( z.b Gasbrenner) und nicht die schweißstange!! Öfters testen ob das Material warm genug ist ,in dem man mit der Elektrode darüber reibt, damm Flamme weg und mit der Elektrode zu machen
R**T
Best bang for buck, takes practice, but good results are possible.
I watched a YouTube video comparing all the aluminium solder. This one rated pretty well while being the second cheapest. That in its self is a green light to buy. I soldered angles 3mm thick onto rectangular tubes 50mm by 25mm, 3mm thick. I also soldered the miter junction of two of those tubes with brackets around them. I soldered a small item too and small things are so much easier. My advice is to file fillets on the corners to get more bonding surface. Sand or file the joints just before assembly, and heating. Rub the joints that are molten with the rod or a screwdriver to release more oxide. If you can pop rivet the pieces together, even one pop rivet will make it so you don’t have to clamp it together. It will drip so expect this and don’t work against gravity if you can. Your first joints will probably look ugly. That roof rack all the angles on the ends and the corners are soldered. The pop rivet are insurance and later ones were done using pop rivets to “tack weld” it in place. The ends of the now I beams were JB Welded and pop riveted in place.
Trustpilot
5 days ago
1 week ago