Desertcart purchases this item on your behalf and handles shipping, customs, and support to South Africa.
✨ Polish Like a Pro, See the Road Like Never Before! 🚗
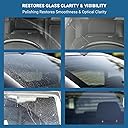
The DIY 3” Windshield Polishing Kit features a 75mm polishing pad with a universal drill attachment and a cerium oxide-based compound designed to remove fine scratches, wiper blade damage, haziness, and water spots. Suitable for laminated and tempered automotive glass, it includes detailed multilingual instructions and video tutorials, empowering users to restore windshield clarity and shine with professional-grade results from the comfort of home.

| Asin | B001RAQGXC |
| Best Sellers Rank | #6,747 in Automotive (See Top 100 in Automotive) #12 in Windshield & Glass Repair Tools |
| Brand Name | Glass Polish |
| Compatible Material | Auto Glass, Car Glass, Glass, Mirrors, Windshield |
| Customer Reviews | 3.8 3.8 out of 5 stars (3,897) 3.8 out of 5 stars |
| Global Trade Identification Number | 05012345621005 |
| Grit Material Type | Glass |
| Grit Type | High-Grade |
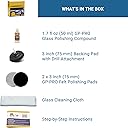
| Included Components | Backing Pad, Polishing Pads, Polishing Compound, Cloth and Instructions |
| Item Diameter | 7.5 centimeters |
| Item Weight | 200 g |
| Manufacturer | Glass Polish |
| Material Type | Backing pad with drill attachment, Felt polishing pads, Glass cleaning cloth, Glass polishing compound (Cerium Oxide), Step By Step instructions |
| Model | 21005 |
| Number Of Items | 1 |
| Number Of Packs | 1 |
| Part Number | 21005 |
| Set Name | 1 |
| Unit Count | 1 Count |
User
Great Product !
About a month ago I noticed a 6" scratch across the top of my 2014 Grand Cherokee backglass. Needless to say it was real bummer. I think that the dealer did it during the complimentary wash after service, but I discovered it too late to go back to them. It was deep enough to catch a fingernail and really showed up against the privacy glass and headlights from behind. I tried to buff it out with a cotton wheel and some compound and managed to create a bunch of light to medium parallel scratches and some haze. Now it really bothered me (scratch + stupidity) and I actually got a price to replace the glass. I saw this product and after reading the reviews, I decided to give it a try. My main concern was not to cause more damage so I emailed the company with my questions. The guys there are great and super responsive. While they honestly didn't know how much of the deep scratch could be fixed, they assured me that it would not make things worse and probably would take out the secondary scratches and haze. They also helped with my tool choices and general approach. That gave me the confidence to proceed. I have a lot of automotive experience and having some skill working with your hands is a plus. Working carefully and following directions is critical. I tried my cordless drill, but it seemed to run slow as the batteries ran down, so I ended up using a corded drill rated at about 2000RPM. It is not a quick or clean process. I draped and masked off the area to avoid splattering the car and garage. After 2 hours I managed to get results that were more than satisfactory. The main scratch has been about 80% reduced. You can see it occasionally in certain light conditions, but it no longer refracts at night from behind. As far as I'm concerned that's a fix. More importantly I eliminated the secondary scratches and haze that that I had subsequently caused. I may even have been able to get more of the main scratch out, but I think as you change the profile of the glass surface significantly, it may start to "lens" and cause some distortion. In my estimation it was not worth going deeper.I think this result is the right balance for me and I'm very happy with the results.
User
Great product!!!
The Windscreen Polishing Kit worked great on my 11-year old BMW z4 with 56K miles. One tab in the middle of the passenger wiper frame got loose last year and etched the windscreen pretty much the full arc. (How do these things happen?) I didn’t notice the damage until this year, when road grime made it noticeable. It was out of my line of sight while driving and I never sit in the passenger seat. ;-) This year, I could see the scratch and I could feel it with a thumbnail. I watched several YouTube videos, a couple of which used this very Polishing Kit. Following the YouTube videos tips, I taped the scratch on the inside of the windscreen so that I could see it as I polished it out. I masked the right side of the windscreen for about 20” of the top and the hood to protect the paint from splatter. I took it pretty easy. I did not use much pressure and kept my 20-year old Bosch 3/8 inch variable speed drill moving at a medium speed so I could control it and avoid the drill jumping out of my hands and making greater damage. The task took about an hour from set up to clean up. I cannot see or feel the scratch; I cleaned up the rest of the windscreen as well. No wear on the pad, I probably have enough cream and pads for 10 more repairs. Another reviewer commented regarding resulting distortion, swirls at night; I did not notice that result. Great results for 25 bucks and an hour of my time!Also used this on a 17 year old, black GE Profile cooktop. It gave very good results in improving scratches and "cloudiness." The progress was much slower than on the BMW windscreen and it did not remove all scratches. However, it did polish off some of the "speckle" finish on the burners so I stopped at that point.
User
it works
Had windshield wiper damage with 3 large streaks clear across windshield. pretty deep and obvious. replace windshield price of $240. saw this and thought I'd give it a shot for the price point. followed instructions, have to be patient and use some elbow grease, but after the first session all scratches were almost invisible. one more session to finish up and they should disappear completely, from any angle. impressive. so for a couple of hours I saved over $200 bucks and some headaches. Should've done before and after, but didn't think it would mater. The scratches were rather severe in my opinion and i never thought they would completely come out. Gave it a 4 because the nut embedded in the disk attachment was not properly seated and caused the disk to "wobble" because the drill shaft was not aligned properly to the attachment. made it a bit hard to keep flat on the glass. thought it would break, but it didn't. So they should improve their qc to catch this one- off or provide a better disk. Other than that, I'm impressed.
User
Save Your Money
I followed the instructions to the letter and spent half hour on a little section of the windshield as suggested by the instructions. The wiper marks are still there and they aren't even deep. Save your money and don't order this product.
User
Glass polishing marathon
The polish and the pads are fine and will work with a lot of effort. The problem with this whole kit is the 3" hook loop pad that comes with the adapter you put in a drill to do your windshield.. WHY they don't sell this with a 51/2" or 6" pad is puzzling. I know, I know that's exactly how they show it but after leaning over your car hood trying to hold a drill straight against the windshield (rather than using a 5 to 6"random orbital or buffer which a lot of people have at this point) you'll realize this a back breaker! I like the material on the pad , but I don't have a 3" buffer of any kind. So I'm going to try Griot's 6" glass pads found on amazon and hope that it is a similar material. The polish works really well and based on reviews read is probably more aggressive than what Griot makes. I have some long scratches left by windshield wipers and I have managed to make them better with this kit after 3 or 4hrs but the drill is not my tool of choice on a windshield. I have purchased a 90deg. adapter for the drill which will help , but I see some 6" glass polishing pads with my name all over them. I;ll have to see if I can keep the glass cool etc.etc.
User
Saved my new car windshield from accidental swirl marks!
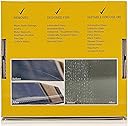
Did exactly what I thought it would!My story... I tried Aquapel on my new Audi. This is a flourinated polymer that chemically bonds to the glass and makes water bead like crazy. The application went fine but whenever it would rain and I'd use my wipers at night, the windshield would almost completely haze over as the wipers passed by. It was difficult to see and the wipers seemed to chatter all the time even with new blades. So I went about the process to remove it -- not as easy as you'd think. The company indicated to use Bon Ami cleanser to scrub it off/weaken/remove it. So I used it by hand in a fashion similar to how you would buff out scratches with a swirl remover. It certainly weakened/removed it and the wipers worked much better. All seemed great that first day but that night driving I noticed swirl marks from the removal process all over the entire windshield when there were oncoming headlights! I had a mini heart attack I swear. :) So I set about to try and polish them out -- I've corrected paint many times. I tried Griots with a glass polishing pad and drill and it made a *very* tiny difference but the swirls were still there. You really couldn't even feel them so I knew I should be able to polish them out. Next, I tried this kit... it worked! I mean, it was a lot of work and I worked each section probably two or three times -- cleaning off between -- with each section getting worked back and forth, up and down, sprayed countless times until I figured the product was broken down enough. I want to say it took about 2 hours to do my entire SUV windshield. It absolutely removed the swirl marks though! There were some slightly deeper scratches from the wiper blade paths -- Audi is notorious for having a "soft" windshield -- and it didn't do much for those but I didn't really care since those will happen anyway. Finally though, the Aquapel that didn't work for me is gone and my windshield is swirl-free again! In hindsight I could probably have just skipped the Bon Ami and gone right to this glass polish kit to remove Aquapel. Oh well... at least now I've got experience polishing my windshield should I ever need to again!I noticed that on my bottle it says the paste contains cerium oxide with 1.5 micron particles and not 2.5 like in the product photo label. Not sure if they changed the mixture to be more gentle and "oops" proof at some point. I feel like to remove wiper scuffs though it's going to take a *lot* of work or maybe their heavier grade product to get them out.TIPS:Absolutely mask off part of your hood, leading edge of roof, and A pillars. Try and seal up the area down below your windshield where the wipers protrude.Don't use a TON of water. Just keep it misted enough to keep the pad spinning freely. All that extra water/compound flinging off the pad is wasted material and not necessary. My drill maxed out at 1500 RPM too and that was a good speed to get great results with less fling. I kept the clutch set at 3 so I wouldn't have to worry about pressing too hard and generating too much heat. My windshield never even got very hot to the touch.Use distilled water. The hard minerals in some water could be enough to actually create *more* swirl marks as you're polishing.
User
It works and well at that.
Yes this system does work very well. I had a couple of areas on my windshield with light scratches from a scouring pad used to remove tree sap. The scratches were light enough you could see them but not feel the lines with your finger nail. With the kit, I needed a spray bottle of water. I was outside in 85 degree weather. I used a cordless drill. It took about 5 minutes per square inch and it does take some elbow grease to push down hard enough. I suggest if you're treating spots, you use a dry erase marker on the inside to show where to treat. I found without any marks, you get off course easily and end up wasting time and product treating the area next to the spot. After about 3 applications and buffing, the areas were completely clear. Unfortunately, I wasn't able to take pictures of the scratches.
User
It's the RIGHT idea, but the WRONG set of tools.
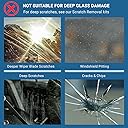
Originally i had given this four stars - but upon further time to assess the effectiveness, i have to reduce it to two. The product does appear to work because you do reduce some fine scratches, and the windshield becomes clearer as result of it removing not the scratches, in as much as other contaminants on the glass. But when you look at headlights and drive at NIGHT time, you can see that the scratches and swirls for the most part remain, although reduced. This results in distorted oncoming headlights and you get a fuzzy, hazy spread of light sources coming through your windshield. At first i thought this is as good as i can get my 14 yr old windshield, but its distracting and potentially dangerous, and turns out that you CAN do better with something else. And i don't know everyone else, but this is what's important to me and why i'm trying to fix it - night time driving and oncoming lights.While using the felt pad and the cerium oxide solution is the right idea, the mixture of the cerium oxide and the quality and size of the felt pad in this package is incorrect and insufficient to do a good job. The cerium oxide is too fine/weak and the felt pad quality and size is too poor and small to cut enough in to the glass to smooth it out. Yes, if you do it enough eventually it may get there for small areas and scratches perhaps, but I've done my entire windshield twice on two cars, with each session being 1-2 hours, and the distortion and scratches remain. Since this is my first time, i had thought that perhaps i'm not using the drill correctly (not enough or too much rpm or pressure on glass and the kind of motion needed) or not enough of the mixture and water spraying, and it was my technique that was at fault and not the tools at hand.The CORRECT method, if you want to do the entire visible view of the windshield right and not a small scratch, is to get powder cerium oxide and mix that with water, use plenty of it, and use a quality felt pad that is five inches in size, not three. And this is what i did and the results can't be even compared. I spent a lot of time doing this for both of my cars, and if you need to do the entire windshield, do yourself a favor and get the powder and mix it yourself, and use a larger pad, and if possible, a rotary polisher or sander (as for a drill, the larger pad size may make it difficult to keep consistent contact with the glass). You will get lot better polishing and correction, for a lot less time and effort. There is a 8 oz cerium oxide (which will cut more than this solution) that sells on amazon and you can find the 5 inch backing pad and felt pad all for about the same price as this in total. A bit more money spent in trial and error on my end, but I hope this review saves you some time, effort and money.
User
Worked Great, but Have Proper Expectations!
I bought the kit to remove windshield wiper scratches. The scratches left a section of haze and scratch lines. The haziness was from very light scratches. I used the kit with a DeWalt 20v drill (I wouldn't recommend using anything less than a 20v drill). It can be tiring on the wrists using a regular drill and takes 20-60 mins of polishing depending on how much you want to polish out.It worked great to get rid of the majority of the light scratches and haze, to the point that I can see clearly enough out of that section again. You can still see scratches, so if your trying to remove any deep scratches, this won't work and you'd need a multi step sanding and polishing kit (personally I wouldn't recommend diy-ing a multi step unless you're willing to replace the windshield if it doesn't turn out well).In hindsight:- Don't let the compound dry on the windshield. Do small sections at a time, keep it wet with a spray bottle of water, and wipe and rinse the compound off as soon as your done. If you windshield has pits in it, the compound can fill them and if it dries it's a bit of a pain to clean them out (I had to use a soft nylon brush drill attachment and soapy water to clean them out).- I decided to lightly polish the rest of the windshield, but that ended up making all the pits in the windshield much more noticeable because all the minor haze on the rest of the windshield was polished off. I got used to it after a couple days but in hindsight I would've just stuck to only polishing the scratched area since polishing the rest didn't really make an old windshield look better with the pits.Overall, if you have very light scratches/haze bad enough to affect visibility, I would recommend this kit, and only to use on the affected area. If you have deep scratches you can feel with your fingernail, this kit definitely won't remove them. In that case I'd actually consider replacing the windshield if it bothers you enough.
User
Noticeable Improvement, Even If It Won’t Perform Miracles
The Glass Polish 21005 DIY kit is a solid option when you want to reduce scratches or hazing on windscreens and other vehicle glass without paying for professional work. It’s easy enough to use, the pads hold up well, and the compound does make the surface clearer and smoother. Just don’t expect a factory‑new finish, deeper scratches remain visible, and the final result depends heavily on patience and technique.Still, for light marks and general clarity improvement, it delivers a “better than before” outcome that feels worth the effort.
User
Voldoet niet echt
Voldoet niet echt maar mss moet ik een machine op 220v gebruiken, deed het met een accuboormachine van Bosch, maar krasjes blijven zichtbaar
User
Rayures pare brise
Génial, super produit pour des rayures peu profonde
User
Had a huge scratch from the windshield blades and it’s 95% gone now! Very nice
Nice
Trustpilot
2 weeks ago
1 month ago