🔥 Grill Like a Pro with Lodge!
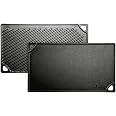
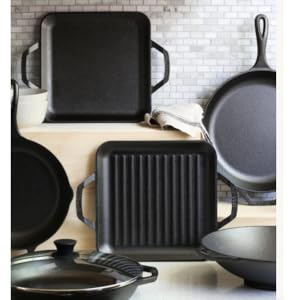
The Lodge 6.25" Burger Press is a durable cast iron tool designed for grilling enthusiasts. Weighing 1.8 pounds and measuring 6.3" x 6.3", it features a natural seasoning that enhances with use, ensuring a non-toxic cooking experience. Made in the USA by a family-owned company since 1896, this press is perfect for creating delicious smash burgers and more, while being easy to maintain.
Item Dimensions L x W x Thickness | 6.3"L x 6.3"W x 0.75"Th |
Item Weight | 1.8 Pounds |
Shape | Rectangular |
Color | Black |
Is the item dishwasher safe? | No |
Material Type | Cast Iron |
Recommended Uses For Product | Use in the kitchen or on the Grill |
Has Nonstick Coating | No |
B**E
A worthy uni-tasker (w/tips and recipes).
I have been on a cast iron craze lately. I have been collecting Lodge products, and eventually it came to this little uni-tasker. I waffled a bit....like I said, it is a uni-tasker. Some reviewers say they use it for other things like grilling chicken and such. But I was looking to straight up make paninis. In the end I just decided to go for the bull and get it. And boy am I glad I did! You have a few options in how you can use this item...the Lodge grill pan is the best since the ridges in the bottom of the pan match those on the panini press. However, if you don't mind too much if the bottom of your panini does not have ribs you can use a plain flat bottom skillet (make sure your skillet is big enough in diameter!) The third option is the one I am using at the moment, which is the Lodge pro 2 burner griddle. I use the ribbed side, which does not match the panini press (the ribs are narrower and spaced further apart) but accomplishes the general idea. I do plan on getting the ribbed grill pan at some point, but for now things work well this way.So, when the product arrived I gave it the usual 2 or 3 extra pre-seasonings using palm oil shortening in a 350 degree oven. Then it was time to get to work. I placed my pro 2 burner griddle on med. high heat (I have an electric stove, so used the 5 1/2 mark on the front and rear burner knobs) to pre-heat for about 10 minutes. I placed the panini press on a third burner to pre-heat by itself using the same setting, 5 1/2. Made up the panini using olive oil brushed on the outside of the bread, set it down on the griddle and (with a gloved hand!...don't forget the handle will get very hot!!!!!) waited about 3 minutes. The press stuck a bit to the bread on top a bit (I continue to have this minor issue, and I think it is not because of the seasoning lacking, but just the way the ribs kind of like to hold the bread a little bit), but I took a butter knife and used that to kinda just hold the bread lightly while I pulled out...pop, press came off just fine. Alas the bread on top was mildly toasted, but not browned (tasted just fine, and was like white toast, but definitely not what you expect from a panini). The bottom, however, was just fine, excellent, perfect in every way. This led me to believe the press was either not hot enough to begin with, or that I needed to compensate for the fact that the minute it goes on top it is losing heat where the pan underneath always has heat. So the next time I made a panini I pre-heated the bottom pan as normal (5 1/2 setting), but the press I heated to a higher temp (7 1/2). With 10 minutes of pre-heating it actually started to lightly smoke, so I could tell I had it much hotter. And sure enough this time the top and bottom came out an even dark brown. The actual process of grilling the panini only took about a minute and a half to two minutes. Dark, brown, delicious!So that is the biggest tip I can give. Pre-heat your panini press to a decent degree higher than your bottom pan.One other thing to note has to do with cheese. When using sliced cheese or at least a light amount of shredded you should have no problems. However, I made a panini today using a good mound of shredded cheese, and while the whole sandwich was warmed all the way through the cheese deep in the middle did not melt to that stringy, classic "grilled cheese" kind of consistency. So a little experimenting in that scenario may be needed.So here are some "recipes" (I hesitate to really say they are such since, well, it is just a grilled sandwich after all.) So far they have all been using homemade artesian bread from my Lodge dutch oven. It is a buttermilk, cheddar and herb bread that is proving awesome for paninis (and if anyone wants the recipe I can gladly post it here if they like along with instructions on how to make great bread in your dutch oven!) Actually, I must correct myself....one batch of panini were made on store bought, fresh made artesian sourdough (available from the bakery at Hannafords). Tasted good too, but the Buttermilk/cheddar/herb bread is better in my opinion.Turkey/Bacon/Cheddar/onion panini:Get some sliced turkey from the deli. Some nice sliced sharp cheddar. Cooked bacon slices. Sauté up some onions (by all means use raw onions, but onions sautéed in butter have such a wonderful sweet flavor and texture!) Take your bread slices (about 1/2" thick slices work best) and brush on some olive oil one side of both slices. Assemble your panini w/ olive oil sides facing out. Place on grill/pan, plop on the panini press and cooked to desired color on the bread is reached (should not take more than a few minutes) using the instructions/tips noted above in main review.Bacon/Cheese/onion panini:Take some bacon slices. Get a fine variety of shredded cheese. In this case I used cheddar, jack and a quesadilla cheese. Once again bring out my favorite style onion, the sautéed kind. To get the best results lay down half your cheese on the bottom slice, stack on your bacon, onions, and then the other half of your cheese followed by your final slice of bread. The cheese on both sides helps to "glue" everything together when all melted. From here on ditto above.Roast beef/mushroom/Cheddar panini:Pretty self explanatory. Get some sliced roast beef from your local deli. Sauté up some mushrooms (yeah, I know, sautéing vegetables adds more work...but trust me, it is WORTH it!). Sliced mild or sharp cheddar (I don't care much for swiss cheese, but I assume it would also make a nice substitution here). From here on ditto above.Some other ideas I am planning on trying at some point:Bacon/sun dried tomato (processed into a paste)/spinach/cheddarSautéed green pepper/sautéed onion/sautéed mushroom/cheddarItalian sausage/sautéed onion/sautéed pepper/mozzarella/marinara sauce
C**M
More uses than just a grill press. Good quality and function
I bought 4 of these grill presses to use for baking on my wood stove when the power is out. It works very well as a top heat source on my 3-quart Combo cooker set, or my 5-quart Double Dutch Ovens, which have flat spaces on the lids. To use, I heat up the grill presses on the wood stove while preparing my bread, or casserole, etc. Then, I place the lid on the ovens, and put one of the grill presses on top, and it will also have the heat from the bottom of the Dutch oven from the wood stove. These have enough thermal mass to put the nice browning on the top of bread, or casseroles that is misssing without having top heat. I had one on top of the Dutch oven, and one warming on the back of the stove to switch out when the top grill press seems to be cooling down. We were able to have the comforts of an electric stove while our power was out for an extended time. I had previously used the other grill press, with the bailing wire handle, but had to replace them after a few years, because the nuts attaching the handle to the press were rusting and loose. With this design, I expect they will last much longer, but they do require a hot pad to handle. I have not used them as a grill press, so I can't rate them on that, but for my use, they are fantastic.
S**R
Nice Grill Press
Really heavy duty, perfect for smash burgers, grill cheese, bacon, or any other item requiring a press. We use it inside the house as well as outside on the grill. Comes seasoned, but I seasoned it again using the instruction method available from Lodge. Works perfectly, no stick surface as well.
B**E
Works but Needs Improvement
It's pretty good for smash burgers. I wish the lip was thinner in order to smash burgers even thinner, but it gets the job done. I also wish it had a wooden/ heat-resistant handle. Unfortunately, I just need to further flatten the smash burgers with a spatula.... Which sort of defeats the point of the cast iron tool.
Trustpilot
1 day ago
4 days ago