Desertcart purchases this item on your behalf and handles shipping, customs, and support to South Africa.
๐ Recharge Your Galaxy, Reclaim Your Power!
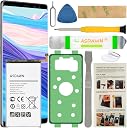
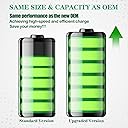
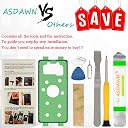
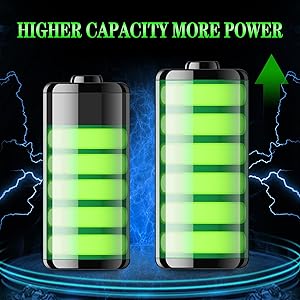
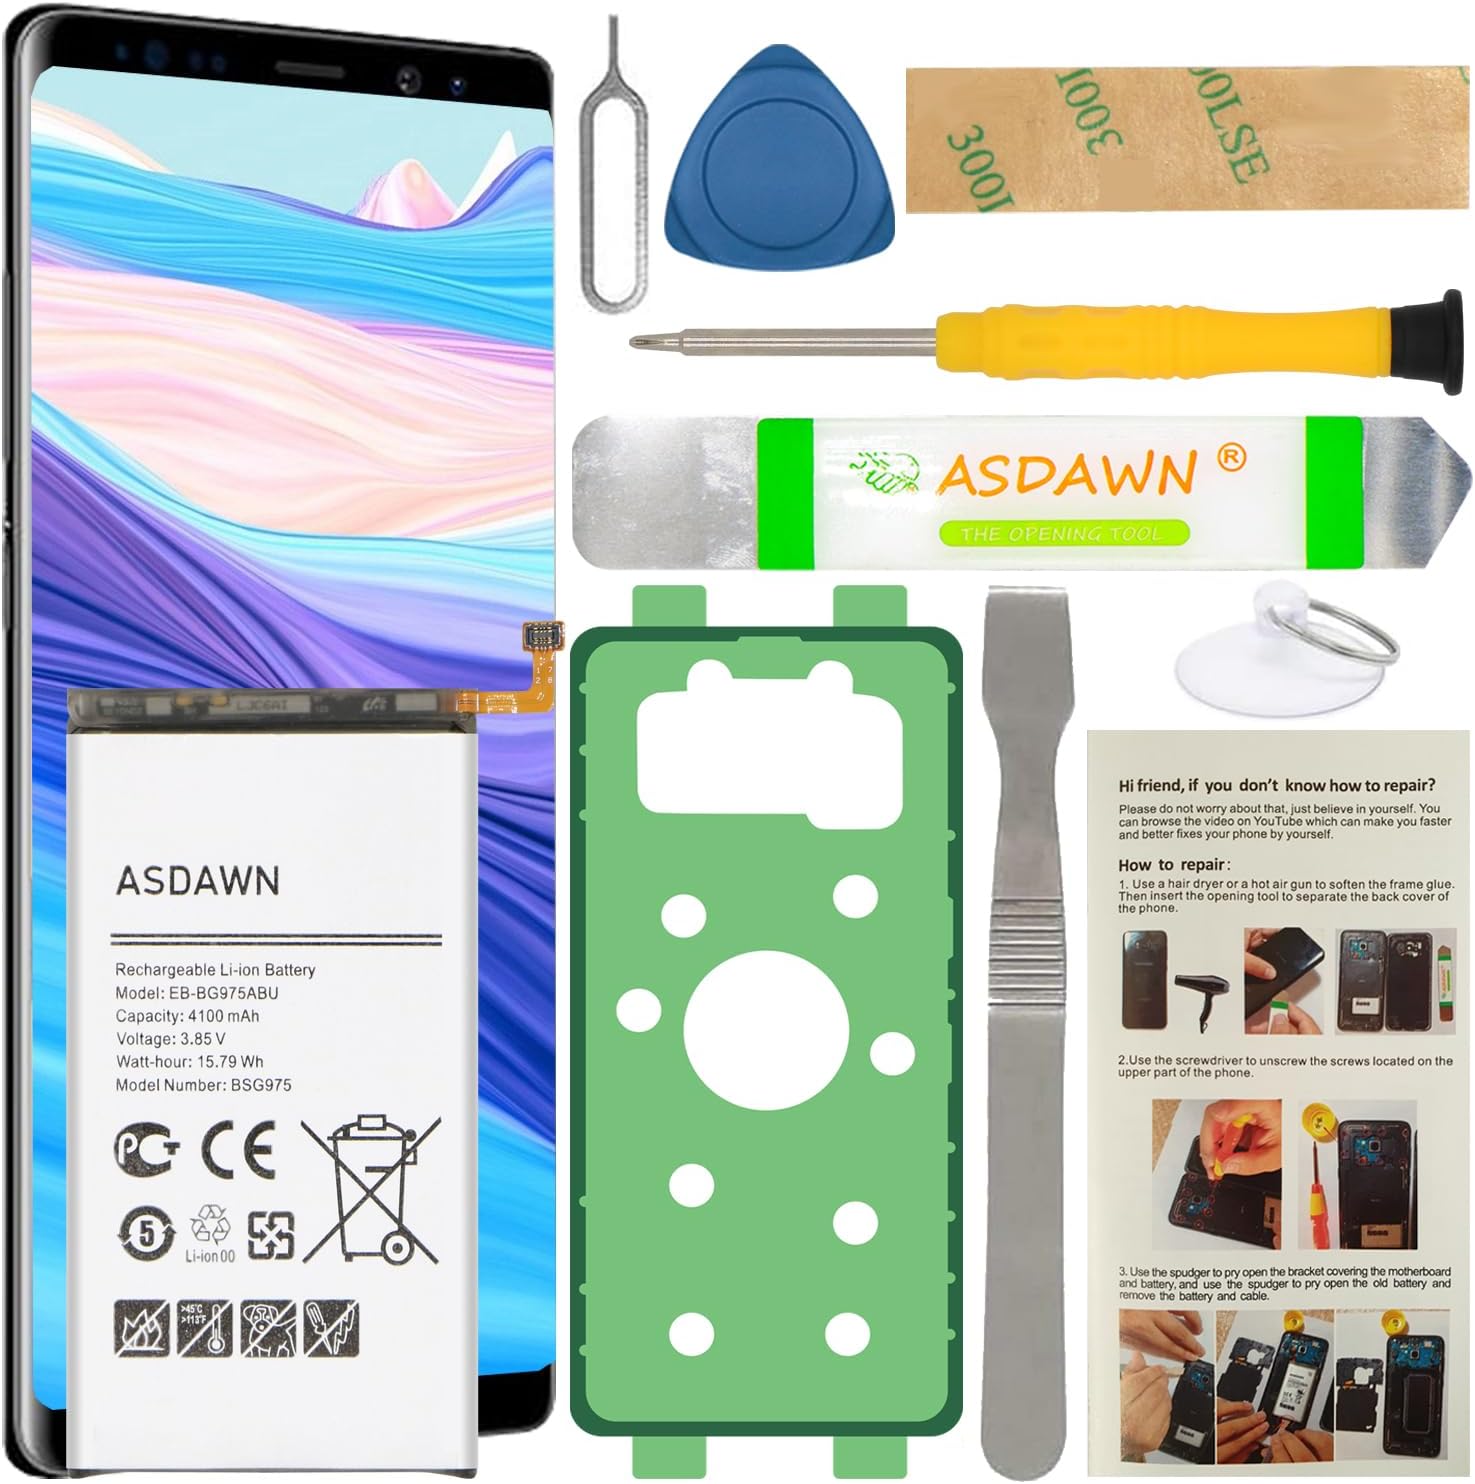
The ASDAWN Galaxy S10+ Battery Replacement offers a premium 4100mAh Li-ion cell designed exclusively for Samsung Galaxy S10+ SM-G975 variants. Engineered for long-lasting performance and safety, it features fast charging capabilities and built-in protections against common battery risks. Backed by rigorous quality control and a one-year warranty, this replacement battery restores your phoneโs endurance and reliability, making it the smart, cost-effective choice to avoid premature device upgrades.


| ASIN | B08SV1KMSV |
| Antenna Location | Phone |
| Battery Capacity | 15.75 milliamp_hours |
| Battery Cell Composition | Lithium Ion |
| Battery Cell Type | Lithium Ion |
| Battery Weight | 50 g |
| Best Sellers Rank | #4,538 in Cell Phones & Accessories ( See Top 100 in Cell Phones & Accessories ) #8 in Cell Phone Replacement Batteries |
| Brand | ASDAWN |
| Compatible Phone Models | for Galaxy S10 Plus |
| Customer Reviews | 4.1 out of 5 stars 1,454 Reviews |
| Item Dimensions | 7.59 x 3.69 x 0.59 inches |
| Item Weight | 100 g |
| Manufacturer | ASDAWN |
| Model Name | EB-BG975ABU |
| Model Number | EB-BG975ABU |
| Number of Batteries | 1 Lithium Ion batteries required. (included) |
| Recommended Uses For Product | Phone |
| Reusability | Rechargeable |
| UPC | 783903983419 |
| Unit Count | 1 Count |
| Voltage | 3.85 volts |
| Warranty Description | One-year warranty |
G**R
Better Than a New Phone
A week or 2 ago I noticed that my phone/phone case was making some creaking sounds when I pressed on the screen and that the side buttons were not always working on the 1st press. At first, I thought the case was not seated correctly or had worked itself apart. (I have a Supcase Unicorn Beetle Pro.) Upon opening the case, I discovered that the back plate of my phone had separated due to the battery swelling. I had not experienced any issues with charging or battery life, only that something was not right with the case. I got a quote from a phone repair place for @ $65 to do the replacement. Having replaced the battery on my tablet previously, I was ready to pay to avoid the hassle. However, they informed me that the replacement battery was on back order. Considering the phone is my lifeline for everything, I wasn't about to wait. Got on Amazon and searched for replacement options. Found this one with good ratings and could get it right away (for half the cost), so I went for it. The good news - it went much easier than I thought and so far the battery life between charging is excellent. Instructions are pretty easy to understand and follow although you can tell they weren't written by someone who has English as a 1st language. Everything you could possibly need (I didn't use half of the tools) is included in the package. The most important thing turns out to be the adhesive. It is also the hardest thing to deal with. I had a head start because my case was already starting to separate. I used a hair dryer on 'high' on the back of the case for a few minutes to loosen up the existing adhesive and then I was able to carefully pry off the back plate. You need to be VERY careful. I can see why several people have broken the back plate while doing this. The adhesive is crazy sticky and if you don't heat the phone first or aren't careful, you could snap the plate trying to pry it off. Once removed, the next annoying task is to get the rest of the adhesive, which is in random pieces both on the back plate and the back of the phone. You may need to use a swab and some solvent - again carefully - to get this stuff off. Try not to use cotton. You'll get the fuzz stuck everywhere. It is important to get the adhesive off and have a flat surface to start with or the phone won't seal correctly. Note it is possible that if you do a good job you may still get some water resistant capability, but I wouldn't trust it. Once the original seal is gone, your phone is no longer waterproof. Sorry. No way around that. The next pain is the screws holding on the back of the phone and covering the battery. They are TINY. The included screwdriver works perfectly, but you need to be VERY careful again. They are hard to handle and will shoot all over the place if you fumble with them. Exceptionally difficult to find if you lose one because they are so small. Once that is done, the cover comes off easily and the battery itself is easy to replace. They recommend you test the battery first, before you put the phone back together. This is a good idea - BUT - those tiny screws again. You have to put them back in, then test, then take them out again. Careful and tedious, but not hard. The last concern is the adhesive. The part that goes on the battery is a solid block, so that is pretty easy. The one for the edges of the phone is another story. This was probably the HARDEST part for me. The adhesive is very thin and if you are not careful, it can roll up, become stuck to itself or deform. This makes it VERY hard to get a nice flat, even surface that is spaced on the back of the phone properly. The directions don't provide any hints or tricks for doing this, and it is not easy to tell the best way to peel off what side of the plastic film covering the adhesive. Take your time, look it over and come up with a scheme before you attempt it. I had mine roll and deform a bit, but with the use of one of the blade tools and some tweezers, I was able to get it straightened out. Once applied, carefully press on the back plate and run over it applying pressure with your fingers. I heated mine again and then put rubber bands on it to hold it tight for a couple of hours. It stayed sealed when I took them off and it went back into the case w/o issue. I discharged the phone almost completely once, then recharged it, and then let it run down to maybe 20%, and charged it again. I'm not sure it helps as much as they say, but it can't hurt. I didn't do it exactly as they describe, but it seems to be fine and holds charge very well. The replacement isn't mechanically challenging as long as you follow their directions and have patience. For me, this was definitely worth doing on my own and saving the money. I highly recommend this replacement kit. It has everything you need. It isn't hard. You'll save some money (and your phone). The battery works perfectly. Good luck!
A**R
Not much available but it seems to work very well.
Everything worked out it's the disassembly that's a difficult part. You really should use over 90% isopropyl alcohol to soften up the glue on everything. I don't think I would have got it apart without using it. Also don't use that metal tool around the battery I punctured my battery during disassembly almost caught it on fire. I basically did a hail Mary soak the battery with 99% alcohol loosened up the adhesive and got it out of there before it caught fire. I will say the battery works perfectly so far. I still haven't went through the three full charge cycles but compared to the battery that was in it it's like a new phone. We'll have to see you long-term if it has some kind of trickery in it where you hit a certain point like 50% or 40% and then basically the battery is flat. But it's acting normal so far. I was to the point where I was constantly having to keep the phone on the charger and just having my phone in the pocket for an hour was losing 20% battery. I just use the adhesives with the kit which works but I don't think they'll be as watertight as the liquid drops but I don't plan on getting it in the water. My phone was already refurbished once so chances are the screen's already been off so it's probably not watertight already. It was either this or buy a new phone so basically for $25 if it worked it was going to be worth it. On a side note I already had a cheaper backup phone cloned in case this went wrong until I could get another one. I consider myself pretty good taking stuff apart and reassembling it was fairly difficult and the harnesses are very small. They all went back everything's working. You should also purchase a different screwdriver the one with a kit is not hardened enough and rounds out the screws I had to drill two screws out. That's kind of a nightmare. Dremeling flat spots trying to use a flat screwdriver on screws. All the factory screws have blue loctite on them so they don't come out that easy. I was basically pushing as hard as I could with that little screwdriver and with a pair of vice grips to turn it to try to keep them from stripping. Also I will bought this kit because it come with written battery instructions removal. I think it left out the part where you have to remove the speaker at the bottom so I almost damaged my phone trying to remove the battery before that point. This is a Note 20 ultra maybe the instructions are more generic. But the speaker at the bottom definitely had to come out to get the cables out of the way and you had a detach more cables at the bottom just one set. The battery seems excellent though so far.
C**S
This one worked - unlike two other brands I ordered
The 4+ year old battery in our Galaxy S21 was no longer lasting a day, so I decided to replace it. The process of getting the old battery out was a major challenge, since it was firmly gripped in place by the factory adhesive. The instructions provided with this new battery were good & helpful. I did end up prying the old battery out from the bottom corner with a screw driver, which shorted it out and destroyed it. Falsely thinking they would work better, I had ordered two other brands prior to this battery. The first one functioned, but would not last most of a day despite the label saying it was only six months old and my cycling it through a full charge cycle several times. The second one had a flakey connector that would not attach to the main circuit board. It also did not come with any instructions (they just expected you to search YouTube for help). I deducted one star for two minor reasons: 1) The battery lead was too long and had to be folded over to align with the motherboard connector, and 2) The battery capacity appears to be less than advertised, although it does last a full day. I do wish this was the first replacement battery that I tried... I guess the third time's the charm.
J**Z
Update on this battery - Very good battery replacement.
Didn't want to replace my phone right away..found this aftermarket battery to replace the swollen battery on my Note 9. It works but don't feel confident that this would last long..feels like it drains faster than OEM. Anyway as long as this battery last me another year then it's all worth it before I upgrade my phone. - Update (2/4/2022) - So far this battery replacement has held up for 8 months now...haven't really noticed it slow down. Drains about the same as the original 4000 Mah Samsung battery. Like, I said in my previous review if this battery last me a year then it's all worth it since I will probably be going to get a new phone anyway. I will recycle my Note 9 when this battery dies. Will buy another one of this battery and donate it to people who need it the most. To those people who left bad reviews because they could not install them correctly without breaking the back glass. Well, maybe you should not be repairing your phone anyway. Take it to a professional to get the battery replaced. Stop whining about the back glass part that you broke when this is about 'a battery' review. Update (July 12, 2022) **** After 1 year, the battery is still holding charge. It can last between 5-8 hours depending on the usage of the phone. Good estimation of the battery health is probably around 80-85% of it's original capacity. I did not expect it to perform or last this long. I will be using the Note until Sept 2022 and get my new iPhone..yes..I'm leaving the Note. It's been a good 4 year run with the phone and was happy to be able to extend the life of it because of this battery.
P**R
Not Like New
I had watched videos on non-brandname cell phone batteries, so I went into this purchase pessimistic and skeptical...but for the price and the comparative reviews, I took a chance. I shouldn't have. The Battery: The battery had a 2014 date on the wrapping label around the battery...didn't think much of it...surely they were not selling me a 9 year old battery? Not thinking, I didn't take a picture of it, so maybe it was a copyright or trademark date of some sort...? But the battery performance leads me to believe the former over the later. I performed the 5 drain-to-zero-charge-to-100 "training cycles", then I set the same settings I had on my previous battery. This new battery performs the same to worse than that old battery. As new, the original battery could last me a day and a half before needing a charge. At its end, it was needing a charge every 10-12 hours. This new battery also needs a charge every 12 hours or so. I went through the pains of replacing a battery to get no better results. The Replacement Kit: SIM Card remover...ok, the metal "Opening Tool" bent when trying to use it, the screw driver worked well, the spudger (prying tool) worked ok, the suction cup wouldn't really stay stuck, the battery adhesive great but covered the entire backside of battery unlike ad picture which shows it framing the battery (I cut it into a frame), the case adhesive was adequate, the plastic credit card (not shown in the ad picture but definitely a savior for removal) was perfectly thin enough to dislodge the back case glue, and last and certainly least, the guitar pick prying tool was ABSOLUTELY WORTHLESS. It was too thick to slide along the case edge and when trying to slide around the corners of my S10+, it cracked the back case glass. I immediately tossed it and finished every thing with the plastic credit card, which was complete spent after the replacement process was done. The Removal (lessons learned if you still choose to take the risk on this battery): Medium heat from a heat gun and the plastic credit card is the safest method to remove the back. As I said, the guitar pick is to thick and risks damaging the back. It will take a few repetitions of heating and sliding the plastic credit card deeper and deeper into the back case seal all the way around. Patience is the key here. Videos showed two options to remove the battery. I originally tried the heat gun and plastic credit card method, but the angle to get under the battery was too steep and the glue to strong for the plastic credit card. I ended up using a solvent, but no the 90% Isopropyl Alcohol in the videos. I used 100% acetone. It worked remarkably well and fast, but be sure to drip small drips only into the battery well. Acetone evaporates fast as well, so there is not a well full of liquid after removal. If you are a gambler...get this battery (maybe you get lucky and get a newer battery). If not, MAYBE, brandname is better...I have lost faith in DIY battery replacement. Seems cell companies have built into their economic model, planned obsolescence of the battery to keep the monetary purchasing stream flowing... :-(
A**E
It works
It works as expected so far.
A**N
Battery Okay.., But....,
I first purchased this to replace a swollen battery on Sept 3 2021. It worked quite fine as a replacement..... Well this week, (8/24/2023) it swollen up as well, so I replaced it again. It seems the more you use the fast wireless charging, the worse it got. I would leave it off and on the charger at night. In the morning.., turn it on, and use it for the day. It was until this week, I noticed that the power button on the phone would not work. SO I removed the case, and sure enough, the case had swollen up enough to pop the back cover off of my Galaxy note 9. The first time it did this was the original battery..., I bought this phone used.., and have had it over several years. I am proud that both times it did this, the rear cover was NOT broken when it separated from the phone. Now My Issues with this kit.... 1) The battery tape/glue .... there is NO way I know of to get it to stick to the battery in the kit without screwing it up.., so Plan on buying a separate one to replace the one you screwed up on..... 2) Battery...., I an pretty sure these are very cheap made batteries. I can't complain. I got 2 years of use out of the first one I ever did. But Fast charging .., they do not likey at all...not for longevity that is... 3) the rear case glue/adhesive..., better plan on buying some extras on it as well.......If the adhesive comes loose during the install.., get prepared to remove the deal and start over...., the same goes for the battery glue as well..... All in all.., I'd give it a 6 out of 10 stars for the kit they include with the battery..., The battery gets 3-5 stars..., the glue kits, they get 2 stars.... The instructions get 0 stars...,(not even close to my Galaxy note 9) (I used the ifixit.com tutorial to get close and more correct....) ..The shipping was fast... 9 out of 10 stars..... Lastly.., no where in the instructions does it state the fact that you GOT TO make your phone relearn the battery......When you get the battery installed.., make sure phone works..., turn OFF fast charging...., then slow charge the phone...., THEN run an app on the phone till it dies...(This will take anywhere from 1-2 days depending on the app and the charge...).., You must make sure the phone is dead and won't turn back on anymore...., then Finally, you slow charge it back to full 100%.....This will take about a day to do.... Then the battery should last you for a long while after doing this.... ( I didn't do this the first time.., hence the only a 2 year life span...)
R**E
Works as intended
Works as intended. A couple of items to note: 1. This is a direct replacement battery with the same mAh rating, so though new, it will not have the charge capacity (read hours of use) as a newer phone. 2. This kit comes with the gasket, necessary if you want to keep the water-resistance of the phone, as the old one will be torn off in the process of dis-assembly.
Trustpilot
1 month ago
2 weeks ago