
Desertcart purchases this item on your behalf and handles shipping, customs, and support to South Africa.
✨ Brighten your ride, boost your reputation! 🚗
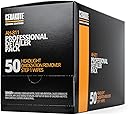
CERAKOTE® Ceramic Headlight Restoration Professional Detailer Pack includes 50 Step 1 Oxidation Removing Wipes engineered to quickly and effectively remove stubborn oxidation from old and faded headlights. Designed for professionals and car lots, this kit enables fast, tool-free restoration for over 6 vehicles, preparing surfaces for ceramic coating application. Highly rated and top-ranked in automotive restoration, it delivers industry-leading performance with ease.


| ASIN | B08DDJ49X7 |
| Best Sellers Rank | #11 in Automotive ( See Top 100 in Automotive ) #1 in Automotive Headlight Restoration Kits |
| Brand | CERAKOTE |
| Customer Reviews | 4.6 4.6 out of 5 stars (71,805) |
| Date First Available | July 21, 2020 |
| Item Weight | 1.3 pounds |
| Manufacturer | CERAKOTE |
| Manufacturer Part Number | AH-811 |
| Package Dimensions | 8.35 x 5.63 x 4.37 inches |
| Position | Front |
B**E
Great product!
Fantastic product! Just follow the video directions, and you’ll be shocked at how good it looks. You really can’t beat the price for how easy and effective the process is. Pro tip: make sure the surface is cool and shaded before step 3, and keep any wind or fans away. One smooth wipe across the surface, overlapping by about 50%, and finish in under a minute. Don’t go back over it afterward. Mine came out great! I’d definitely buy again and recommend it to friends and family I actually like.
D**G
Excellent Ceramic Protection and Outstanding Clarity
I was honestly surprised by how well this kit worked. My headlights were cloudy, yellow, and making night driving more difficult. The CERAKOTE® Ceramic Headlight Restoration Kit restored them to a crystal-clear finish that looks almost like new. The instructions were easy to follow, and everything I needed was included in the kit. The sanding process took a little time, but the results were absolutely worth the effort. The ceramic coating left a smooth, glossy finish and added a layer of protection. I've used other headlight restoration products before, but they started fading after a few months. This kit feels much more durable, and my headlights still look great after exposure to sun and rain. If your headlights are oxidized or hazy, I highly recommend this product. It saved me hundreds of dollars compared to replacing the headlights and significantly improved both the appearance of my car and nighttime visibility. Definitely a 5-star product!
A**R
WOW! I am so impressed!!! You need to get this!
I do have before and after pictures, but I'm too lazy to upload them. Trust me when I say that the difference is DRAMATIC. It's as if I have brand new headlights! I took them from foggy/clouded to crystal clear, without even that much effort. And with the ceramic coating, I expect they will stay that way. Here are some tips from what I learned about using the kit. 1. If you are careful, and you're not doing the lights on a big truck, and the fogging isn't terrible, you can split the supplies in half and have enough left over to do another car! 2. It's not a bad idea to tape off the headlights through steps 1 and 2 (initial chemical cleaning, and especially, sanding). Even though I did this, I still managed to sand off a thin line of paint right next to one of the headlights. That was entirely my fault. 3. You can't really sand too much. I actually did it twice. Instead of going by the clock (they say 3 minutes per pad), I just told myself I would use the applicator twice on each piece of sandpaper, and then take off the sandpaper to sand by hand a third time. In other words, three passes with each grit, for a total of six passes per light. That worked out well, and it wasn't too hard, either. Just be careful you don't sand the paint on your car! 4. Bring a roll of paper towels with you before you start. I spent a lot of time running back and forth to the house. You won't need the whole roll. I used about ten towels, total. So bring a roll, and save yourself some time. 5. Make sure you set aside an hour to do the job, and another hour to let it cure. That's about how long it took me, and I'd never done it before. I believe I can do it again in under 45 minutes, easily. But you'll still need an hour for the final coating to cure. If it's raining, you won't be able to do this work. Also, you should work in the shade. I don't think it would come out very well if you do it in direct sunlight. 6. You will definitely need a spray bottle, filled with water. A 16 oz bottle would be about right. I used a little tiny 2 oz bottle, and had to refill it numerous times. 7. When they say to keep the surface of the headlight WET while you sand, they mean it! Your work will come out much smoother, and go faster, if you do that. If not, you end up with a gunky mess that you will have to clean off anyway, and probably have to sand some more - so why not spray while you go? 8. Be sure to use those paper towels to clean things around the lights very well between each step. It just makes the job easier when you don't have to worry about ruining your paint with the chemicals, and you get all the sanding glop out of the way, so you can see if you are sanding your paint, and not your headlights! 9. Be sure to REMOVE THE TAPE before you begin step 3 (ceramic coating). Then, use a hair dryer to THOROUGHLY dry out the surfaces around the lights (and the lights themselves) before you start coating the headlights. This last step 3 is crucial to performance, and is why this kit is so special. It takes no time at all to do the work, like rubbing alcohol once on the headlight surface. But the chemical isn't alcohol, and it's very strong, so prepare well - you don't want to have to stop in the middle of the application. Dry out those lights and surfaces first (because the chemical coating does not play well with water, at all)! Then know that putting on that coating only takes about 15 seconds per light. You just coat it once, with 50% overlap, wipe off any of the chemical that's dribbled onto your paint, and then DON'T TOUCH THOSE HEADLIGHTS FOR ONE HOUR! Let them cure, and they will be like-new! Again, this kit is marvelous. If I had known the end result would be so amazing, I would have taken it out of the box much sooner. I am going to do my wife's car next. It really is the best thing I've seen to do this job. Somebody put a lot of thought into this product, and you can tell. Not too much work for an absolutely fantastic end result!
K**E
Easy DIY Kit That Really Works
Honestly, I didn't expect such an amazing result. My husband was extremely skeptical at first, but after reading the reviews, I decided to give it a try because I loved that it didn't require any special tools or professional skills. I really wanted to do the whole job myself. The results were incredible. Our car is over 20 years old, and the difference is a true wow effect. The headlights are dramatically clearer, and all of the oxidation on the surface came off beautifully. There is still one small white spot, but it's inside the headlight, so no restoration kit could fix that. Everything on the outside cleaned up amazingly well. If you're wondering whether this kit is worth buying—the answer is absolutely yes. It was easy to use, the instructions were clear, and the results exceeded all my expectations. I highly recommend it! P.S. The results were so satisfying that I actually made a before-and-after collage. Trust me, that's something I almost never do 😄
N**C
It Works
This is my second time using this kit. The first was approximately 1 year ago. The directions on the kit is easy to follow and the results are great. Does it last a long time? About 9 months it kept my headlights clear and then they became cloudy again. Therefore, I appreciate the cost of the product since it does require reapplication each year.
D**L
Results as promised
Fantastic product. Can't beat the price for the results and way too easy to do. I recommend watching the "how-to" video on-line, follow their instructions, and the results will be pretty amazing. I wish I had taken "before" pics, but really didn't think about it, nor how great it would turn out. Just for reference, that is the front end of a 2012 Tahoe, that has never been garaged, and those are the original lights. The lenses were pretty yellowed needless to say I have always been an old school rubbing compound, paste wax, sweat and elbow grease type of car care guy (which I might of just aged myself), somewhat reluctant to try the newer easy fix wipe on/wipe off products. But I have to say Cerakote did not disappoint. I am looking forward to trying out some of their other products, but in the meantime, I highly highly recommend the headlight restoration kit. D.L. Virginia
E**Q
Have you or a loved one ever suffered from what experts like to technically refer to as......
...foggy, yellow headlight syndrome? If so, there's still hope! If you have dealt with in the past or are currently dealing with this silent but frustratingly annoying problem, just know that you are not alone! You understand not only how terrible it looks but also more importantly how it can restrict the amount of light that shines through at night time while trying to drive! Well finally there is hope! Finally there is an inexpensive and unbelievably effective solution! So if you or a loved one understand the frustration of not being able to solve what seems like such a simple problem without using methods that require a "professional" to charge you ridiculous amounts of money for a solution that may or may not even work. Or if you've fallen victim to "As seen on TV" promises or that quirky yet engaging young man who approaches you at your local gas station with claims (and quite effectively to be fair) to be selling the "next big thing" in headlight restoration... THERE IS FINALLY AN EFFECTIVE SOLUTION!!! Ok, all joking aside, plus I wanted to make sure I got your attention. First and foremost I could understand how this review may come across as some type of paid promotion or that I am gaining something from submitting such a lengthy review that unabashedly shows love to this amazing product. Well rest assured I am not! I am just your average dude who decided to give this product a shot because quite frankly nothing else works! The reviews for this ceramic headlight restoration kit we're very positive and provided me somewhat skeptical optimism but I figured all these other dudes and dudettes are showing pictures and talking about how great this product works that I figured for the price it was definitely inexpensive enough to give it a shot. Why not?! Over the years I've probably spent at least 15 to 20 times that amount trying to remedy this really annoying problem! Seriously folks it is an issue. If you have no one idea what I'm talking about and have never had to deal with it then you are very lucky, but if you're here reading reviews and thinking about buying this product then you just know. You just know that it can really make your car look dirty and old, but most importantly it can be a legitimate safety issue! If your headlights can get as foggy and yellow as mine it can seriously effect the amount of light my headlights are shining onto the road in front of me and to the cars coming towards me. That's pretty scary! It has gotten so bad recently that I have questioned whether my headlights are even on or not because the lack of light shining from my headlights! That was when I decided to do yet another dive into finding a product that would actually work. Well I found it, and this Cerakote ceramic headlight restoration kit is the answer! A couple things of note when using/applying this product. Pay attention to the manner in which the instructions tell you to apply or scrub. The first step you're using a small circular motion with pressure, and then the second step you're supposed to use short back and forth strokes, and then the third step requires a different method of applying as well. I only mention this because it was easy for me to get distracted or lose focus and start using circular movements when I'm supposed to use back and forth movements or vice versa. The manner in which you do each step is important so keep that in mind. The most important thing I can suggest about this restoration kit, is to keep the faith! My headlight didn't look foggy after the first step as stated it would so that started making me skeptical that I've been had yet again, but stick with it! I stated above there were times where I kind of just lost focus and wasn't applying the cleaner or scrubbing the cleaner the proper way and then with my headlights not being foggy after step one I thought I was just kind of going through the motions and what was the point?! Even through me trying to sabotage the application and the cynical and skeptical thoughts creeping back in my head yet again this product still delivered way way above and beyond what I had hoped for! What I don't understand is how this product doesn't have five stars across the board and isn't promoted more heavily, because it is legit and it works! Trust me guys I get the frustration of product after product failing to come through, but this product delivered in every way possible and obviously I cannot recommend it enough!! If you're tired of your foggy, yellow headlights, or getting more and more nervous driving a night because the light projected in front of you seems to dissipate more and more over time. Just buy this headlight restoration kit! I promise you will not regret it!! After literally years and years (and different products) of trying to find a solution this Cerakote ceramic headlight restoration kit is the solution I have been looking for all along. This company has earned a lifelong customer and fan and I would hate for other people to continue to struggle to get their headlights clean when there is a very inexpensive and super, super effective solution!
V**3
Great result upon initial application
This review is posted one day after application and the lights look close to new. I’ll visit back in 4-6mths as time passes. Directions are easy to follow (3 step process). I used ALL the items in the box per the recommended directions. I’m thinking there might be a way to use half, but I am extremely satisfied with the results, so no complaints on using it all. They don’t tell you to tape around the light but I did. Think it helped keep the product container on the light itself. I’ll probably drive without the day runners for a couple days to see it it helps the clear coat seal better, but not sure it will matter in the end.
G**E
Great results if you follow instructions
Great product. I used this on a 2010 Toyota Yaris headlights. The left side headlight had yellowed from sun exposure, as a result of being ungaraged for 16 years. The right side looked ok. I followed the instructions carefully for the left side headlight and found it took less than 30 minutes to prep and apply. The end result was that the light looked almost as clear as new. However it was so good that it made the right side look old by comparison, and so I then treated the other side too! This does also mean both headlights now have UV protection and should have future aging delayed on both sides. The quantity of chemical on the wipes is ample for two headlights, I also had sufficient excess to apply to the Plexiglas screen of my motorcycle. The box contained a QR code for a YouTube tutorial video that is essential to watch. The process isn’t difficult but it identifies where water must be used and where the lights must be meticulously dry. This has made a great improvement to the aesthetics of the car and is cheap and easy.
N**E
Nice and good
Nice and good
P**P
New Like Look
I used this headlight restoration kit and the results were exactly as mentioned in the product description. My car’s headlights were yellow and dull, but after following the steps in the kit, they became clear and bright again. The process was simple, and all the required materials were included. The final finish looks almost like new, and the light output has improved a lot. Definitely worth the money and highly recommended for anyone wanting to restore their headlights without replacing them.
C**N
Praticità d'uso e risultato finale.
Se si esegue il lavoro in modo corretto il risultato è straordinario, basta osservare con estrema attenzione il video e replicare tal quale e I fari tornano come nuovi. Vedremo nel corso del tempo quanto durano.
D**K
Excellent product.
Works.
Trustpilot
2 weeks ago
1 week ago