

Desertcart purchases this item on your behalf and handles shipping, customs, and support to South Africa.
🛡️ Seal the deal on garage protection with style and safety!
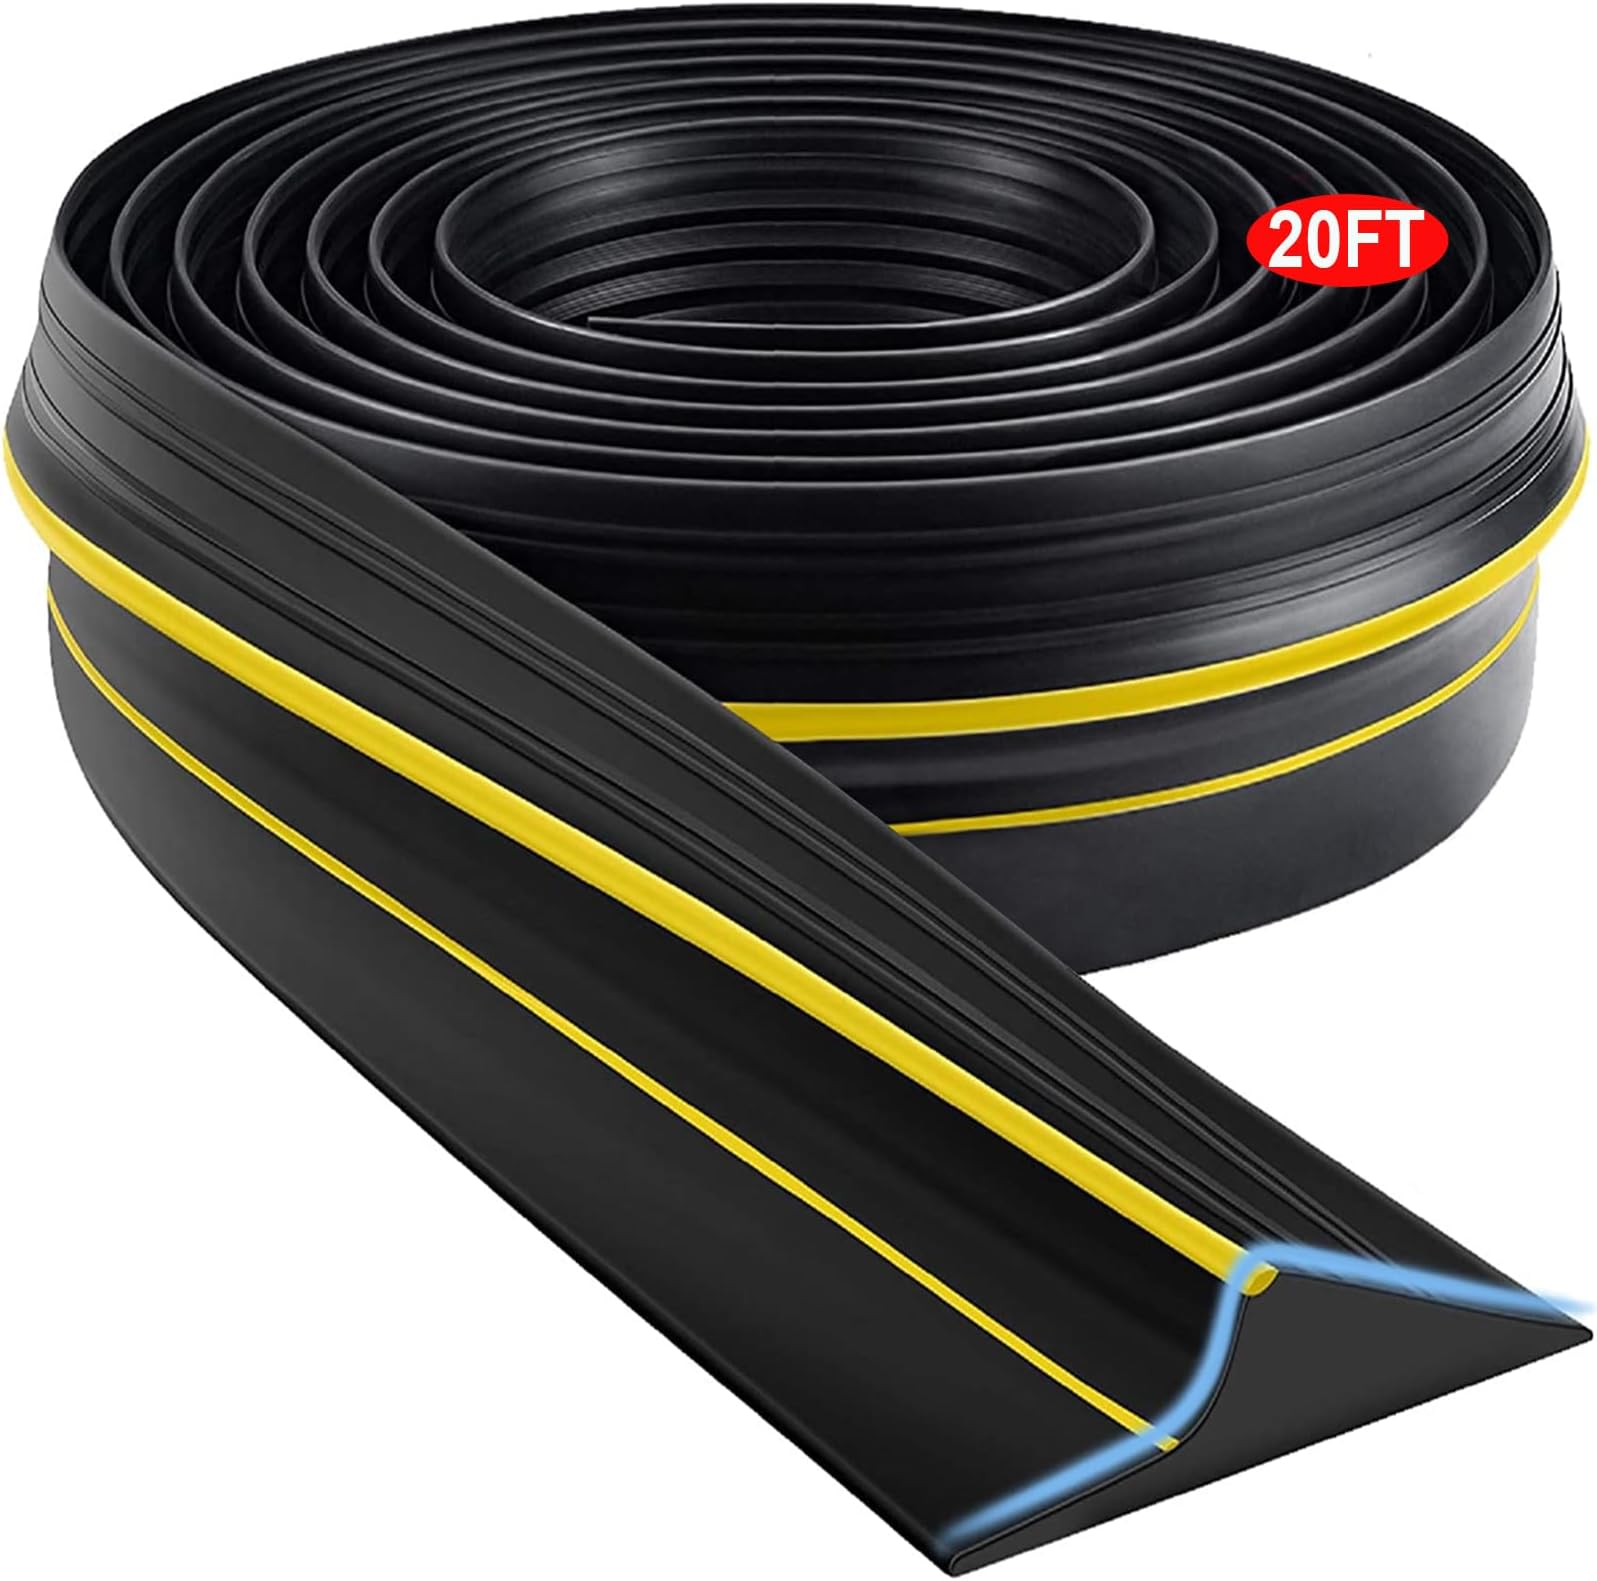
The Jin&Bao 20FT Universal Garage Door Threshold Seal is a durable rubber weather strip designed to keep your garage clean and dry by blocking water, dust, and debris. Featuring a high-visibility yellow anti-slip strip and engineered to withstand extreme temperatures from -40℉ to 284℉, it fits universally on concrete, asphalt, and treated surfaces. Easy to cut and install, this 20-foot seal combines safety, longevity, and effortless DIY convenience for a professional-grade garage upgrade.
| ASIN | B0832QXJVJ |
| Best Sellers Rank | #6,561 in Tools & Home Improvement ( See Top 100 in Tools & Home Improvement ) #6 in Weatherproofing Garage Door Seals |
| Brand | Jin&Bao |
| Brand Name | Jin&Bao |
| Color | Yellow (No Adhesive) |
| Customer Reviews | 4.6 out of 5 stars 6,015 Reviews |
| Item Dimensions L x W | 240"L x 3.7"W |
| Item Thickness | 0.6 inches |
| Manufacturer | Jin&Bao |
| Manufacturer Part Number | 1 |
| Material | Rubber |
| Material Type | Rubber |
| Model Number | 1 |
| Number of Items | 1 |
| Number of Packs | 1 |
| Product Dimensions | 240"L x 3.7"W |
| Recommended Uses For Product | Floor, Garage, Garage_door, Threshold |
| UPC | 761312557636 761312557629 742440824913 794261107560 794261107515 761312557599 761312557643 |
| Unit Count | 20 Feet |
L**O
Sealed well
Seals out rain from under garage door.
C**Y
Trust your measurements
I got this after the garage door installation person suggested it since there was still a visible gap between the concrete and the door even after cramming pieces of pool noodles into the bottom of the door seal. I measured and calculated that there would be a dip in one spot that could exceed this product's assistance in bringing the height up. I removed the pool noodle pieces and re-measured and came to the same conclusion. I was going to get some self leveling cement fixer stuff (which I should have) but the garage person told me "nah just put the door sealer down and you can always double it up if you need to" Unfortunately I listened to him. I don't believe this product was ever intended to be doubled up for a short segment. To the product's credit, it is easy if you follow the instructions and chalk everything out before you even bring any glue out. You can adjust in and out for dips so long as they don't exceed the height of this product by simple changing where the bottom of your garage door touches when closed. Don't double it up because then there's no way to get that smooth good seal as it comes out of the deepest dip. If you only have dips as tall or shorter than this product, you're going to be really happy with it as is. If you have a gap taller than this product go get some kind of self leveling product intended for concrete outside (so it can handle the temperature swings) and let it completely set up and dry before you bring this product out to try and address other issues. That being said it has significantly decreased how much crap from outside gets in ( it would be zero if I had done the install right). It has withstood all kinds of harsh torment and weather and is still doing well 2yrs later. It was fairly easy to notch out the ends for a great fit against the edges of the opening. I didn't take any stars off since the area where mine was installed correctly preforms as promised.
K**M
!
As described
Y**E
Working great
So far this barrier is working. The garage door developed a very slight bend and I replaced the bottom rubber seal. The middle was making far more contact than the sides. I crammed backing rod material into the ends to stiffen the ends of my new seal but I needed more material to get a better seal. I found this product and it helped. I closed the door by hand and laid the product down on the ground. Once I figured where it made the best contact I used a carpenters pencil to mark my inner and outer margins. I trimmed the barrier and made sure it was tight fitting in the hopes that it would not shrink. I cleaned the floor and ever sprayed a little brake parts cleaner in a few spots to make sure no grease or oil was still on the concrete. I used Loktite 3x to create to outer parallel lines then zigzagged the adhesive between the first lines. I lowered the door and made sure the fit was perfect. I left the weight of the door to help hold it down and bond. After it was bonded I lifted the inner edge and ran a small bead of adhesive to make sure it was fully secured. I wiped up and excess and it had held well. I waited a full day before I drove the car over it. I have been happy with the way it has kept the water out and sealed the gap that formed over time. It was easy to work with. I didn’t have any of my ends that was not able to use. I believe this should hold up a good long while but time will ultimately decide that.
M**R
EXCELLENT GARRAGE DOOR STRIP FOR UNEVEN GARRAGE DOOR FOUNDATION
We have a three door garage with one garage having a slightly uneven tilted surface under the garage door. This allows water and small bugs (scorpions, pill bugs, centipieds, moths, flies, and more) to enter the garage. I am aware of this from the clue traps I put in the at the sides of each garage door. I used this seal strip to stop the water from leaking through the opening on one side of the garage door. I was disappointed no glue was provided with the seal strip so I decided to temporarily cut and emplace the strip and then glue it later. After several months the seal strip is still in place and has not moved. I have no intentions of gluing the strip at this time. There has been no water leaks since the strip was installed and the bugs are kept to a pleasing minimum of maybe three (of the smallest) or so a month that may have gotten through. I am very pleased and consider the seal strip a great success and worth the price. Most important was my wife's opinion that I was very smart to recognize the the value of the item and how she appreciates my efforts in defending the home against the insect invasion. LOL
J**.
Fixed My Water Issue
I picked up this 20-foot garage door threshold because I was tired of dealing with water coming into my garage every time it rained. Before installing it, I was constantly having to mop up puddles or move stuff off the floor to keep it dry. This simple fix made a big difference. Before installation, I laid the rubber threshold out in the sun for a bit to let it straighten out. I definitely recommend doing that. It made handling and positioning it way easier. Cutting it to size was easy using normal scissors, and I then used a good bead of silicone underneath to secure it in place. Once installed, it sealed tight against the bottom of the garage door, and I haven’t had a drop of water come through since. It’s held up well and looks good too. Super easy project that solved a frustrating problem. If you're dealing with water getting into your garage, this threshold might fix your problem!
K**G
I would highly recommend this seal
I bought the 20' roll. Plan on cutting about a foot off one end to throw away. When it rolls up tight, you can't quite get the end to lay flat. Installation. I have seen many pics of people posting their finished product. The ones that say it doesn't keep all the water out is because they installed theirs incorrectly. This product is easy to use and works perfectly. So I am going to tell you how I did it. First, cut 1' off the end you will not use because it won't lay flat. Try and straighten best you can. Bring the rollup door almost all the way down. Try to get it down to 1/4" from touching the floor. You want to see light on the other side. Now place the 1' weather strip in the middle of the door and put the longer side under the door. The big yellow line should butt up against the garage door seal. See how it seals in pic 3? (Some people put the yellow line directly under the main seal, THIS WILL NOT SEAL. Your BIG yellow line needs to be on the inside garage portion of the seal on the bottom of the door. See pics 2 & 3. My pics are from the inside.). Now that you can see where the Threshold Seal Strip will be placed, use a sharpie to mark the spot. Move it down a foot and do it again until you have a line from one end to another. You will no longer need this 1' cut. Throw it in the trash. Now grab your roll and start measuring. You are ready to cut your length. The glue you want is equivalent to liquid nails. It must be able to stick to concrete and rubber. It must also be usable for under water applications. Use only the best premium. The difference is $6 vs $12 a tube. This is NOT the time to be frugal or cheap. Correct placement is as seen in my first photo. Second photo shows the garage door seal coming down. Third pic shows the seal in place in front of this threshold strip. 4th pic is the glue I used We just had a major storm and not a drop of water made it under the door. Before my shop would tend to flood. REMEMBER, DO NOT put the big yellow line down the middle! Your garage door seal should lay between the yellow lines. I'm going to say it again, Your garage door seal should lay between the yellow lines.
J**.
Leaks
Did not seal with concrete using liquid nails.
Z**O
Does the job well
we needed to block snow and water from infiltrating our garage under the door. This did the job perfectly, and was easy to trim to fit and install. Reasonable price, decent quality. We're very pleased.
M**.
Excelente producto!!
Realmente evita que entre el agua de las lluvias!! Lo puse en todas las puertas que dan al exterior y tampoco entra basura de los árboles ni insectos
P**L
It Did The Job
I was tempted to purchase a cheaper product - but glad I didn't. This product is good quality and proved its worth during a severe down pour - no water in the garage.
P**L
Sealant product.
A very useful product and well made.
K**'
感動もの!!
オーバースライダーから雨水の侵入に長年悩まされてきたのですが、ダメもとでもの商品を取り付けたら台風の大雨でも雨水の侵入が全くなくなりました。 もっと早く買っておけばよかった。
Trustpilot
1 day ago
2 weeks ago