Description
💡 Elevate your lighting game—smart, secure, and stunningly simple.
- MULTI LOAD CONTROL MASTERY - Effortlessly manage RGB/RGBW LED strips, single-color LEDs, halogen lights, and compliant resistive loads all from one sleek device.
- ADVANCED SECURITY PROTOCOLS - Protect your smart lighting with industry-leading S0 and S2 security modes featuring AES-128 and PRNG-based encryption.
- COMPACT YET POWERFUL DESIGN - Discreetly fits into tight spaces while delivering robust control, perfect for professional-grade smart lighting setups.
- PRECISION ENERGY MONITORING - Track real-time power consumption and energy usage to optimize efficiency and reduce your carbon footprint.
- UNIVERSAL Z WAVE PLUS COMPATIBILITY - Seamlessly integrates with any certified Z-Wave or Z-Wave Plus controller for ultimate smart home flexibility.
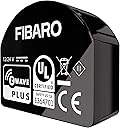
The Fibaro RGBW Controller 2 (FGRGBWM-442) is a compact, black Z-Wave Plus universal LED light strip controller designed for professional and personal smart lighting solutions. It supports RGB/RGBW and single-color LED strips, halogen lights, and other resistive loads, with advanced security via AES-128 and PRNG encryption. Featuring active power and energy metering, it integrates seamlessly with certified Z-Wave controllers, enabling precise, automated, and secure lighting control.