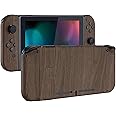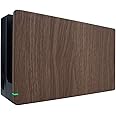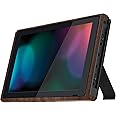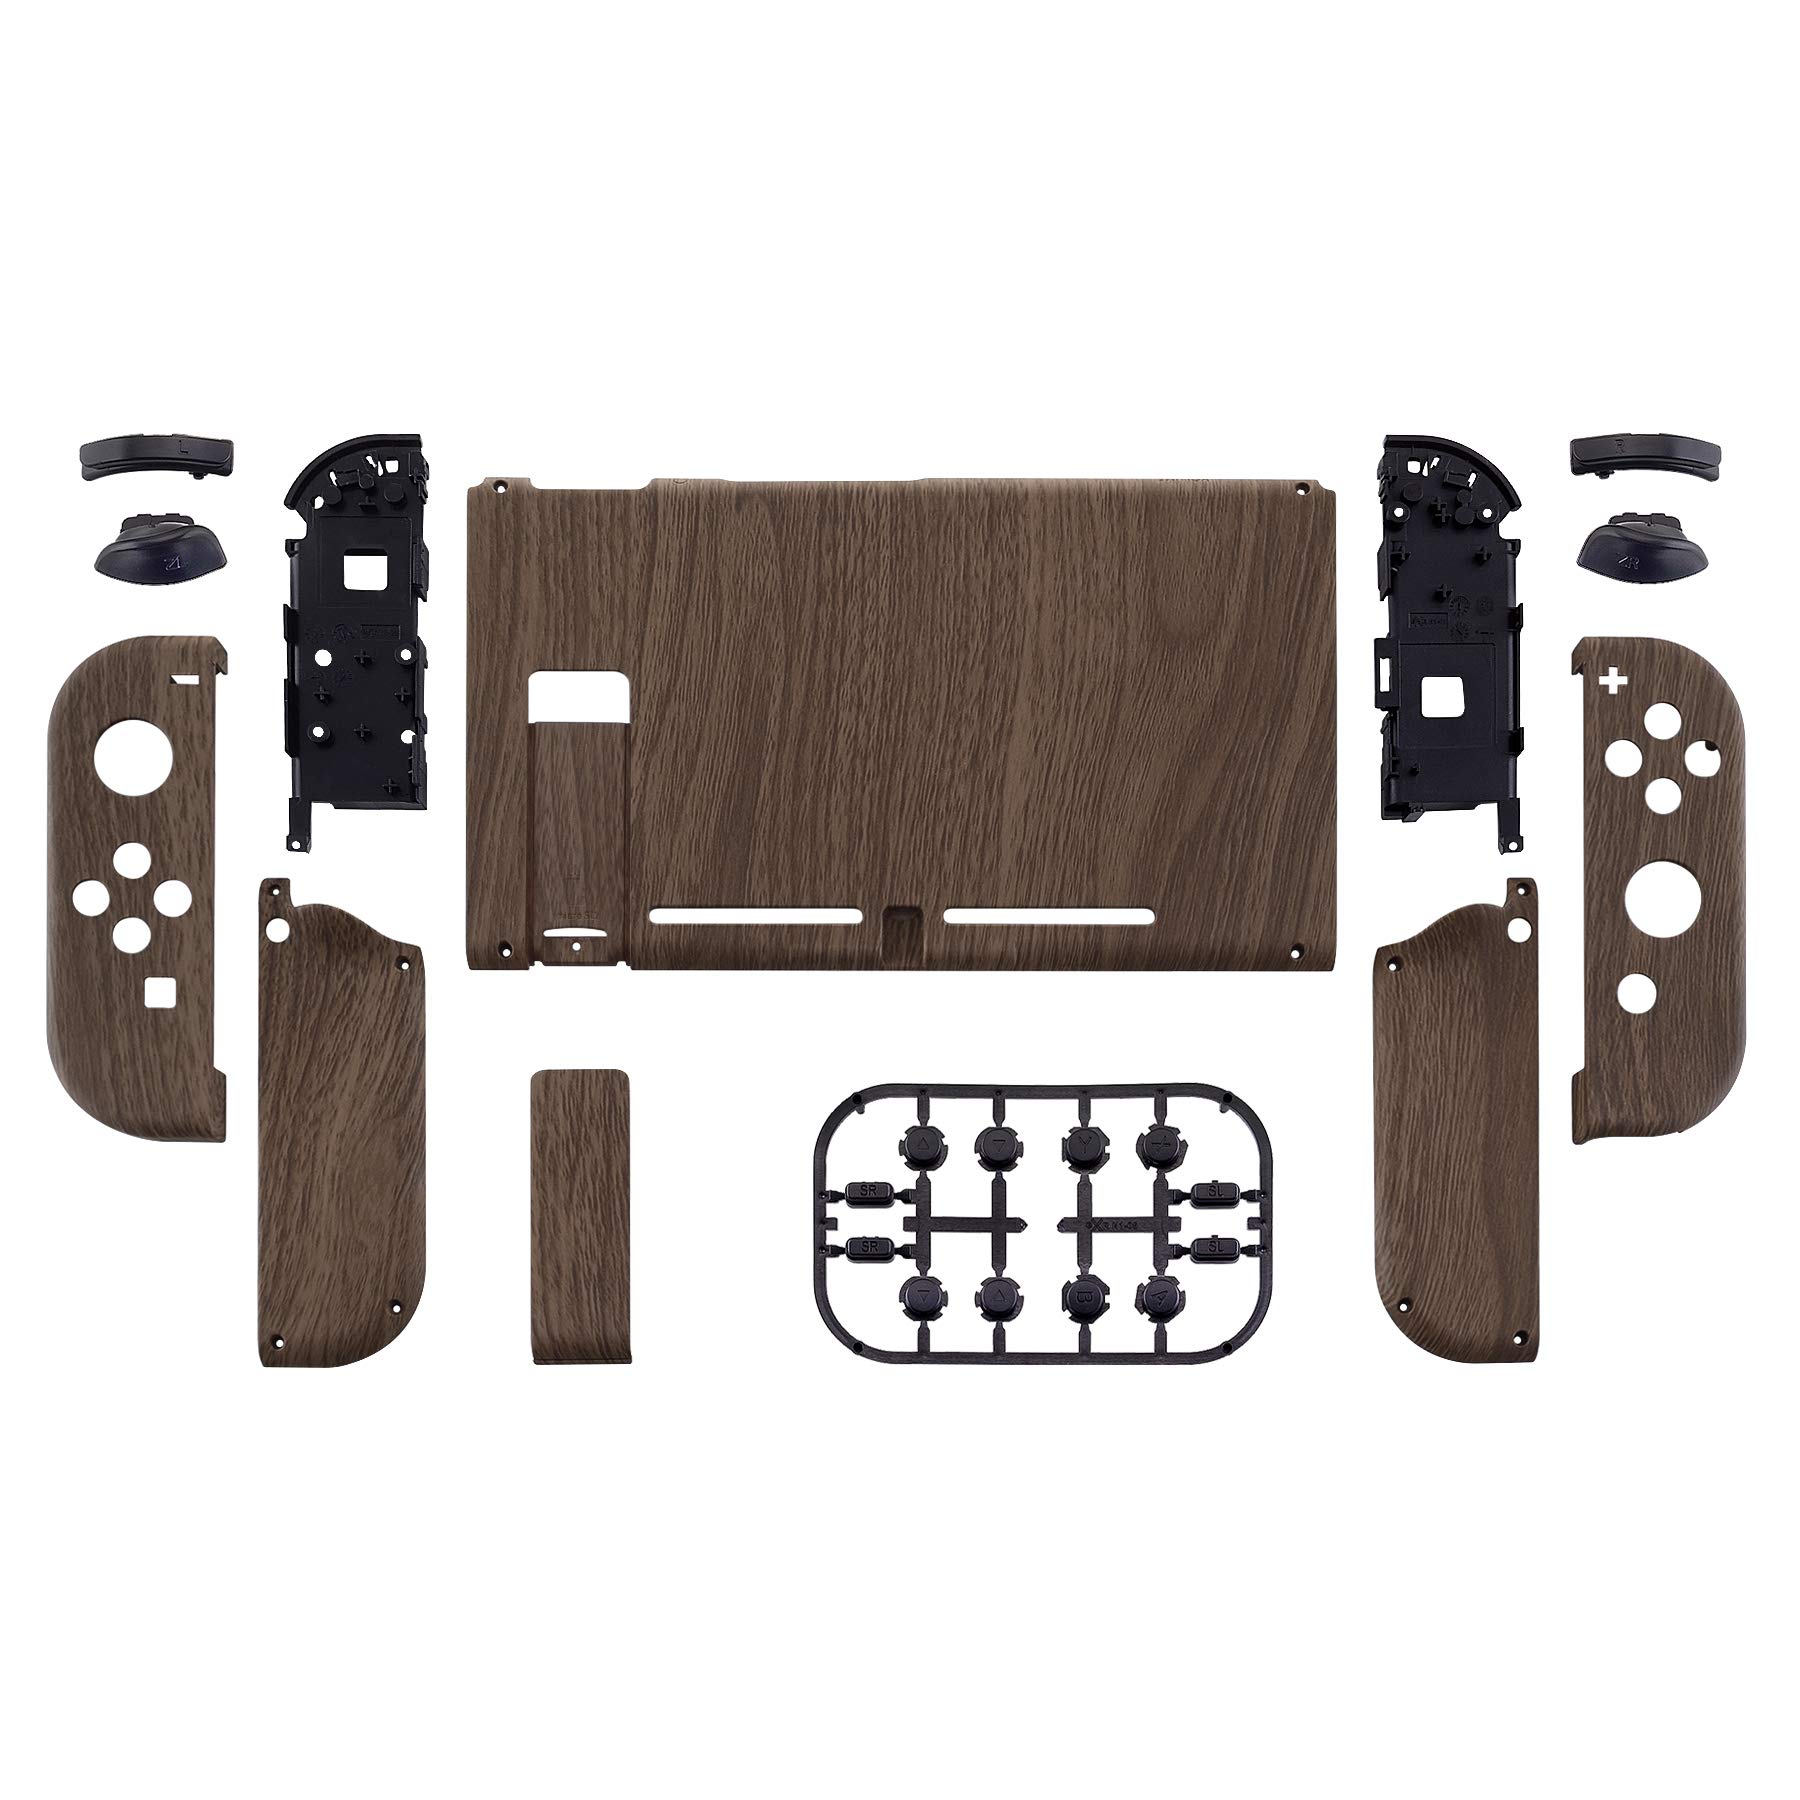
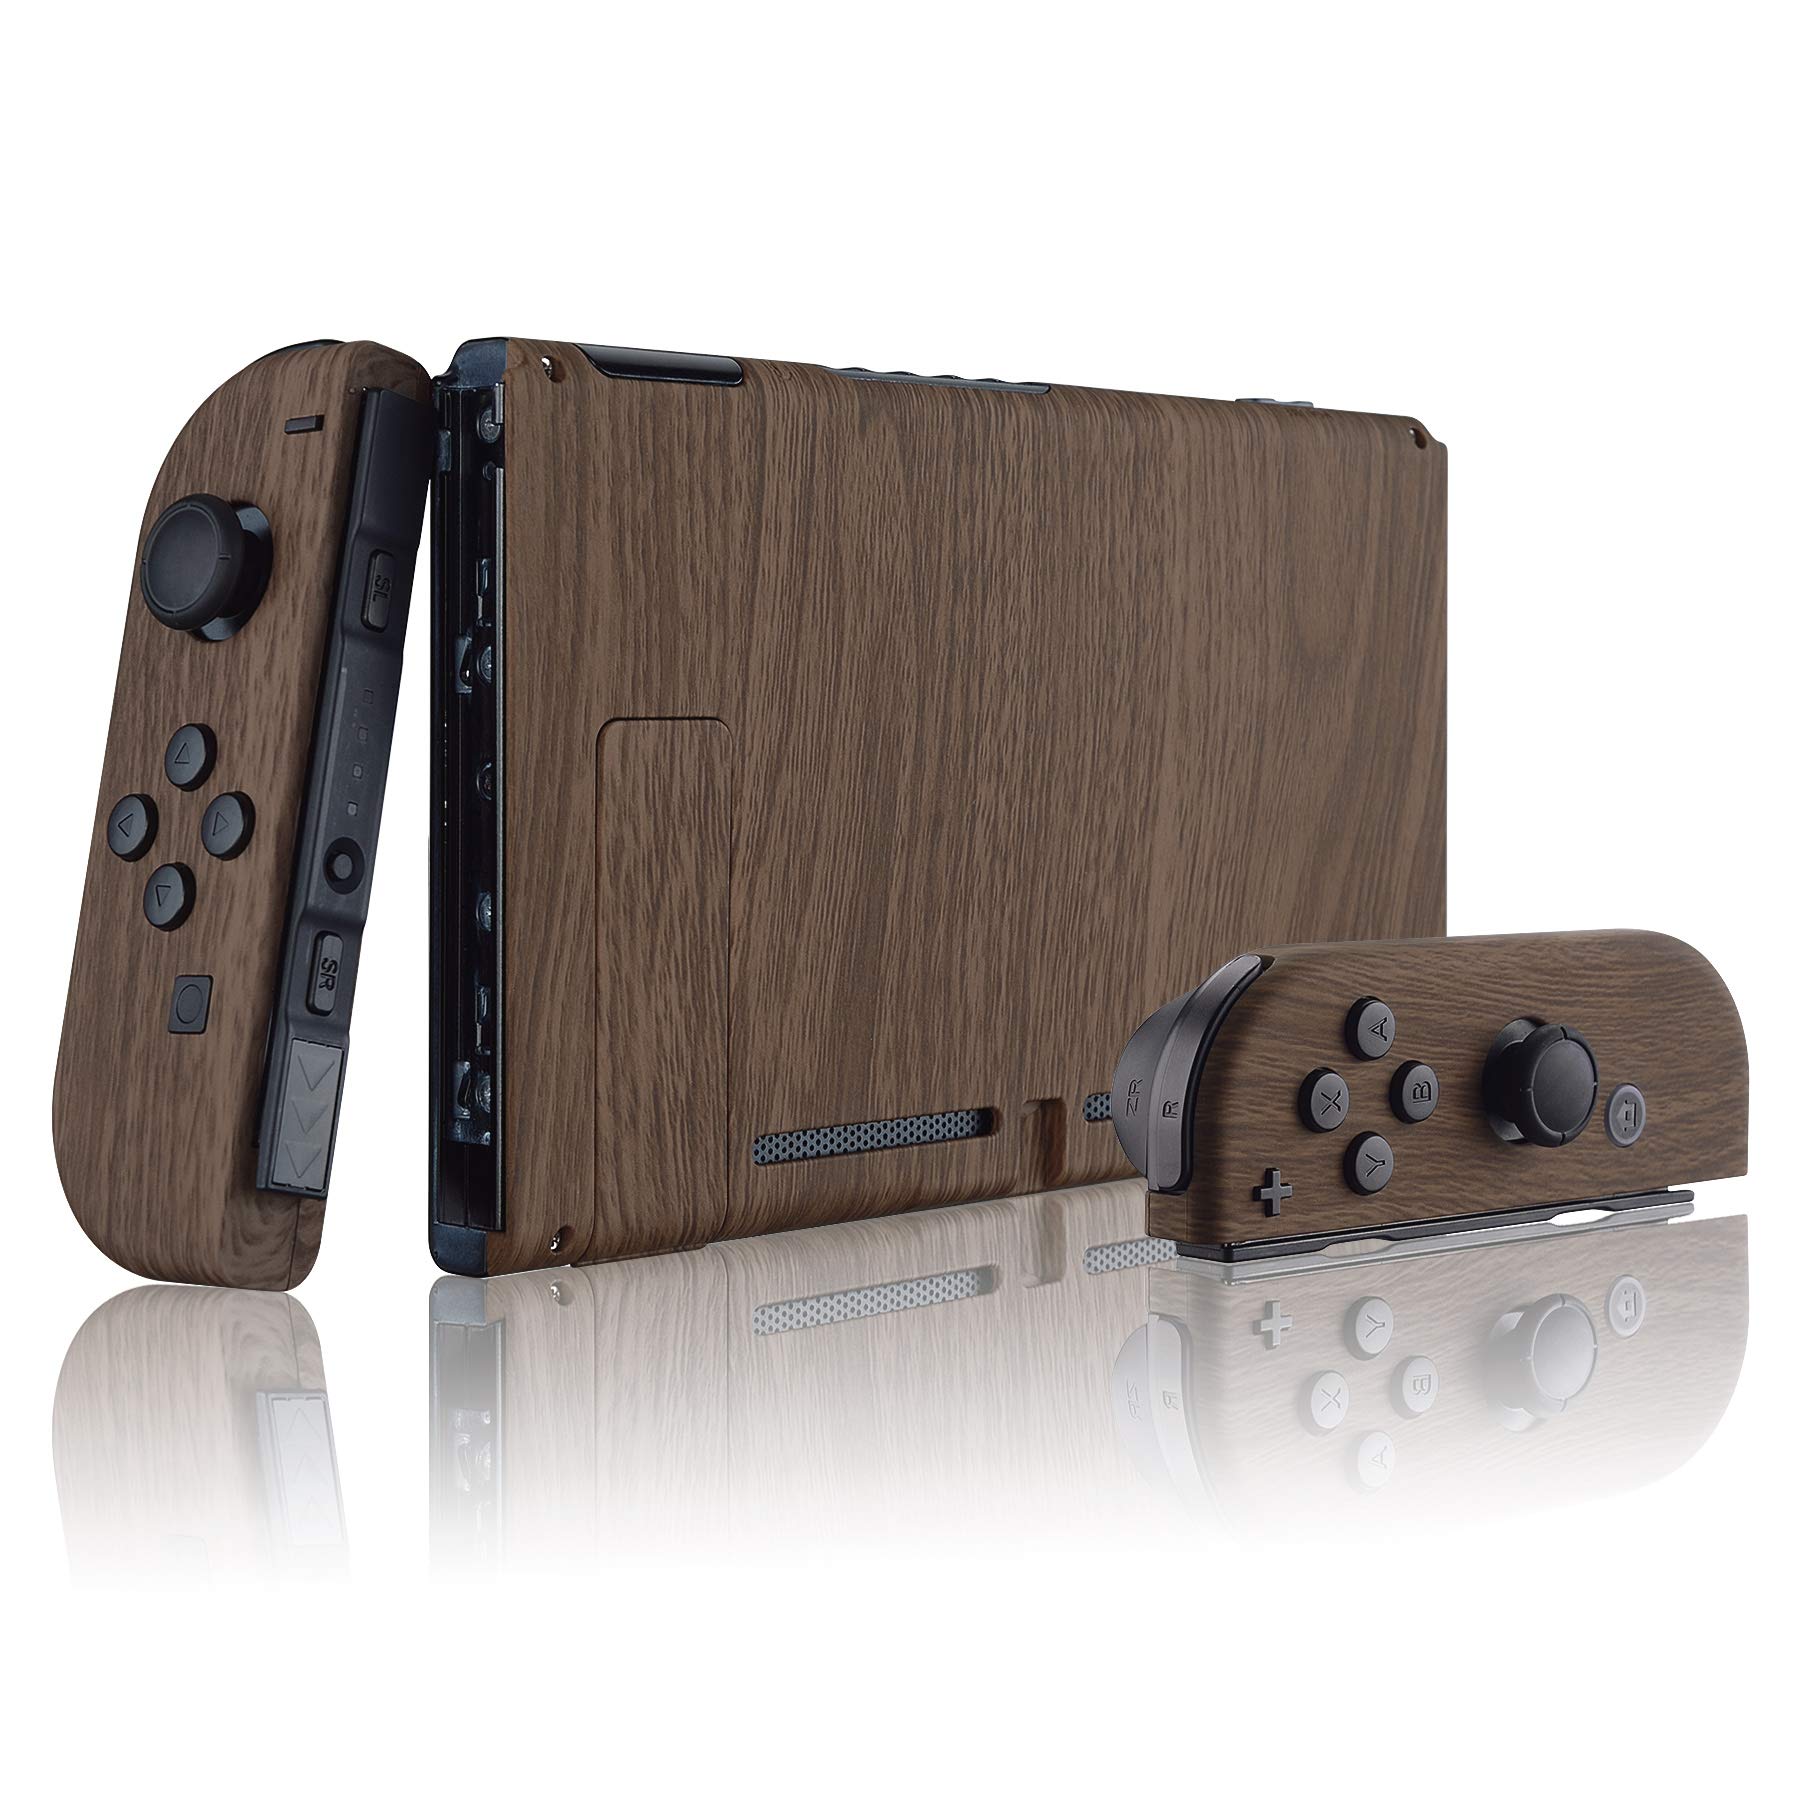


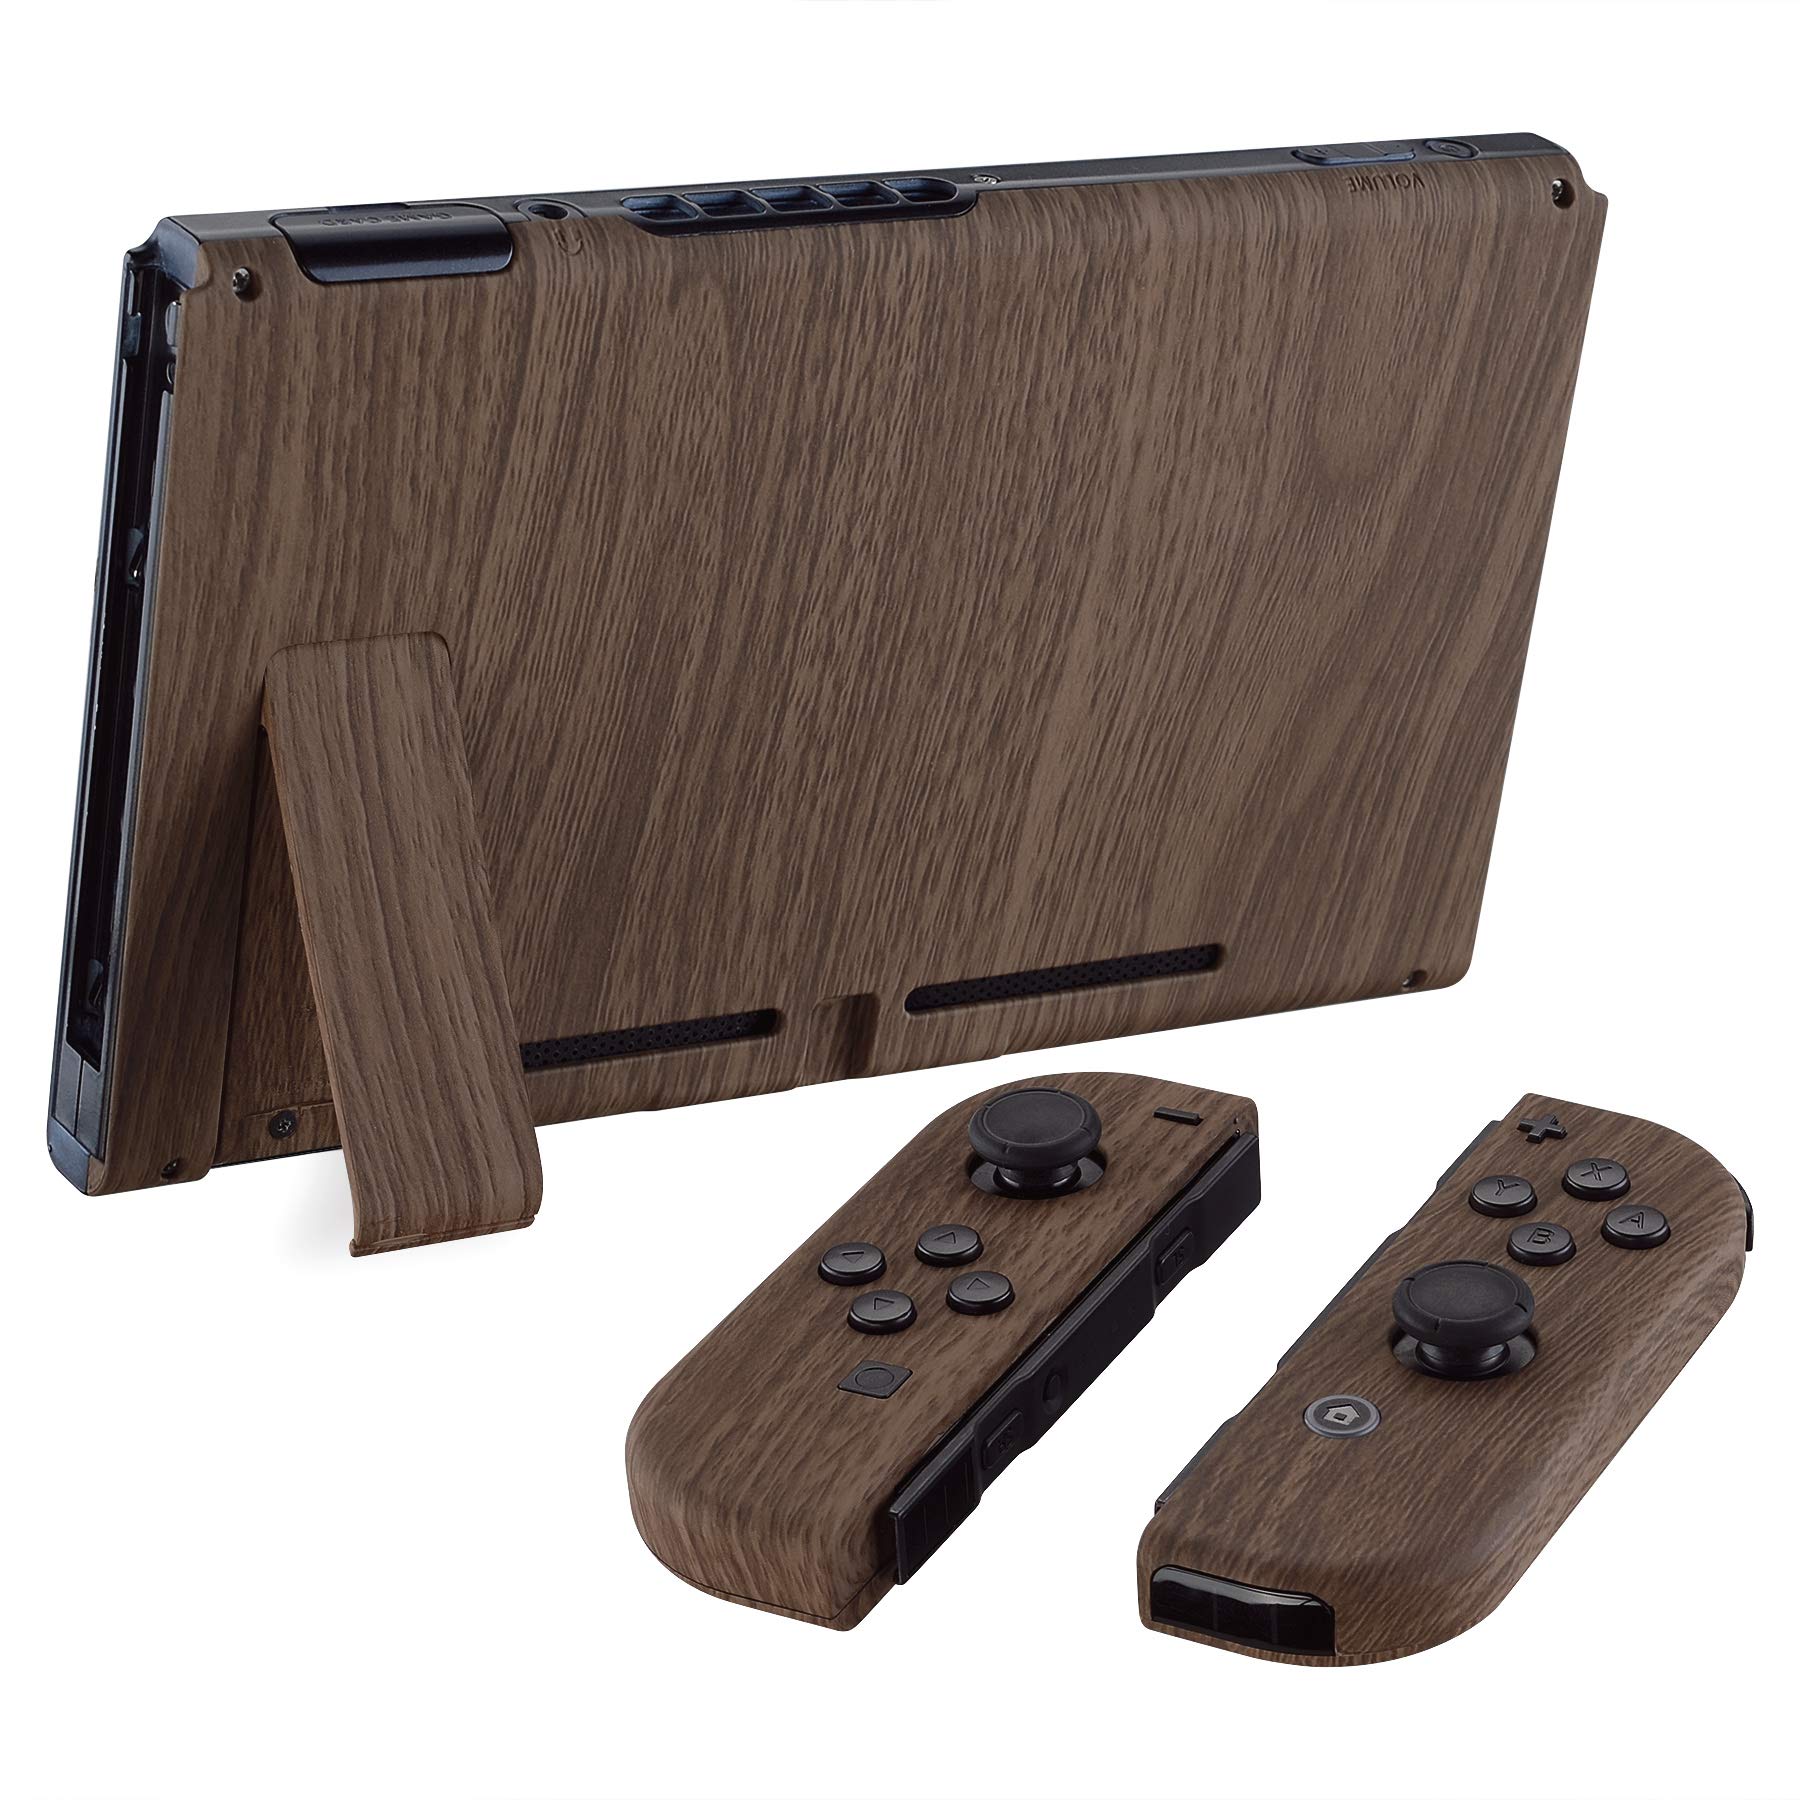
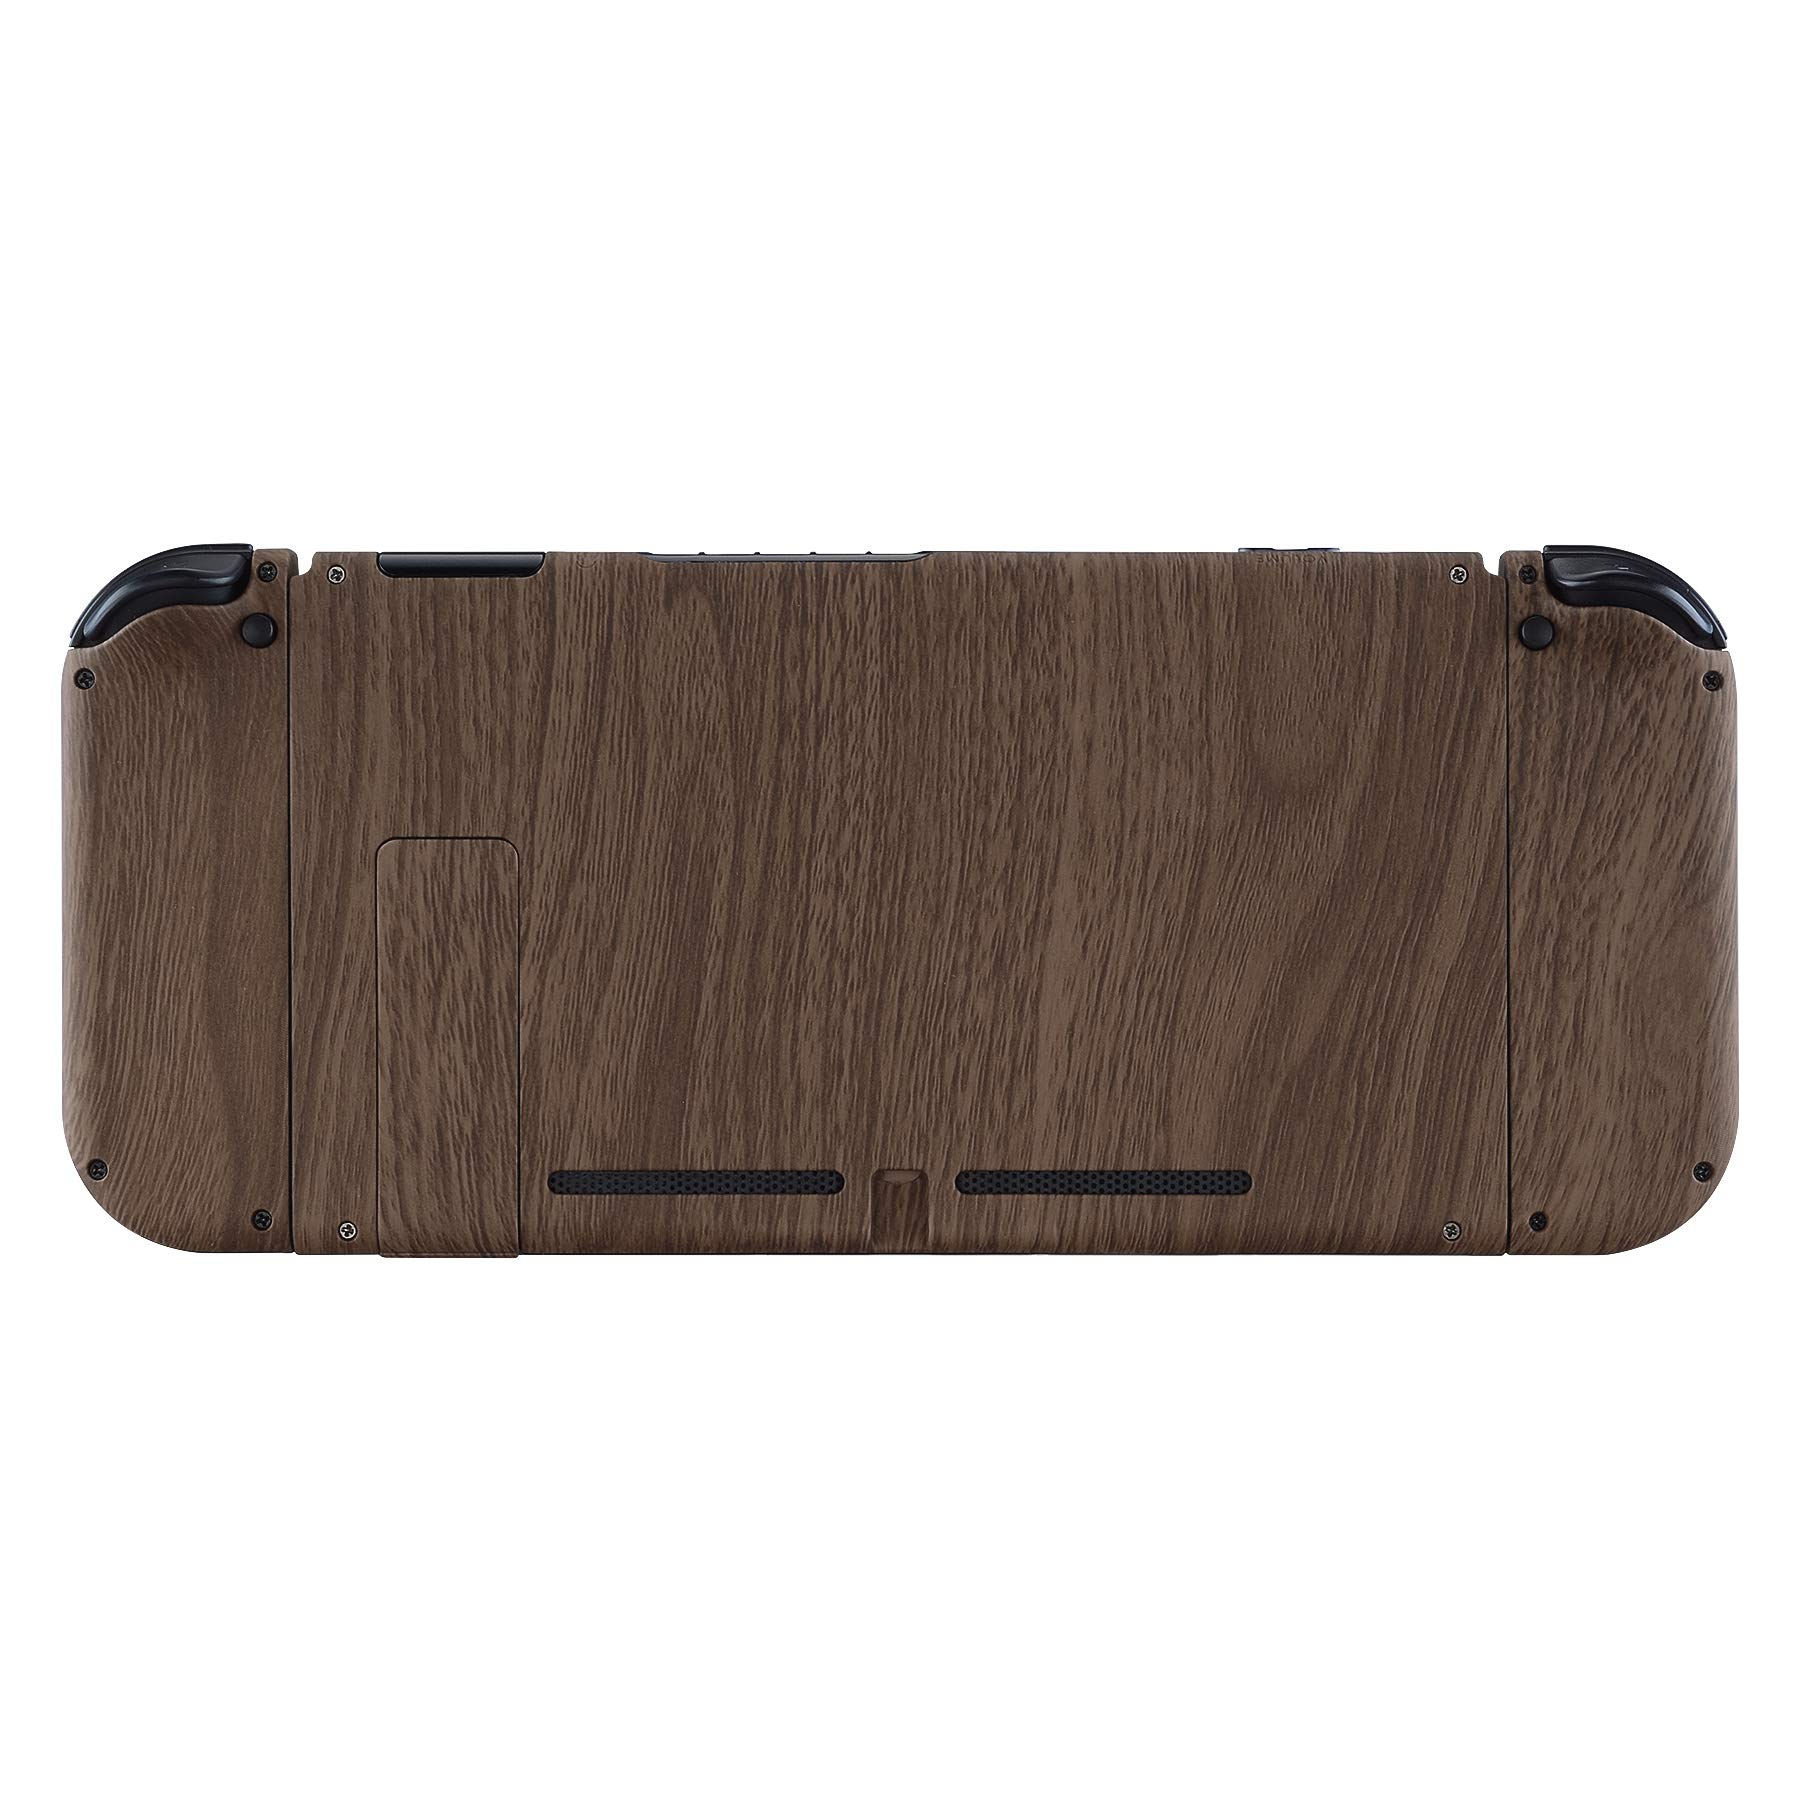
🎨 Unleash Your Style with Every Game!
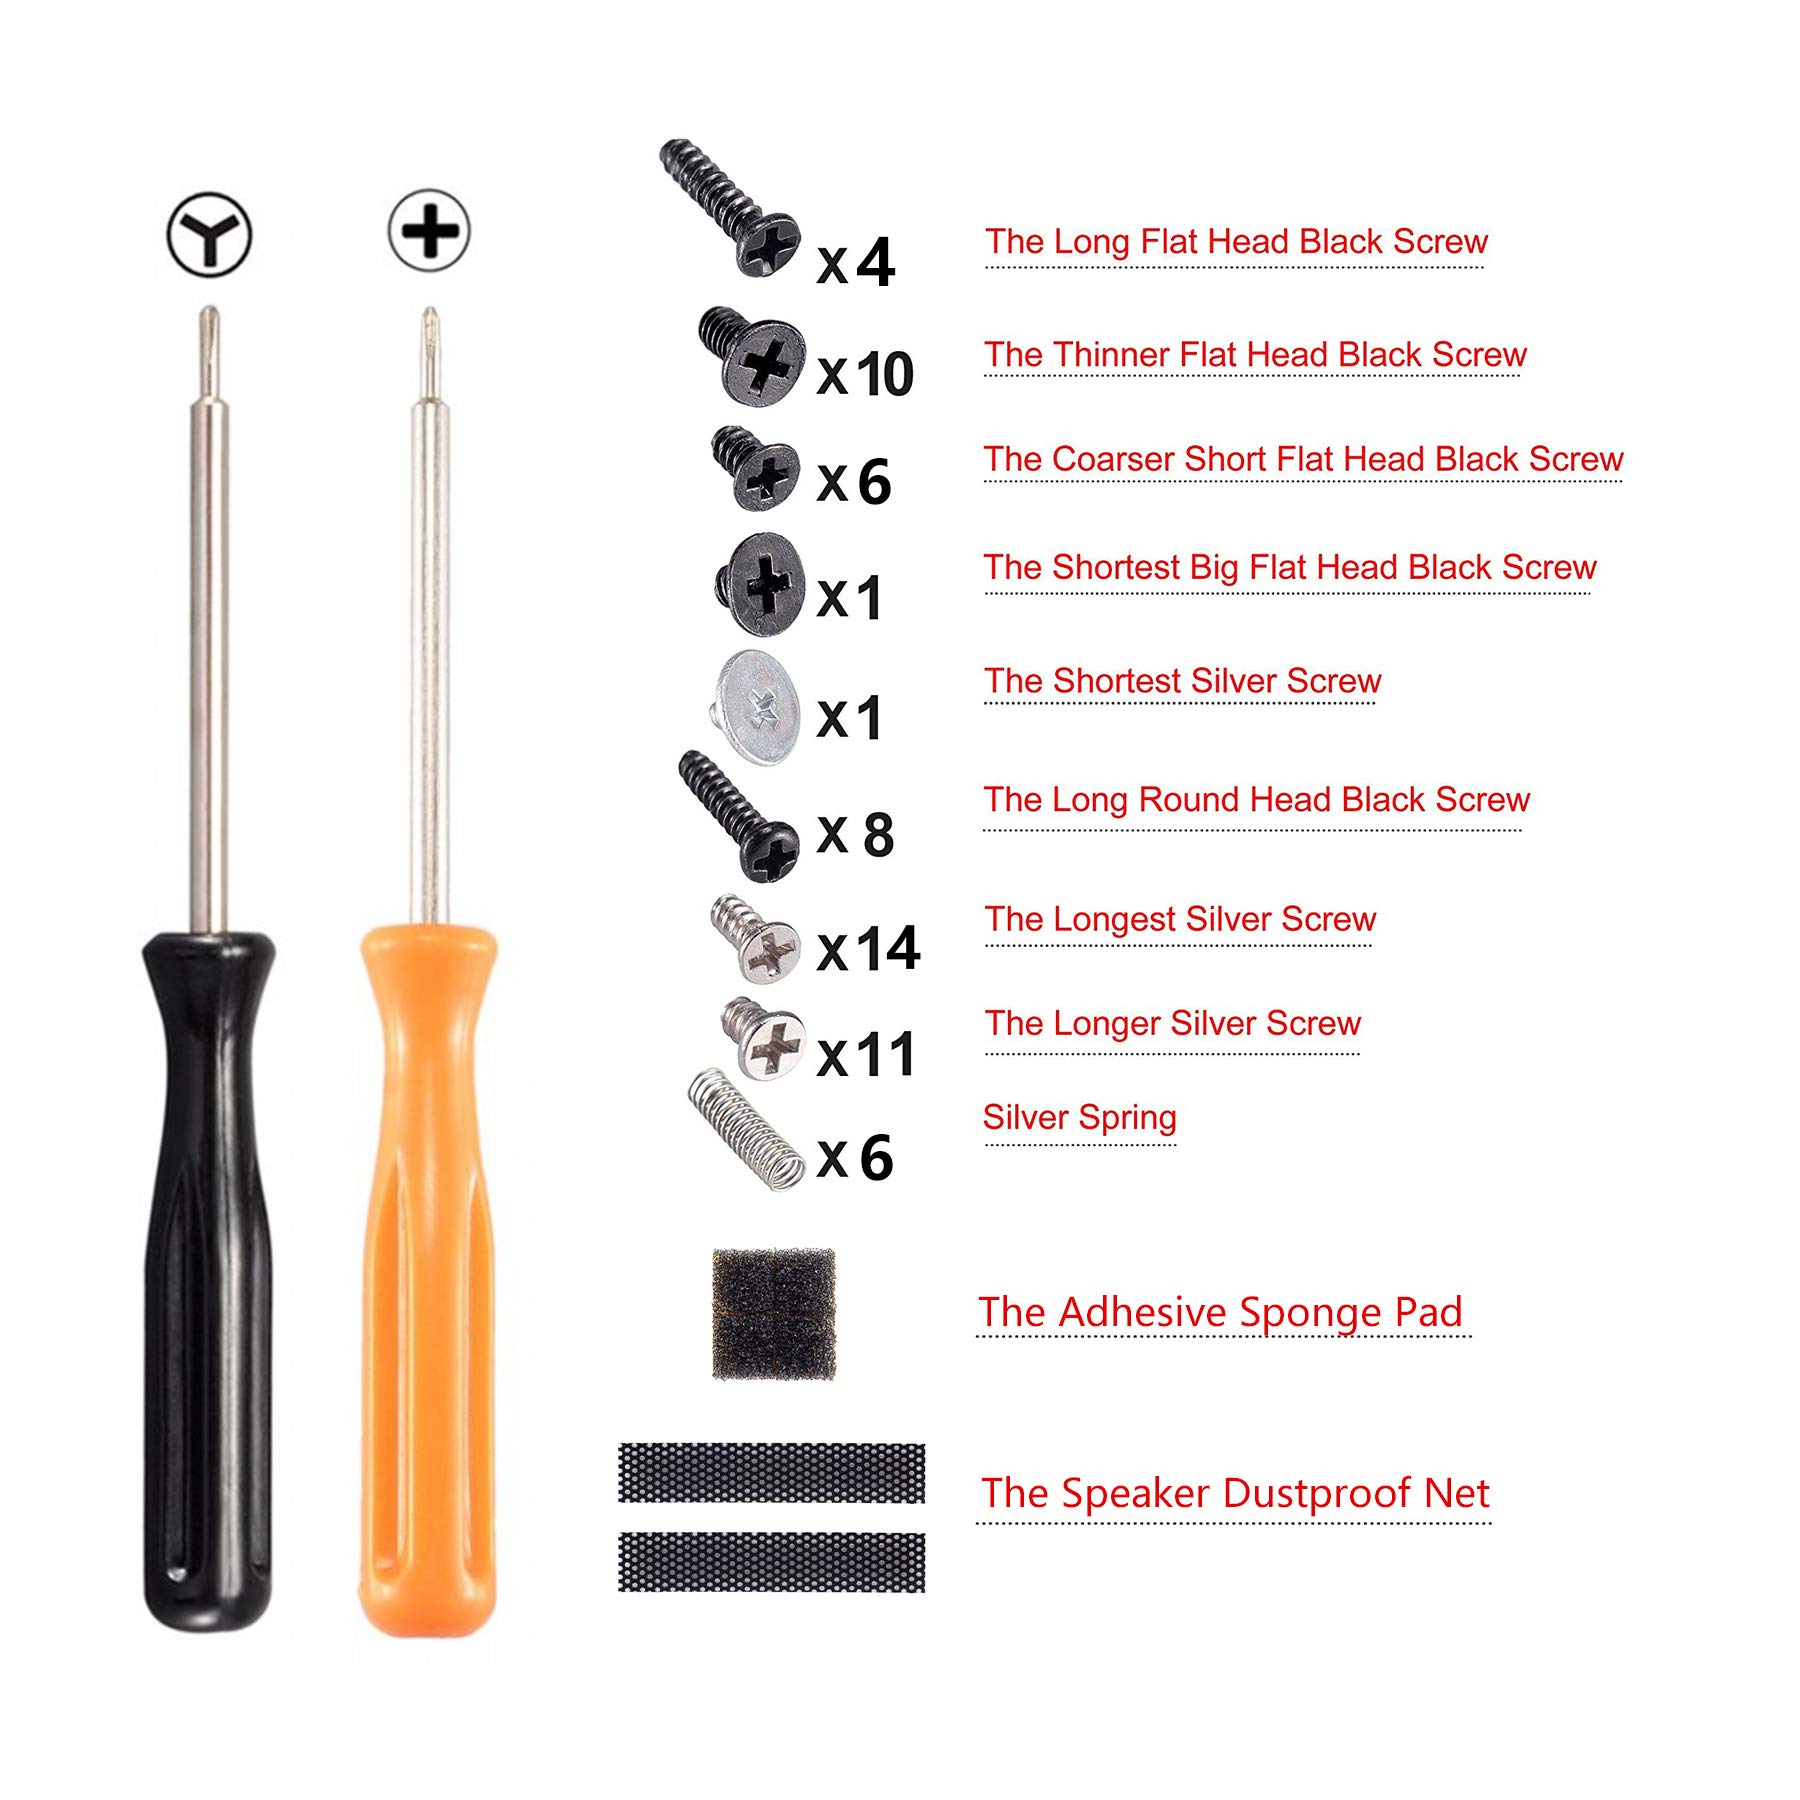
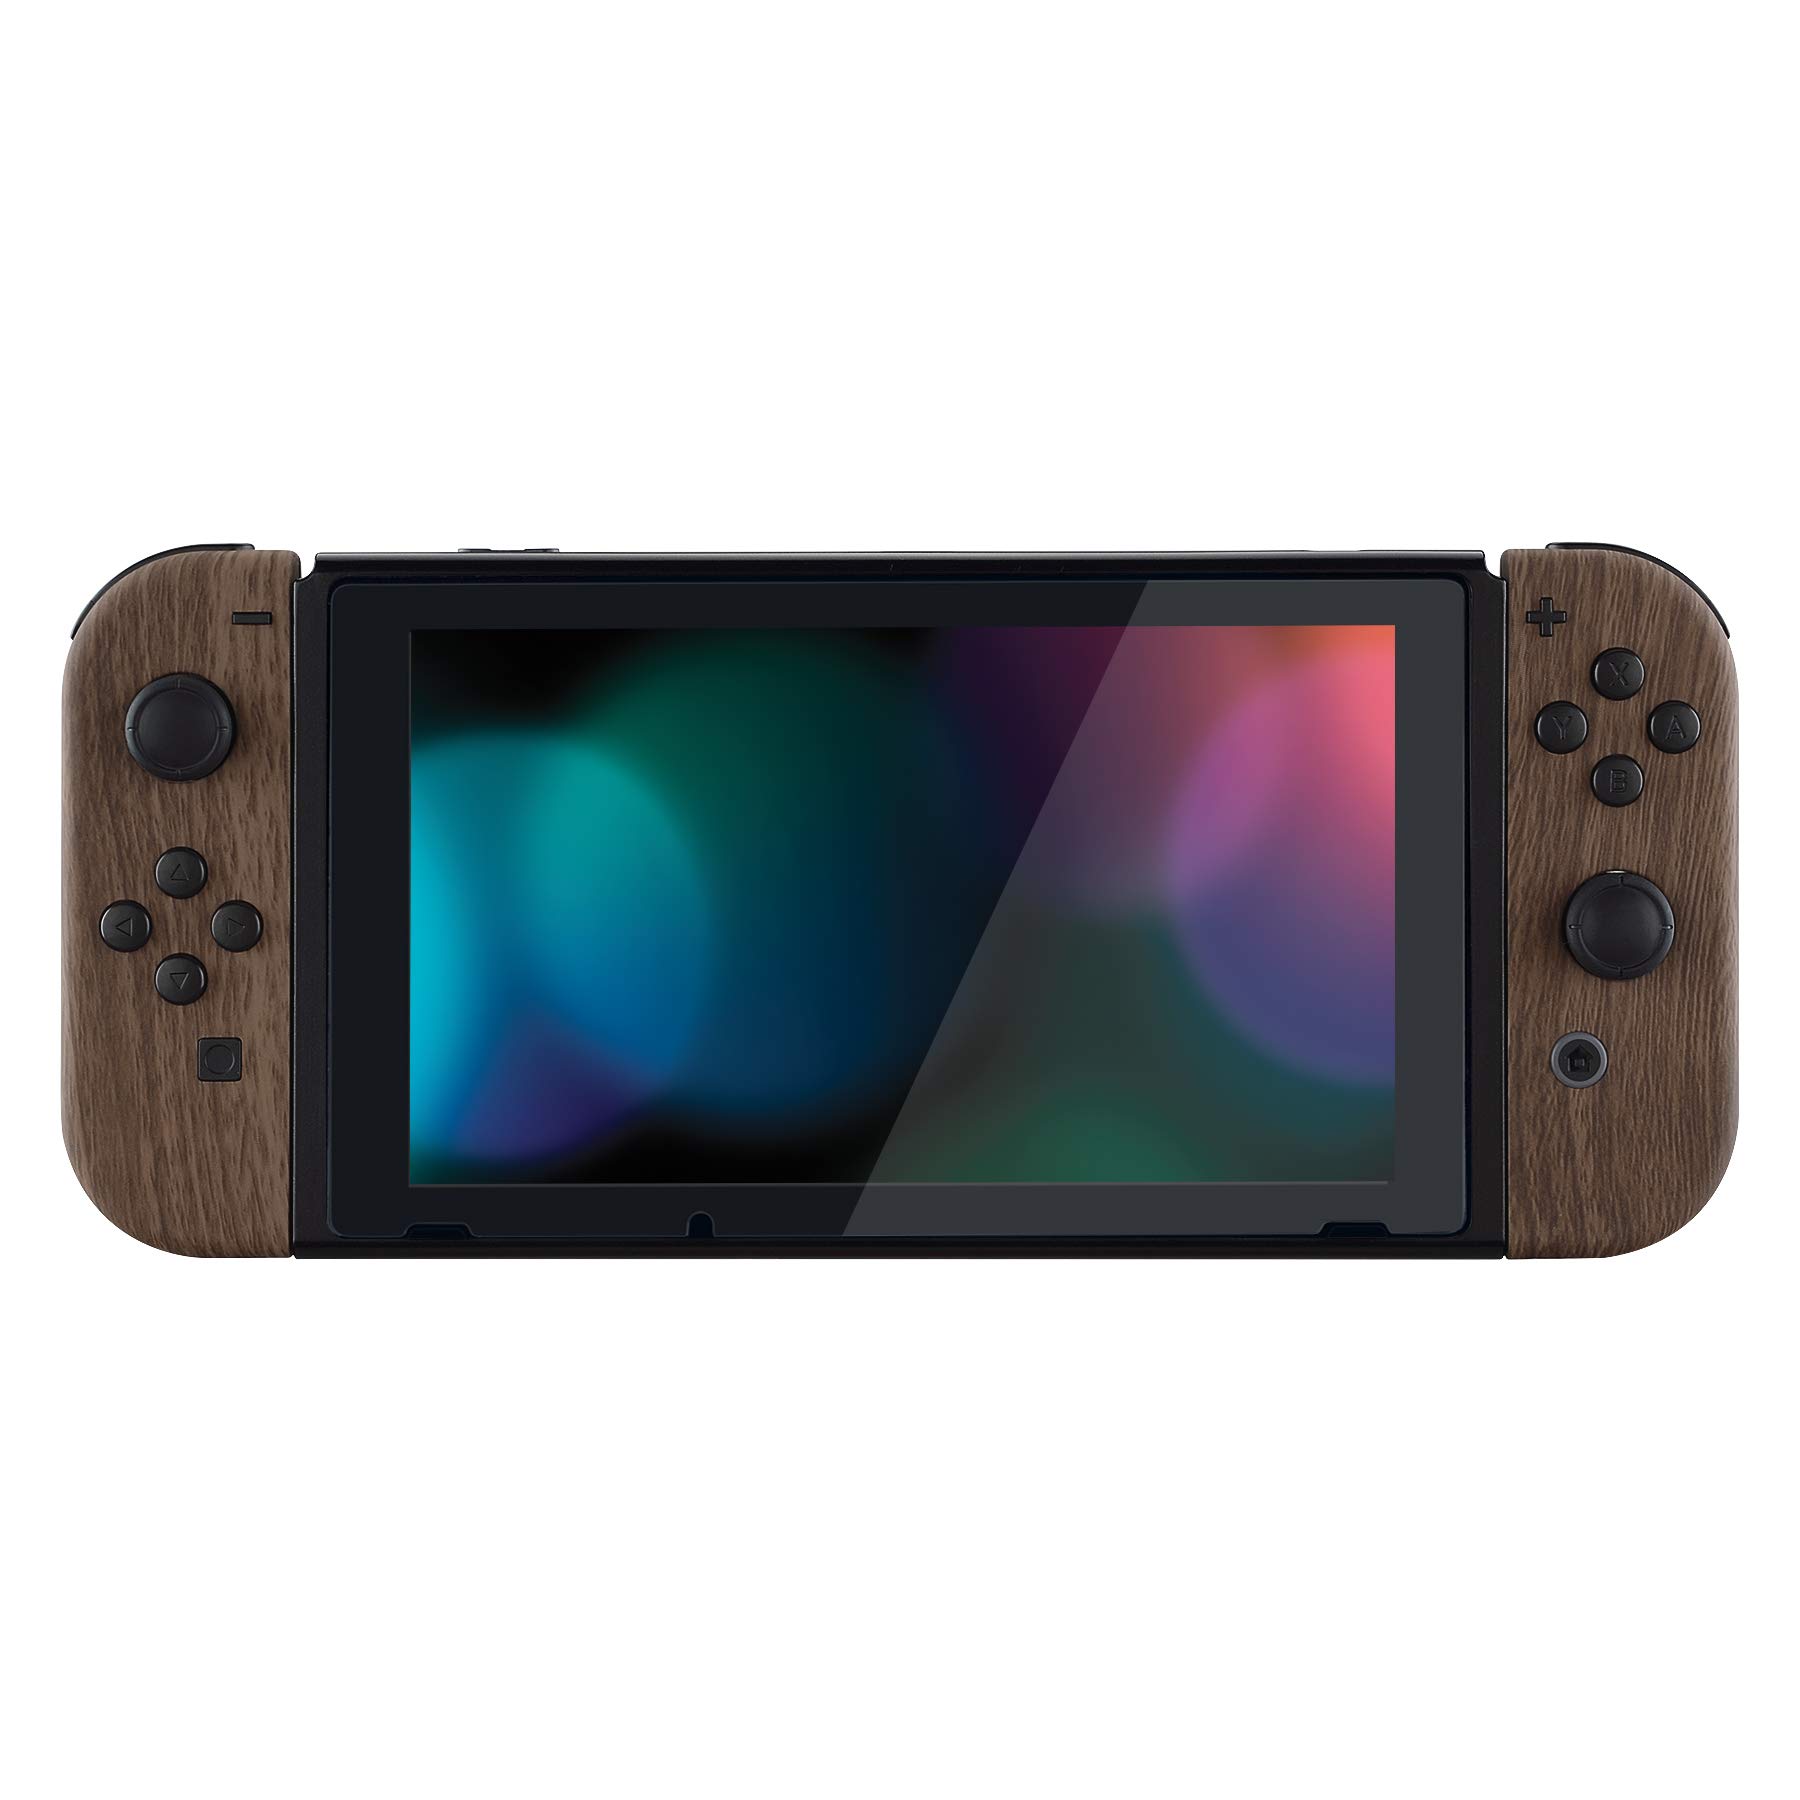
The eXtremeRate Soft Touch Grip Back Plate for Nintendo Switch is a custom-designed replacement housing that enhances your gaming experience with a stylish wood grain finish. It includes a full set of buttons and tools for easy DIY installation, making it perfect for gamers looking to personalize their console while ensuring a comfortable grip during extended play.
S**I
Excellent Housing Replacement
Had a day one switch for 7 years so it was time for a refurbishment, ordered this and its really good quality, installation takes some time but if you've done a switch housing replacement prior it shouldn't be too difficult, jerry rig everything has a decent guide as well as extremerate themselves on youtube. the right joy-con always takes longer only due to it being far more complex with the NFC reader and IR sensor.Included screwdriver is great as well as the included spare screws incase you lose them during installation, fit and feel is excellent, feels OEM after you're done, the quality of the housing and feel of the joy-con buttons feels great.Finished product looks amazing, really matches the tears of the kingdom theme and the included gold side buttons for the single joy-con mode is a great touch. Will happily buy another kit if a have a spare switch on hand. Glow in the dark also works though it is hard to capture on camera and is subtle.Overall a great product and would definitely buy again if need be.
C**N
High quality mod-job kit!
The switch is passing down from our 13.5 year old boy to our 4.5 year old girl for Xmas. He didn’t look after it too well and had a lot of scratches and his left joy con was drifting, the joy cons also weren’t securing to the switch as strong as they used to. Came across ExtremeRate products on Amazon and realised I would be able to do a complete re-shelling and fix up of the console to make it more girly too.I have little to no experience when it comes to things like this but I have never been too afraid to open things up and give things a try.First of all, I replaced the drifting joy stick, then I swapped out the plastic clips for metal ones before starting on re-shelling the joy cons themselves. It look a little bit of examining and playing about to figure out how it comes apart and goes back together, but it was not overly complex.The came the big job, the console itself. The new case came with a back shell but no front so I opted for white front shell to contrast the rear shell and component some of the white features of the new shell. I initially took apart the entire console, but for bit, mapping out the screws as I went along. I ensured I was meticulous and slow. After doing that I realised that I could have just separated the digitiser screen from the front shell to expose the screws and not dismantled it all.I made I few little mistakes putting it back together, nothing too worrying, so ending up closing and re-opening the console a few times but after some persistence and care I got there.The trickiest part was removing the digitiser, it’s pretty well stuck down and I also didn’t use heat to soften it up but I was gentle and careful.I think the end results speak for itself. It looks amazing and has added a whole new life to a 4 year old console. The warranty is long gone so there was no risk of losing that anyway. The replacement parts are all high quality, even down to the tiniest of screws.I have now ordered some Thermal Grizzly Kryonaut to top up the thermal paste on the heat sink (as it was starting to look a little dried up) just to be sure and keep the console as cool as possible, so one more open up and job done in time for Xmas.Would highly recommend these products! If I can do it, you can too.
A**K
Great product but be careful when attaching
I just completed the customisation of my switch but a couple things have stood outThe screws stripped really easily especially if you haven’t ever undone themYou have to fully open up the switch controllers so be sure to have plastic tweezers etc to handle themSome video tutorials make you detach the motor and battery but you don’t need to do this as long as you are careful when handling the motherboard - I tried to follow this and ended up breaking the battery wire and had to find a replacement battery so BE CAREFULAlso some buttons were really stif after finally closing so don’t tighten the screws too much as I will probably have to reopen them to fix thisQuite complex installation if it is your first time - the shell is really sturdy but the screws and screwdrivers that came with it were not
M**K
Really good product, but beware the build.
Okay, first off: The design on the shell is gorgeous. It was exactly what it was promised to be.Now for the installation: the shell for the console itself was easy to install. No issues there. However, the joycon shell replacements were pretty difficult to install. It requires a steady set of hands, which I do not have. I got there in the end, though with some persistence.Overall, the shells are sturdy, slightly damage resistance but over all they are beautiful.Would recommend, but be warned. You need a steady hand and the patience of a saint.
N**E
Absolutely great
I bought this because my original switch shell was in a bad state, it was missing screws and everything.I love this design and it wasn’t too hard to replace everything (as long as you don’t accidentally strip I screw which I did, leaving my only option to pry apart the back of a joy-con)The backplate for the switch is the easiest, with the joycons being a little more involved.I didn’t use the joy-cons buttons as I didn’t like the multicolour ones , I feel like the cherry blossom set would benefit more from getting bundled with white buttons!Overall this set is great and I would highly recommend getting one if you are comfortable fitting it yourself !
J**O
Don't attempt unless you have experience modding
Best switch shells you can buy not made out of crap plastic like cheaper models, especially the transparent ones that shatter with the slightest drop of your switch on to a carpet.Keep screws organised and patience is key. They have micro ribbons and screws unlike ps4 and xbox one Controllers make sure you know what your doing before you Attempt it or you can kiss your switch goodbye.
B**A
Shell is really cute but the bit it came with was flimsy
The media could not be loaded. When buying this I assumed I could use the bits that came with it, however upon attempting to remove one screw using the PH00 bit, the tip broke apart and stripped the head off the screw.Overall the shell is of good quality. Feels really nice to the touch, and very adorable. Just wish the screw driver was better quality as I had to go to a repair shop for them to removed the stripped screw.But I am pleased.
F**H
Supera espectativas
Ya había comprado la transparente y esta en definitiva se ve excelente. La he colocado a la Nintendo de mi hermana y quedo perfecto. Lastima que vendan por separado la parte frontal.
L**N
Don’t do if worried about breaking a joy-con
I really like this product and LOVE how it turned out! It’s beautiful and feels great. I accidentally dropped it once and not cracks (not a far fall and I’m not saying it’s super protective as I did not test that. So if you want to do this for your kids who drops stuff all the time, I might not recommend as I’m not sure if the cases are as sturdy as they feel). The video was great annd helpful. Overall I love the product. I did run into problems (by no fault of this company) and feel I should let you know if you plan on doing this.First of all, I have no experience in this area. I just like challenging things and building stuff, so I decided to try it. It did take longer than 4 hours for me (only the first set of joy-cons, which were the blue flame ones) and I did break one of my joy-cons (the left blue flame one in one of the pictures). I did the blue flame ones first. Once I was done with the left blue one, I tried it and the joystick wasn’t working properly, so I kept taking apart, redoing the joy-con, and testing it again. After a bit, I accidentally broke one of the electrical components (the thing you put the ribbon cable in). So I got a left joy-con and did the process again, but now (for some reason) it won’t charge and say it’s connected to the switch. It connects separately but won’t recognize when it’s connected to the switch. So not sure what happened there. Another problem I had was when I replaced the back of the switch (the switch itself and not the joy-cons) accidentally stripped the middle screw on the side of the switch. It took a dremel, stripped screw kit and a drill to get the screw out. It was very risky and we’re lucky it didn’t damage the switch. Unfortunately it did do damage to the area around the screw (took off paint and stuff). I covered it with sharpie and looks better (I attached a picture). So BE CAREFUL!!!! Everything (except the one blue flame joy-con) works properly and couldn’t be happier with the out come. Just if you decide to do it, take your time and be patient. Do everything the video tells you to do. Just understand the risks that come with doing this stuff. You’ll break the warranty and you run the risk of breaking the joycon or the switch (you would only run the risk of breaking the switch if you did what we did to get the stripped screw out). I would highly recommend watching the video first before buying to see what goes into it (video is at the bottom of the page of the product). Hopefully this helps!!!!
J**E
Cutest case ever!
Cutest case ever!The Joycons have a lot more steps than the console back plate, but you DO NOT want to underestimate the back plate installation. ExtremeRate has a link to their video library detailing how to change your plates. You can also search on video sites on how to do so as well.Warning: the Switch Console side screws are VERY fragile. It's very easy to "strip" the screw. You have to be very careful and slowly unscrew it so you don't damage the screw head. In my case, I accidentally stripped one screw.If you stripped your screw, there's a drill bit called a "screw extractor." It comes in a set of varying sizes. You'll want to use one that's in the range of 3mm. You want to bore a hole into the striped screw head then switch to using the other side of the extractor to remove it. I recommend using a power drill. It was all worth it, because everything is cute as a button!
A**N
Great look & feel
Wonderful update to my switch. Parts fit well and look great.The soft feel of the shell is very comfortable as well.Gotta get green buttons next to really make it pop.
8**W
Awesome shell
Good quality shell, it's a perfect fit so no room for improperly reinstalled parts. Highly recommend quality Phillips instead of the one provided as mine broke while adjusting side rails (not req'q for install) and stripped a screw. Lots of quality screws to replace the used ones, I reused mine except for the Tri-originals on the disassembly, used the new provided ones for the outer shell. Definitely order again for the other switches.
Trustpilot
1 week ago
2 weeks ago