

Desertcart purchases this item on your behalf and handles shipping, customs, and support to South Africa.
♻️ Upgrade your kitchen grind game—power, ease, and durability in one sleek package!
The 
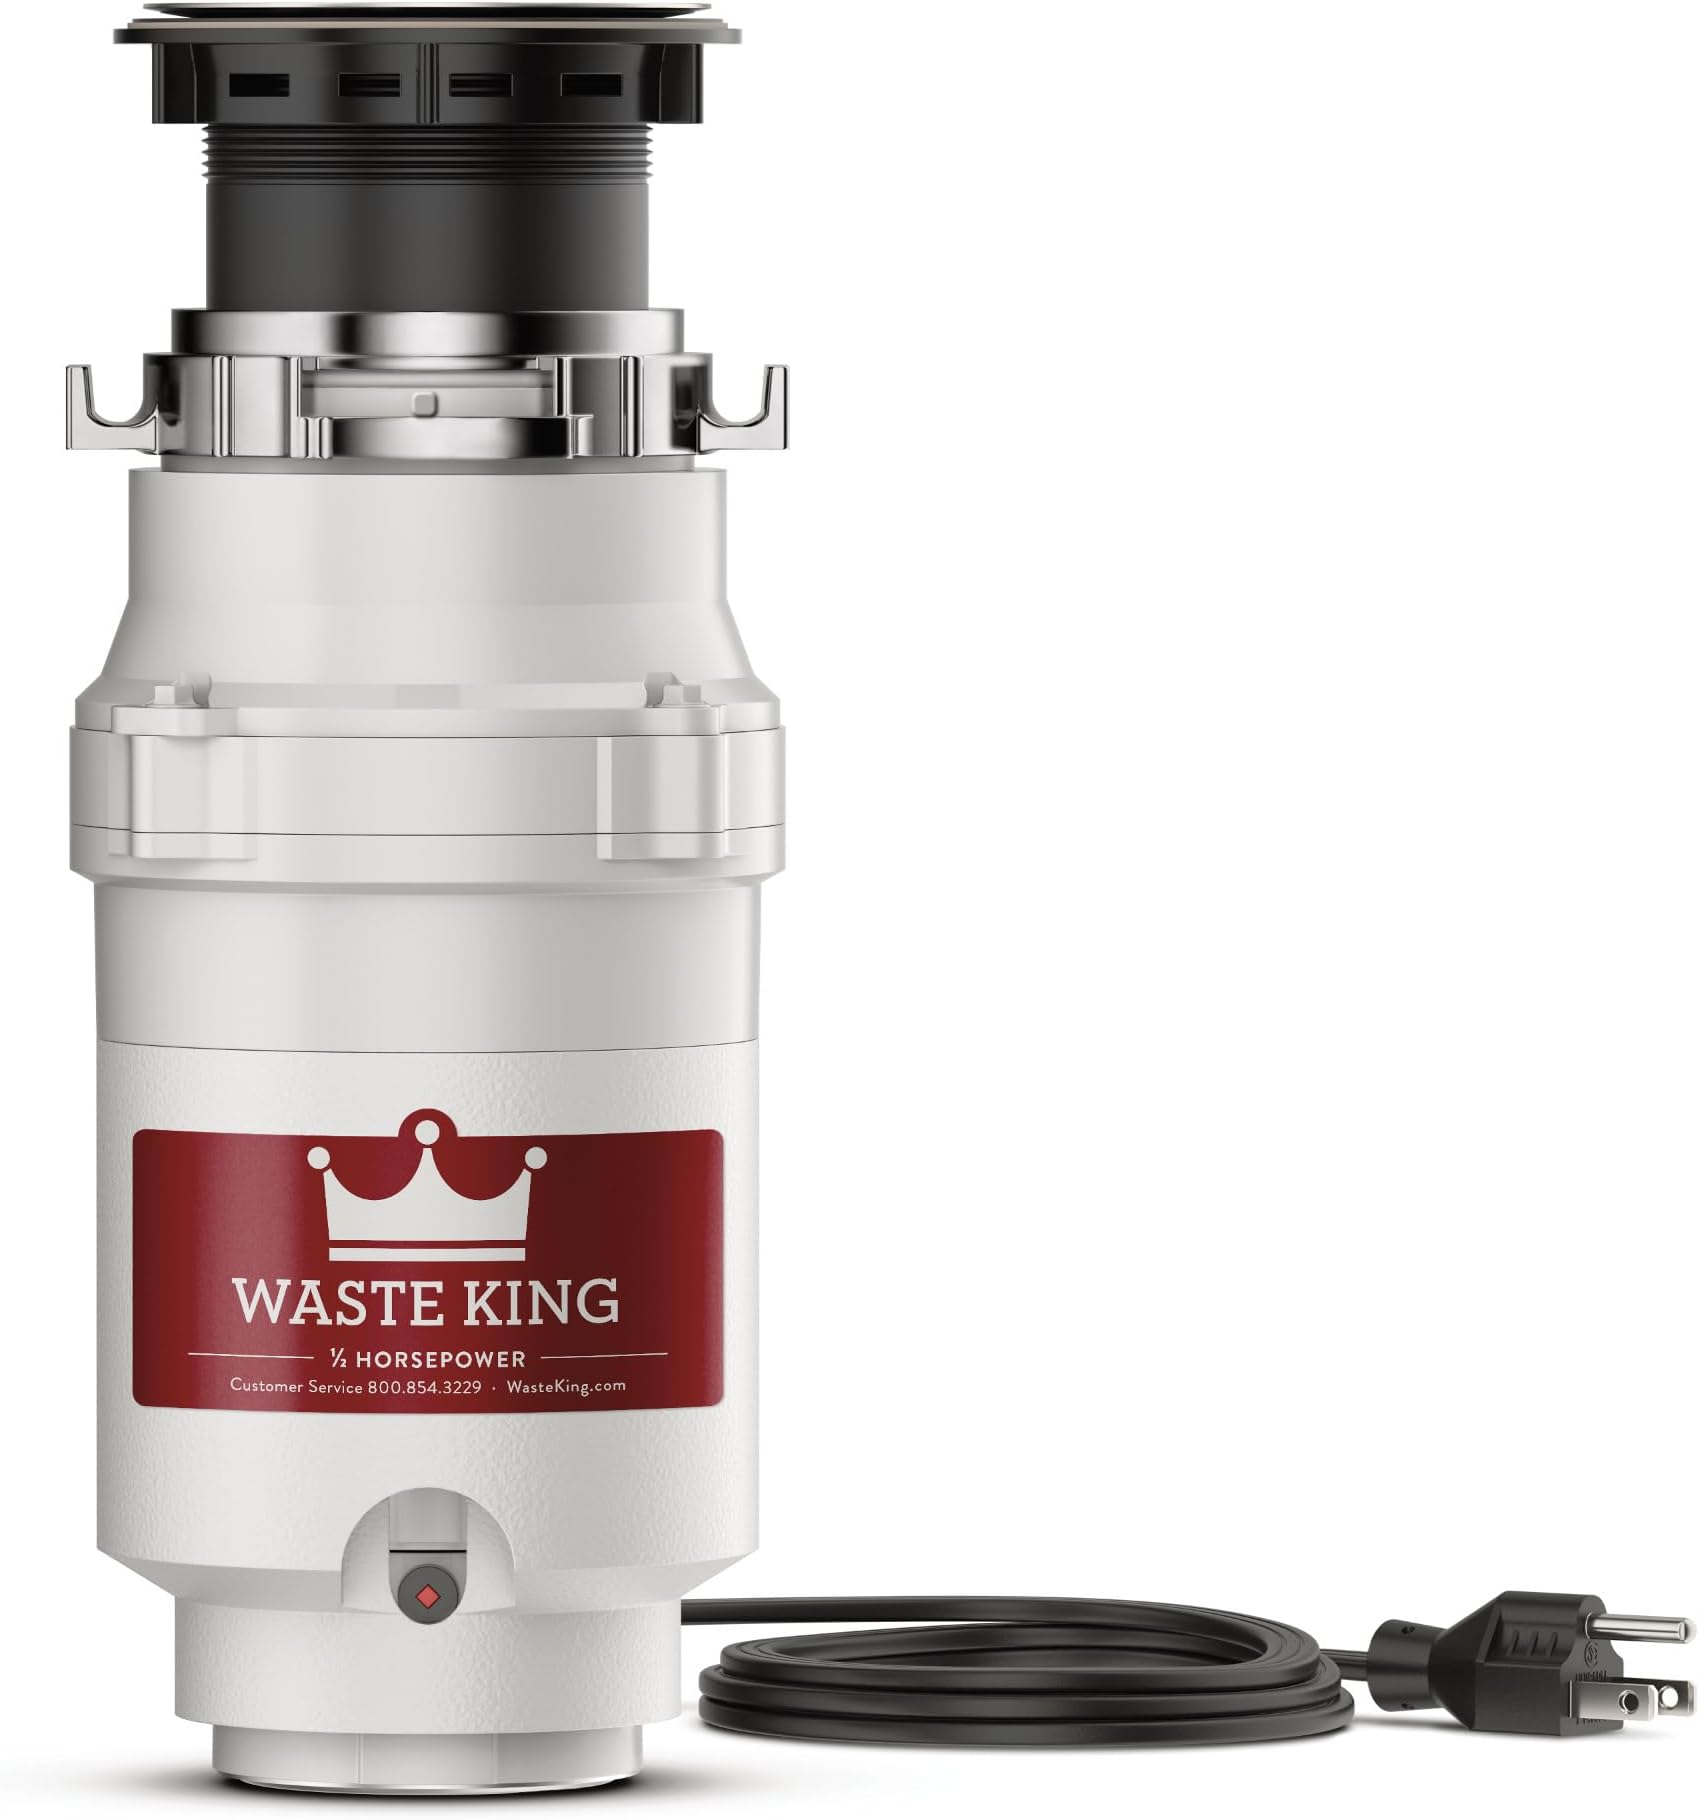
Waste King L-1001 Garbage Disposal features a powerful 2,600 RPM permanent magnet motor and a 1/2 HP continuous feed system for efficient, jam-resistant food waste grinding. Designed for easy installation with its EZ Mount system and pre-installed power cord, it requires no additional electrical work. Its compact, lightweight build includes stainless steel grinding components and a corrosion-proof chamber for lasting durability. Backed by a 5-year limited warranty, this disposal offers a quiet, reliable upgrade for modern kitchens.


| ASIN | B000LNIK6C |
| Batteries Included? | No |
| Batteries Required? | No |
| Best Sellers Rank | #7,044 in Tools & Home Improvement ( See Top 100 in Tools & Home Improvement ) #13 in Garbage Disposals |
| Certification | For Household Applications |
| Color | N/A or Unfinished |
| Customer Reviews | 4.4 4.4 out of 5 stars (40,582) |
| Date First Available | January 1, 2008 |
| Finish | stainless_steel |
| Included Components | EZ Mount Garbage Disposal Power Cord Installation Instructions |
| Is Discontinued By Manufacturer | No |
| Item Package Quantity | 1 |
| Item Weight | 7.5 pounds |
| Item model number | L-1001 |
| Manufacturer | Waste King |
| Material | Stainless Steel, Glass-filled Nylon, ABS |
| Part Number | L-1001 |
| Pattern | 2 Year Warranty |
| Power Source | Corded Electric |
| Product Dimensions | 5.25 x 5.25 x 12.75 inches |
| Size | 1/2 HP - Continuous Feed |
| Special Features | Lightweight |
| Style | Disposal Only |
| Usage | Grinding |
| Voltage | 115 Volts |
| Warranty Description | Limited |
| Wattage | 4.5 watts |
C**0
Easy to install!
Let me start off by saying that I am not a handyman or plumber. About the extent of things I'm able to "build" are tables with step by step instructions from IKEA or mounting a TV mount to the wall. Other than that, i'm not very handy (my wife would say not at all handy). When my old garbage disposal started leaking, I called a plumber. He came to my house and told me I needed a new disposal. He told me the MINIMUM price would be $498 for the "bottom of the line" disposal, but it would "get the job done." I had already researched disposals and seen the Waste King on Amazon, so I asked him what they would charge for installation if I provided the disposal. He quoted me $250. Honestly, I considered it, but then (luckily) declined. Right after he left, I ordered the Waste King L-8000 on Amazon. I looked up installation and watched some installation videos specifically for this model. It didn't look too bad at all so I figured i'd give it a shot. My Waste King L-8000 came this morning. I completely removed my old disposal, which was not difficult at all. The only thing that kind of got me was dislodging the spring to disconnect from the sink. Probably took me 15 minutes (including walking my disposal out to the trash). After re-watching some installation videos and reading through the instruction booklet, I figured I was ready to install. Turns out, I got worked up over nothing. The installation of this disposal took me 10 minutes. I was shocked - I thought there'd be more to in. The EZ mount system is incredibly easy. I would be pissed if I had to pay someone else to install it. If you're thinking if hiring someone else to install this system with the EZ mount, I would save my money. Unless you're unable to lift the 14 pounds this disposal weighs or you just can't physically get on your hands and knees to install - do it yourself. I bet a professional plumber would be able to remove the old disposal and install the new one total in 15 minutes. WAIT A SECOND - that means if my plumber quoted me $250 to remove and install and it really did take him 15 minutes, i'd be paying him at a rate of $1,000 an hour. ARE YOU KIDDING ME?!?! Save your money and install it yourself. As far as the disposal goes, I've only had it installed for about 8 hours now and so far I love it. It's much quieter than my old disposal and although bulkier, it's much more powerful. I tested some food and waste products on it and it handled it all with no problems. The one thing I did miss, however, is the connection to the dishwasher. The disposal comes with a little cap over the part where you connect your dishwasher hose. You can't see it, but it's inside. There are specific directions which I overlooked that tell you to knock out the cap with a dowel or metal rod. I didn't do this, even though I connected my dishwasher hose. I ran a load of dishes this afternoon and when the load finished, I opened it up and noticed a pool of water at the bottom of my dishwasher. After re-reading the instructions, I then saw that I needed to knock out the cap for the dishwasher to drain properly. Once you knock out the cap, it stays in the disposal until you remove it. It's really annoying and the instructions say that you can leave it and it will be ground up after several uses. It was too annoying for me, so I used a pair of tongs to remove - simple. I would highly recommend this disposal not only because it is a fine piece of machinery, but also because it is very straightforward and easy to install!
S**H
Waste King Legend 8000 works great, fairly easy install
Overall: Works great, fairly easy install (1 hour or less), much quieter than my Insinkerator Badger, much more powerful than the Badger (1 HP instead of 1/3 HP), replaced 3 bolt with EZ mount without any need for an adapter kit. Amazon: Lowest Price (just over $120), arrived three days after I ordered it even though I selected free shipping (don't yet have Amazon Prime, but thinking about it). Experience: I was trying to figure out what to buy to replace my broken Insinkerator Badger (12 years old). Consumer Reports rated the Waste King Legend 8000 the highest, so that was the default buy, unless I found consumer reviews that recommended otherwise. I read many of the reviews on Amazon.com as well as Consumer Reports, and most said that it was a great buy and fairly easy to install. I was concerned about whether the EZ mount would fit my sink, because my Insinkerator Badger is a 3 bolt mount. One Amazon review mentioned having to purchase an adapter kit to use the EZ mount if you had a 3 bolt install, but others said that they didn't need it, including those that bought and reviewed the adapter kit. I did not purchase the adapter kit, and I did not need it. I am not a plumber, and have only had a minimal amount of experience installing plumbing-related appliances, so I was ready to call a plumber if needed. Not once during the install did I feel that I was in over my head. 1. After reading the directions, the removal of the Insinkerator Badger took about 30 minutes (I was cautious and took more time). The helpful hint about using a screw driver to remove the snap spring did the trick in removing the hardware. 2. I followed all of the instructions, in order, including the hints, which were very helpful. I did use plumbers putty, as I do not have a stainless steel sink, but I did notice that another reviewer also used plumber's putting even though they were installing it with a stainless steel sink. The branding on the chrome top of the sink flange is very minor in my opinion. It was much less noticeable than the one on my Insinkerator Badger. 3. I had a minor leak after connecting the pipes, but it wasn't the Waste King and was just a matter of using a little bit of teflon tape amd rescrewing the pipes together under my sink. It is crucial to make sure that the pipes are screwed together properly or else there very well may be a leak. Check all pipes from both sinks. I also ran my dishwasher afterwards to check that connection (no leak). 4. I did use a little bit of soap the first time around, which was a helpful hint from another reviewer to reduce noise. I did notice that there is a little click when I first turn on the Waste King, which is the impellers swinging into place, but after that, the sound is much quieter than my Insinkerator Badger. For those who are worried about the product itself, I could not be any happier. For those worried about the install, I would say that, if you are the occassional handyperson around the house, and like to try things yourself, this install is a piece of cake. Once again, Amazon, and all of those who take the time to review products that they purchase really came through. I continue to be a very happy Amazon customer.
P**H
Best Value, and truly "EZ" installation as advertised
I just received this product yesterday and installed it myself today. Obviously, I have only used it a couple of times so far and I am very pleased with the extremely easy installation (necessary, for I am not that handy, especially with plumbing). The unit is working perfectly so far. It has a lifetime warranty, unlike competitors 3-7 year warranties; however, if I ever need service it appears I have to return the unit with receipt to Amazon...so we will hope for a long, long life of use. The instructions profess grinding many things (bones, etc.) that I would never put down a disposal, so I will be anxious to see how it performs on Thanksgiving when my wife continues the tradition to ignore my warnings and put 10 pounds of potato peelings down the disposal at once. After reading numerous reviews of continuous feed disposals and watching other comparisons on YouTube (http://youtu.be/BX57lMiFGuo), the Waste King L-8000 1.0-Horsepower was a clear winner for me in choosing to replace our Kenmore, which barely outlived the warranty. I was not familiar with Waste King, and was leaning toward a comparable InSinkErator -- Ah, but when comparing price, quality, warranty and more, there really isn't a comparable InSinkErator, so I ordered the L-8000. (The InSinkErator has a single advantage: a metal drain flange compared to the plastic flange on the Waste King. Hardly a deal-breaker, but the reason I gave a 4-star rating, instead of 5 stars, to the L-8000). The EZ Mount system works as advertised. You may read some reviews about a rubber ring that creates difficulty in installation, but Waste King has responded with double emphasis on how to complete the install easily and without incident. Just in case, here is a very helpful video walking you through the installation (https://www.youtube.com/watch?v=PfDABrRLcjk). The only tools I used for installation were flat and Phillips screwdrivers, plumbers putty, and a steel punch, although the instructions say you might need more. I also used a bowl to prop up the unit, freeing both my hands while I hooked it up. This is a good idea. I was able to use my existing dishwasher hose and coupling, so I did not need to replace the connector kit. The L-8000 comes with a cord already wired and ready to plug in after installation, so no electrical skills are needed, thank goodness. Another nice featured compared to other brands is the removable and, therefore, replaceable splash guard (you know, that rubber guard that slightly reduces something going down the drain that should not). The L-8000 is big and will take up a bit more valuable space under your sink than smaller brands. However, that is because it has more insulation so it may be quieter than others. It is at least quieter than our old Kenmore, and the price was impossible to beat for such a powerful unit (7 amp, 1.0 HP, 2800 RPM). Again, my rating and review are based on the easy installation and overall quality of a brand new unit. Perhaps I'll come back and add some more after those Thanksgiving potatoes!
C**N
Love it so far; good upgrade over ISE Badger
The old 1/3 HP ISE Badger garbage disposal in my house was in the house when I bought the home 10 years ago so the old disposer is AT LEAST that old. It worked pretty well for these 10 years, but during that time it would jam frequently which required me to use the wrench tool to release the jam. Last week, the disposal started inexplicably leaking from the bottom whenever I ran the water on that side of the sink. I didn't spend much time trying to fix it since I had been putting replacing it anyway and decided to go ahead and purchase a new one. I originally wanted a 1 HP model, but saw that the 1/2 HP was half the price and STILL more powerful than my existing one so I opted for the L-2600 Legend instead. Another plus is that it is much cheaper on Amazon then what I find in the B & M stores. So even though I had to wait a few days it sure beats paying double for comparable models in the local stores. The day after the disposal arrived, I went to my local hardware store to purchase the tools I thought I would need and based on what the instruction manual said. The things I purchased separately are as follows. 1) Plumber's Putty 2) Mini Hacksaw 3) Pipe Wrench 4) Wire Nuts 5) Assortment of different sized strain reliefs (called Clamp connectors in the store). Because I couldn't figure out what size I needed I purchased 3/8", 1/2" and 1 1/4". 6) Assortment of water tight connectors just in case Out of these things I only needed the Plumber's putty and one of the Clamp connectors I purchased (3/8" with 1/2" knockout). I returned the unused strain reliefs to the store but kept the hacksaw and pipe wrench to use for future projects. Function This disposal is amazingly quieter than my old ISE, which is good since I just replaced a noisy 10+ year old dishwasher last year. It seems to have no issues grinding up old food or jamming which my ISE seemed to do frequently. I think this is a good relatively inexpensive replacement for your old broken disposal or just as a nice upgrade. I purchased the 1/2 HP because I didn't want to spend too much since it was an unexpected expense. But from what I've read, for most people the 1 HP (Waste King L-8000 Legend Series 1.0-Horsepower Continuous Feed Garbage Disposal) is better especially if you have a big family and/or frequently have a lot of guests over for parties or what not. Neither of these apply to me and since 1/2 HP was STILL more powerful than the 1/3 that came with my home, I was still coming out ahead. INSTALLATION (DIFFICULTY) Power Cord -- Can it be removed? ---------------------------------------------- Before I continue, many people (like myself) may wonder if the Power Cord is removable, the short answer is yes its removable, I removed mine because all the appliances in my home are hard wired Here are the steps I did to remove the cord while preserving it if I want to go back and use it later 1. Unscrew the metal plate on the bottom of the disposal. 2. Find the wires that run from the power cord (should be a white, black and copper wire) 3. Depending on how the wires are connected you may have to use a wire cutter to free the wire from the connector. Mine wasn't connected with wire nuts, but a plastic connector that seemed to be a permanent connection so it couldn't be twisted off. So what I did is stick a utility knife under the plastic connector and cut away at the exposed wire until it came out. I repeated this for the other wire. 4. To remove the copper ground wire, I just unscrewed the green screw to release it. 5. Removing the power cord assembly is a little harder; to do this I inserted a flathead screwdriver end under the rubber plug and pryed it out; this take a few tries as its in there pretty good. A WORD OF WARNING: DO NOT use a utility knife to try to pry it out, I stupidly tried this since I was too lazy to go to my tool box to get the proper tool and ended up stabbing myself in the thumb with the knife after it slipped, after learning my lesson I got the flathead screwdriver instead. 6. Once the rubber plug is released you should now be able to pull the power plug out through the opening. 7. Don't forget to use a wire stripper to prepare the remaining wire under the disposal to connect to your existing wires in your home. ---------------------------------------------- Installation of the Waste King itself was pretty simple; removing the old one...not so much. Prior to me installing a range hood and a dishwasher last year I had no experience installing appliances, but I was able to install this disposal by just following the instructions provided in the manual. Comparing this install to my range hood (non-vented), and my dishwasher, i would say it's harder than installing the range hood but slightly easier than installing the dishwasher. My old disposal wasn't connected to my dishwasher so I decided not to connect the Waste King to it either. I may go back and connect it later on, just not right now. If you want to read on about my installation experience it starts below, otherwise you can stop reading right here. INSTALLATION (TIME AND PROCESS) The install took me 7+ hours. Not because the new garbage disposal was hard to install, it was because the old one was such a pain to get out. While I had no issue getting the disposal itself out, the old sink flange was virtually impossible because it looks like the people who installed this disposal screwed the mounting bracket on too tight and ABOVE the threading on the lower part of the sink flange. As a result, no matter how many times I turned the mounting bracket it wouldn't go anywhere because it wasn't catching the threads to move down and come loose. If the sink flange and mounting bracket weren't so old, I would have just installed the Waste King over on that using the Easy Mount adapter kit, (which I bought separately just in case). But because it was so old and I really wanted to switch to the easy mount system anyway, I was determined to get it off. Normally, after removing the old disposal, you should be able to screw the mounting bracket off from under the sink and lift the sink flange up from the top of the sink. However because the mounting bracket just would not screw off because it didn't seem to be able to catch the threading. I decided to try to bend the edges of the sink flange that sits on top of the sink far enough so I could push it down through the sink instead of lifting it up. However I had no idea was I was getting myself into when deciding to try this. This process alone took a good 4 to 5 hours because whenever I would bend one side another part would stick out making it too wide to go through. After about 3 hours of using my wrenches (the hacksaw I bought was useless in cutting the flange), I went to the garage and got my tree branch cutters to try to cut the old flange so I could bend it more. The branch cutters made the job a little easier but still took almost two hours to get the flange bent enough so that I could push a part of it under the sink so I finally hammer the rest through. I also ended up slightly damaging the circular opening of my sink in doing this, but hopefully the plumbers putty will continue to stop any leaks as a result of the damage. UPDATE: Turns out I made this much harder than it needed to be. After examining the old sink flange assembly after removing it, I noticed a metal ring around the top of the threading that was preventing the bracket from screwing off. I did see this when trying to get it off but didn't know what that it was a separate piece and I thought it was part of the threading. Just out of curiosity I inserted a flat head screw driver around the edges of the metal ring and it popped right off making the mounting bracket easy to screw off. I am kicking myself for not seeing this before and it would have saved me 4 hours and would have prevented the damaged I caused. Oh well, I'll know for next time and hopefully you won't make the same mistake I did. After FINALLY getting the old sink flange off, installing the new disposal with the EZ Mount System was pretty simple. I put the new sink flange in and following the instructions, checking for and correcting any water leaks before I continued. While following the EZ mount instructions I didn't think the rubber cushion would be strong enough to hold the disposal without falling down, but a quick check showed that it would hold. After getting the sink flange prepared to hold the disposal next was the task of connecting the wiring. If you have an outlet under your sink, then USE it, it saves about a half hour of labor. Unfortunately I don't have an outlet under my sink and I didn't want to incur the extra expense of installing one under there, so I had to stick with hard wiring. As far as connectors go, I ended up using one of the water tight connectors instead of the 3/8" clamp connectors I originally planned to use. Reason being is that while testing out the connectors to see which ones would fit, the water tight connector was a perfect fit and I just never took it off and after the ordeal of getting the old sink flange off, I didn't want to waste any more time. I used my tool box to lay the waste king on then I connected it to the wiring in my home. The hardest thing here was getting the ground wire around the green screw. So I just ended up taking the green screw out completely, placing the ground wire directly over the hole, and then screwing the green screw back in. After I had the disposal connected to my wiring, all that was left was to mount the Waste King to the sink flange. This was incredibly easy and only required hammering to get the notch to the locked position. After mounting the Waste King now was the time to reconnect all the pipes. Because I don't run my dishwasher to my Garbage disposal, I only had one pipe to connect and surprisingly, the opening of the waste king was at the exact same level as my old ISE was; so the old pipe lined of perfectly. Everything was now hooked up so I turned the power back on to the disposal and let it run with running water. And SURPRISE!! Leaks! Leaks from under the sink, and leaks from the piping. I applied more plumbers putty under the sink as well as re attached the pipe and tried everything again. This time there were no noticeable leaks but I still am not ready to call the install a success just yet. I did this install on the 26th of March and have been monitoring it periodically for and standing water under my sink. So far no leaks, but I will probably give it another week or so before I'm 100% confident in my install.
C**F
Easy to install and works well
So easy to install, very powerful and quiet for a 1 HP unit. I definitely recommend this garbage disposal.
T**M
Excellent disposer and incredible value, but frustrating custom flange compatibility
I moved in to a new home recently and found that the existing disposer was in need of replacement. Instead of replacing just the disposer, I decided to go ahead and completely replace the entire sink, including the faucet, flanges, and disposer. I decided to purchase most of these items on Amazon due to the excellent prices and free Prime shipping. However, I was troubled by the lack of documentation and details regarding the compatibility of the different parts. I'm writing this review along with a review of the disposer flange I purchased in an effort to fill in these gaps for future purchasers. For the disposer, I went with the Waste King L-1001 Legend Series 1/2 HP Continuous Feed Operation Waste Disposer; unfortunately, the flange that comes with the disposer has a highly reflective chrome finish which will not be suitable if you want to coordinate with faucet hardware that isn't also chrome. Though there are many custom flanges to choose from, the Waste King will not be compatible with most of them since it utilizes the EZ Mount system for attaching the disposer to the sink. This assembly is not compatible with the majority of the custom finish disposer flanges found on Amazon and in most other stores; most are intended for Insinkerator (ISE) disposers. There is an adapter kit available ( Waste King 3101 ISE Adapter Kit ), but I would highly recommend only using this adapter if you are replacing an existing ISE disposer and want to use the hardware already attached to your sink; if you are starting from scratch you would still need to purchace the ISE mounting hardware in addition to the adapter. I should also note that there are some Waste King branded flanges for sale, but the only ones I found that are compatible with the EZ Mount system have plastic finishes, like white, biscuit, etc. Waste King flanges that offer a metal finish are only for Waste King disposers that use the very different 3-bolt mounting system, which are a bit more expensive than the EZ Mount variety. If you plan to start from scratch with all new components as I did, using an EZ Mount disposer along with a suitable disposer flange like the Waste Maid Custom Sink Flange/Stopper Set I eventually purchased will simplify your installation and help you avoid headaches and delays caused by ordering incompatible parts. If you insist on a certain brand of disposer flange you will have to get the flange, ISE mounting hardware, and the adapter. This should work, but at a much higher cost than the Waste Maid flange alone. I won't go into too much detail about the disposer itself; anything I would say has already been posted. It's compact, it's powerful, and it's an excellent value. On top of all that, it's also the quietest disposer I personally have ever used; however, I should note that I've only ever had Badger junk before this and I have it mounted to a very solid and heavy cast iron sink. Your mileage may vary when it comes to noise and vibration if you're using a lighter sink. Installation was a breeze once I had the correct type of flange. Like some others have mentioned, I would recommend installing an outlet under your sink if you were considering rewiring the disposal with an existing connection. Installing an outlet will be easier than replacing the existing cord and will also simplify future replacements/upgrades. Finally, an outlet and box costs less than one dollar, so it's really a no-brainer. In conclusion, I would not hesitate to buy a Waste King again, but I'm pretty confident that I won't even have to for a long time. If you need a new disposer, Waste King is the way to go; just make sure you get the right kind of flange if you don't want to use the stock one.
-**-
Good replacement for a defective In-Sink-Erator
7/1/2015: I finally got around to installing this beast, ordered a few weeks ago. The plumbing under my sink still needs some work, and that is what actually took up most of my time. (I plan on redoing it.) The problem under my sink is that the house was built in 1940, before garbage disposals, and the inlet in the wall is higher than it should be. Short of tearing out the cabinets and the plaster wall to move the current line or install a new one, we have to work around it. The In-Sink-Erator (ISE) has been "retired" due to the common problem with the housing cracking on the side. A former brand I trusted in two other houses, now isn't worth bothering with (at least not their cheaper Badger line of products, where all the failures are at). Aside from the plumbing, the Waste King is a cinch to install. I had the old ISE removed within a couple of minutes. Since it was a stainless sink, the ISE was attached with a rubber gasket. The Waste King was shipped with the EZ Mount system, and it is very simple to screw the new flange into the stainless sink with the rubber gasket (no plumber's putty required). I hand-tightened it, then gave it a few taps with a small hammer for good measure. For the mounting collar on the disposal, I used a bit of dish soap where the pins on the mounting flange rest, so it made tightening up that collar a bit easier. If you're wondering--the Waste King will fit in place of an ISE with no modification to the plumbing. However, you will still need to remove the outlet pipe, as you need to swap out the metal bracket that holds it to the side of the disposal, as the one provided with the Waste King is smaller. (The larger ISE bracket touches the plastic housing and won't rest completely flush.) While you have the pipe off, replace the rubber washer. My ISE's washer was still good, and exactly the same size, but it's best to start fresh and prevent problems. Plumbing tip--does that sewer smell gag you like it does me? I keep a $1 can of Glade air freshener close by, and give the area under the sink a healthy shot of it every so often as I'm working. It doesn't make a disgusting job completely better, but it does make it livable. And lunch is saved. ;) As for grinding performance, the claim is that the motor is faster. It does seem to take longer to grind food, but I believe that is because the Waste King is chopping the particles finer, as there are very small openings inside the grinding chamber compared to the ISE. I'll live with that, as it will save me from having to either use a plunger or disassemble the pipes to clear them out from clogs, which the ISE did on a regular basis. (Even just a few stray potato peels were enough to clog up the system--the ISE just never ground them up!) The Waste King is also quieter than the ISE. The (removable!) rubber splash guard keeps the innards quieter without needing to partially insert the drain plug. And it seems to vibrate less on the sink than the ISE ever did. This is a good, solid replacement for the ISE Badger. So far, it is operating nicely. If that changes, I will be back with an update.
I**N
Quality Item/Upgrade from In Sink Erator
I purchased this item from Amazon Warehouse at a significant discount due to the damaged box. When I opened the box (which had never been opened), I noticed that the accessories (drain elbow, hardware, sink mounting rings, etc.) were inside of the garbage disposal. After turning the disposal upside down, I was able to locate all accessories. I also removed the instruction booklet from inside the box. I would advise anyone installing a Waste King disposal to read the directions as the mounting system is slightly different from In Sink Erator (specifically, the quick mount system). After looking at the directions, I began removing my old In Sink Erator (ISE) and the drain mounting pieces from the sink itself. One thing I could not find was how to release the old mounting ring from the ISE on the underside of the sink as it was extremely rusted from leaking. FYI, if you're removing this, there is a clip on the inside of the ring that pops out easily with a screwdriver, allowing the ring to come off the sink drain that inserts from the top side of the sink. Once I removed the old drain mounting hardware, I cleaned off the old plumber's putty and used abrasive to make sure it was all gone. Once cleared, the new sink drain mounting system was easy to install. I used the rubber gasket provided and tightened down the plastic screw ring on the underside, with the cardboard ring above the plastic piece. DO NOT use plumber's putty AND the rubber gasket; it's either/or. Once the new sink drain was tightened down, I installed the quick mount ring. I slid the quick mount ring up the tube of the drain and then placed the rubber piece ONTO the end of the tube. DO NOT try to to slide the rubber piece up the tube or between the metal ring or it won't hand down properly. If you need help, there are YOUTUBE videos showing this. If you are having a hard time, you are not doing it correctly and it is not the Waste King disposal. Once the quick mount system is in place, the disposal slides on easily and I was able to mount the existing plumbing to it without any changes. One item I did need was a thick rubber gasket from the drain elbow provided. I placed this gasket onto my existing plumbing so that the drain could be tightened down properly. I then mounted the dishwasher drain line to the disposal AFTER punching out the plastic plug in the dishwasher drain line. I removed the small, white plug from inside the disposal even though the directions stated you could just grind it up. USE: I found the Waste King to be significantly quieter and smoother operating than the same HP ISE. The ISE it replaced was VERY old, but I recently replaced a disposal in another home with a new ISE and found it to be pretty much the same as the old ISE's. So far, the Waste King handles any scraps quickly and efficiently with less vibration and noise. I do have to be careful what foods I put down the drain due to our pipes though. Overall, this is an excellent garbage disposal for the price and I would highly recommend this item to anyone. I cannot comment to the reliability of this disposal but it does have a 5 year warranty.
A**E
Needed a new one, read about this one on amazon.com and decided to get it.
Pros: Cheap Easy to install Lots of power Cons: Not enough noise to scare the cats off the counter anymore After moving out of an apartment with a disposal into a house that didn't have one, I really started to notice how much organic waste was thrown into the trash and since it was just two of us it would sit for a week for garbage day. I looked hard around at stores near by and at online reviews for them. They were all 300+ and didn't have as many good reviews as this one. I risked it and couldn't be happier. I received it in less than a day for a small fee(something like 5$ more). Ordered Monday and got it Tuesday around noon. The install was simple and the Easy Connector that was included was a breeze to put together. I do recommend doing what it says in the manual and put the whole system together outside of the sink. The power is amazing. It shreds everything. The only thing I haven't tried is banana peels which my old disposal had problems with. The noise level is on par with what you would expect from a 1hp motor. It was actually quieter than our old one but I'll chalk that up to the age of it. There is a slight "ting" sound if you turn the motor on with no waste down the drain. I assume it is from the actual moving bits inside hitting the stoppers, but if there is food it there you don't hear it. It's been install for about a month now and had no problems at all with it. Would defiantly recommend this one.
A**N
Great return experience
Item is very well packaged and appears good, however I had to return it as it doesn’t fit my needs. Return process was very smooth and pleasant
E**I
Second hand product?
The box already gave it away, it looked old and as if it had been opened before, looking inside the disposal confirmed the suspicion, the disposal had been used, there was food inside. Hope it was only for testing, could have been in use for a year also, who knows....
R**G
Excelente producto.
Después de casi 5 años funcionando (comprado en ene/21 y funcionando a partir de jul/21), creo que ya es necesario decir que sigue como nuevo. Espero que así sigua muchos años más.
J**R
Bon rapport qualité prix
Travaille bien et niveau sonore respectable. Assez facile d’installation
Trustpilot
3 days ago
2 weeks ago